Keragon Integration
Connect HIPAAtizer with Keragon to automatically send HIPAA-compliant form submissions into your healthcare workflows. Once configured, every new submission on your HIPAAtizer form triggers a Keragon workflow, letting you route data to EHRs, CRMs, notification systems, and more without writing code.
Prerequisites
Before you begin, make sure you have:
- An active HIPAAtizer account with at least one published form.
- A Keragon account with permission to create workflows.
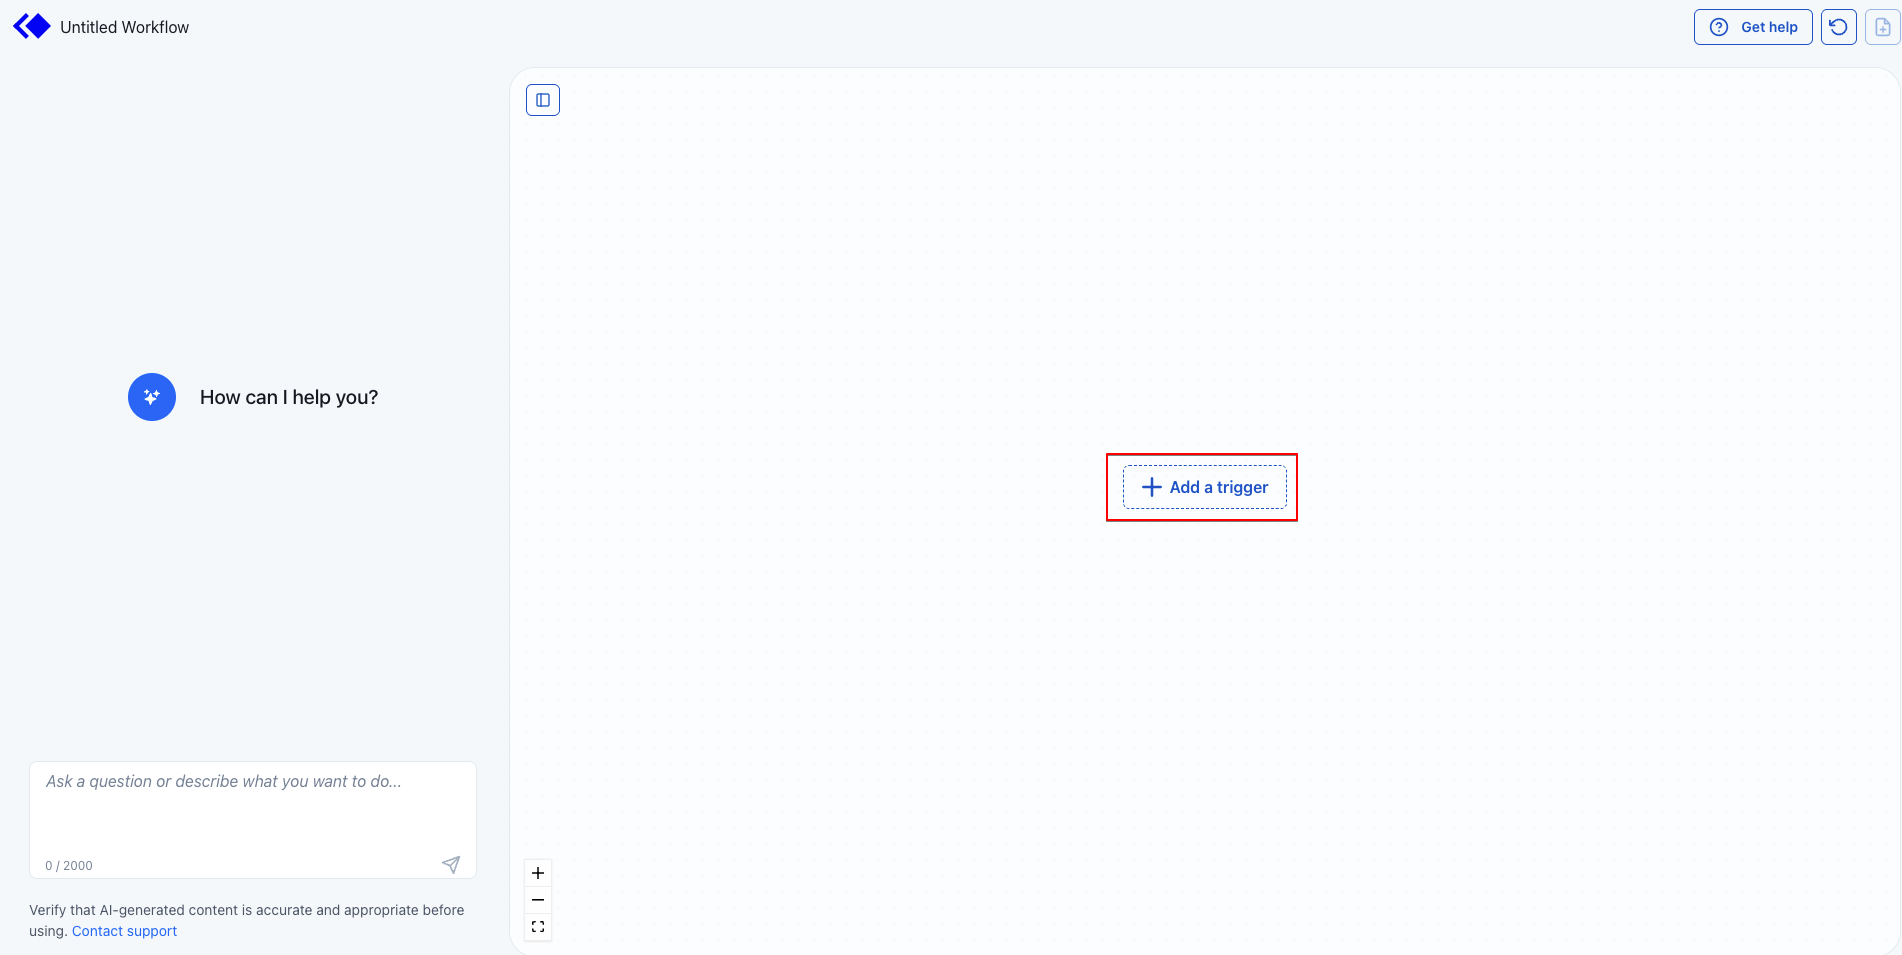
Step 1: Create a New Workflow in Keragon
Log in to Keragon and create a new workflow (or open an existing one). On the workflow canvas, click + Add a trigger.
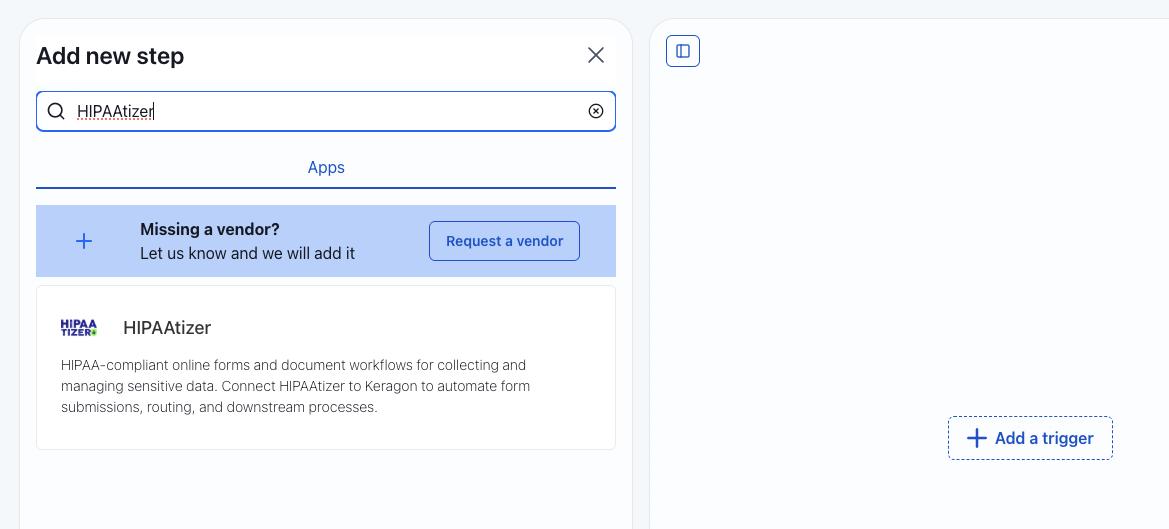
Step 2: Select HIPAAtizer as the Trigger App
In the Add new step dialog, type HIPAAtizer in the search bar. Click the HIPAAtizer app from the results to add it as your trigger. The trigger type will be set to New submission created.
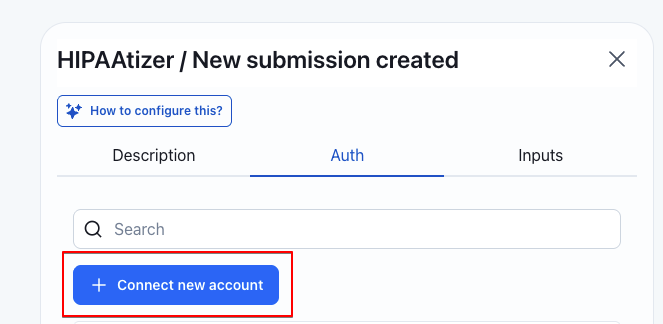
Step 3: Connect Your HIPAAtizer Account
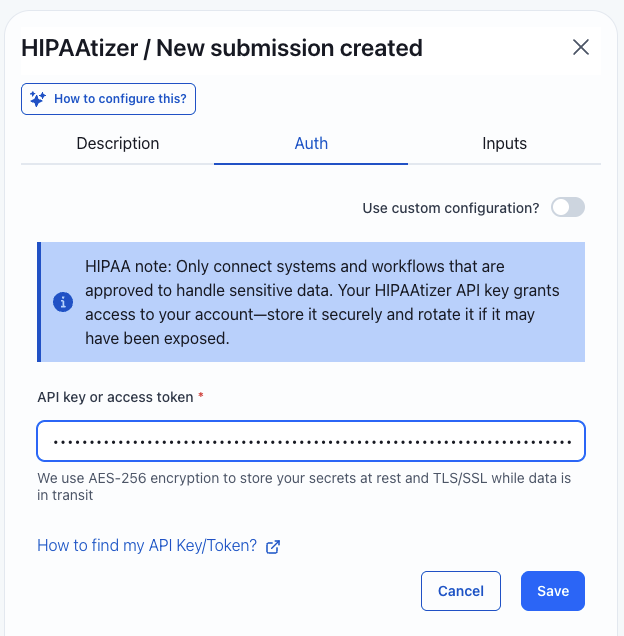
In the HIPAAtizer trigger configuration panel, switch to the Auth tab and click + Connect new account.
You will be prompted to enter an API key. To generate one:
- Open your HIPAAtizer Dashboard.
- Navigate to Integrations > REST API.
- Click Create API Key.
- Enter a descriptive name (for example,
Keragon-integration). - Set an Expiration Date as needed.
- Under Allowed IPs, select Allow all IPs.
- Click Create and copy the generated key.
Back in Keragon, paste the key into the API key or access token field and click Save.
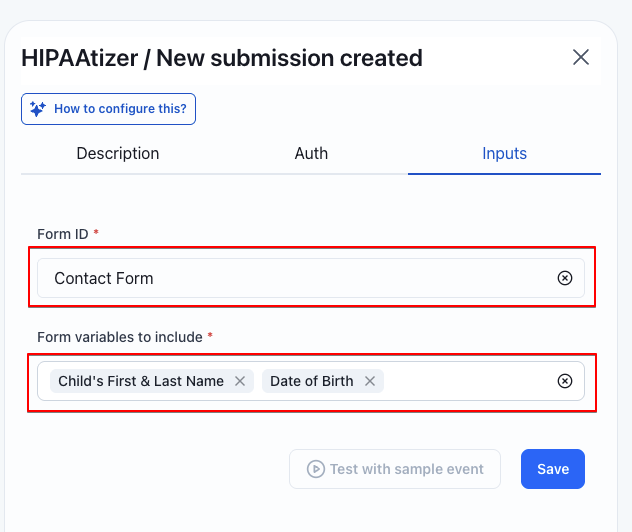
Step 4: Choose a Form and Map Fields
Once your account is connected, switch to the Inputs tab:
- Select your form from the Form ID dropdown. Only published forms appear in this list.
- In Form variables to include, pick the fields you want available in your Keragon workflow.
- Optionally click Test with sample event to verify the connection, then click Save.
 s
s
Your trigger is now active. Continue building your Keragon workflow by adding actions (e.g., sending data to an EHR, notifying a team via email, updating a spreadsheet) that will run each time a new submission comes in.
Troubleshooting
"Request failed with status code 401"
If you see the error Failed to fetch options for property "formId" with error "Request failed with status code 401", your API key's IP restrictions are blocking Keragon's servers.
To fix this:
- Open your Integrations > REST API.
- Find the API key you created for Keragon and click Edit.
- Change the Allowed IPs setting to Allow all IPs.
- Save the change and retry the connection in Keragon.