

Send Copy to Respondent
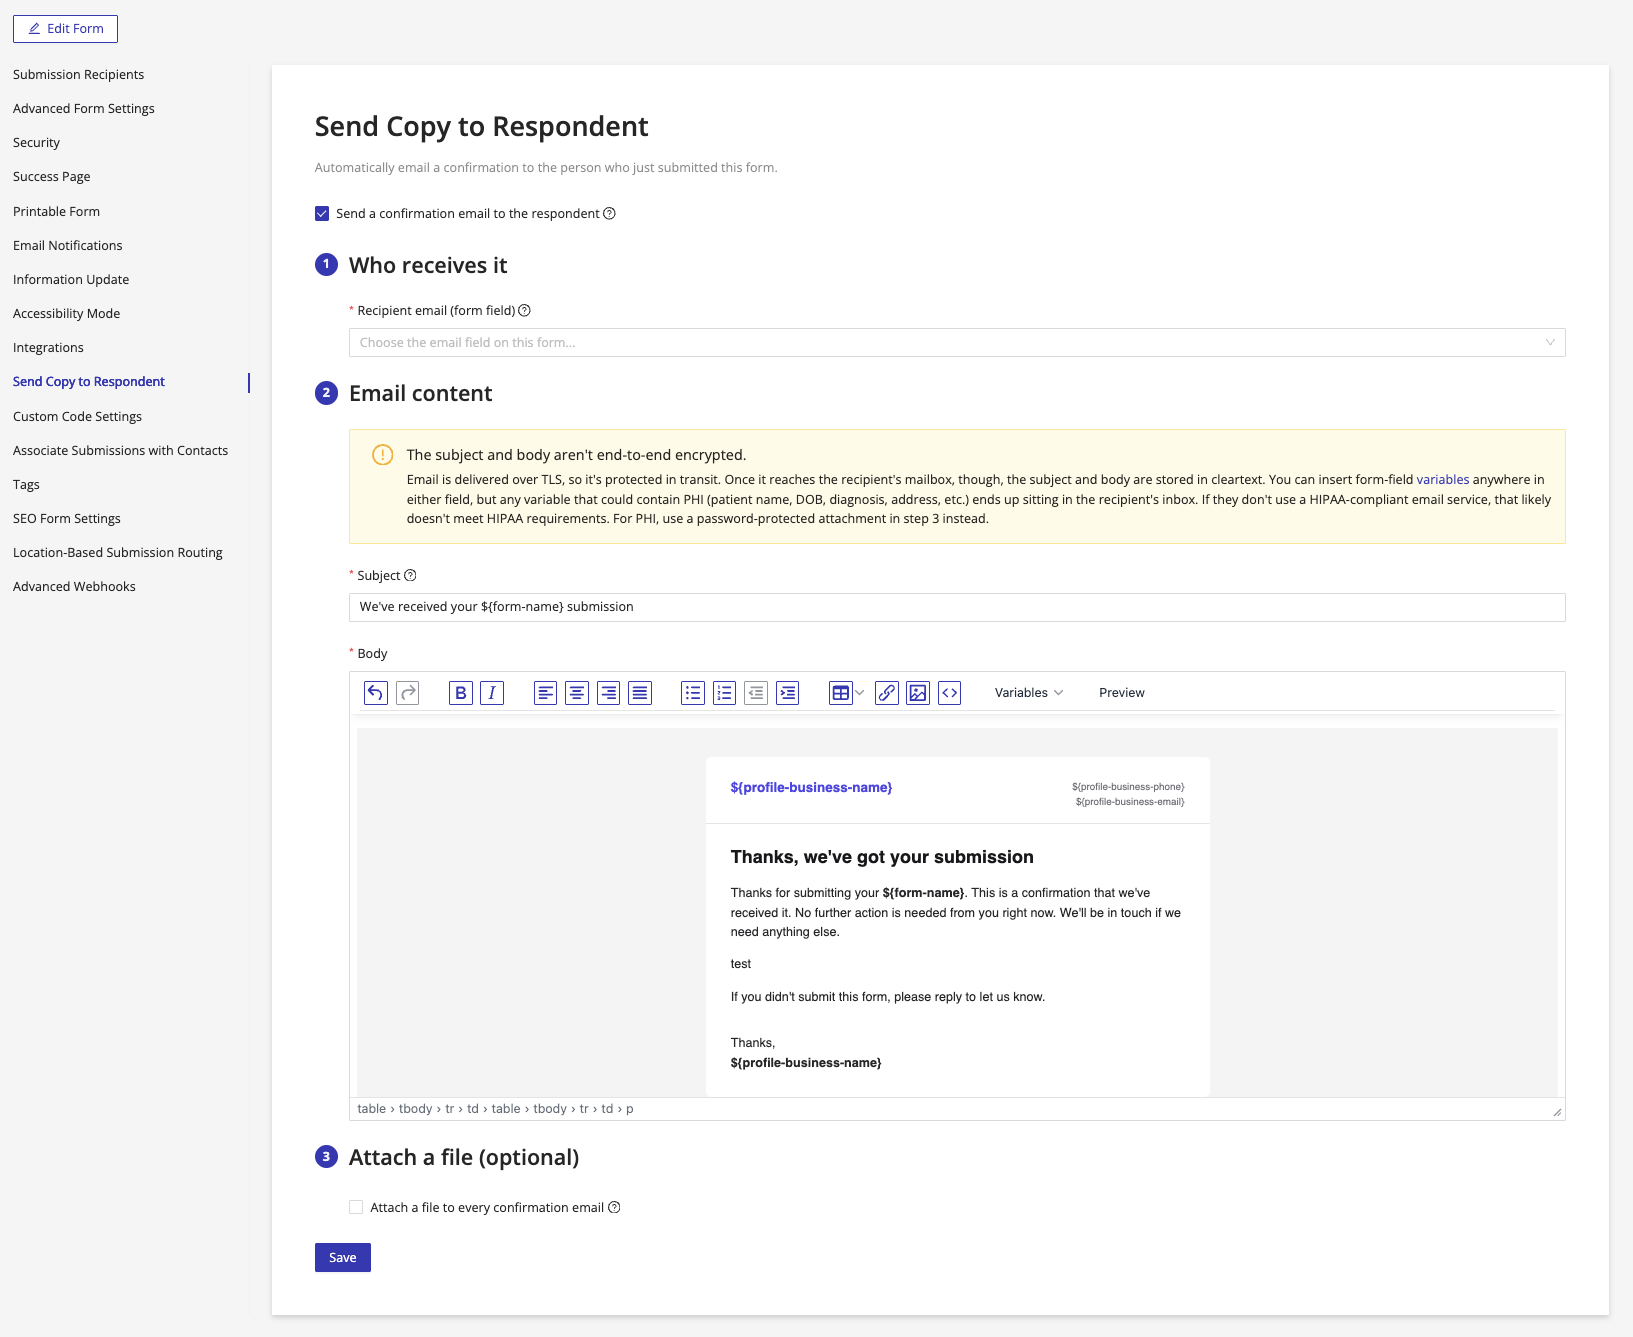
The Send Copy to Respondent panel lets you automatically email a confirmation to the person who just submitted the form. You write the subject and body, choose which email field on the form is the recipient, and optionally attach the submission itself or a file of your own.
This is separate from the Success Page, which is what the submitter sees in their browser right after submission. The two work together: the Success Page appears on screen, the confirmation email lands in their inbox.
This is also separate from Email Notifications, which sends PDF submissions to your internal team.
Turning it on
- Go to My Forms and click the gear icon on the form you want to configure.
- In the left menu, click Send Copy to Respondent.
- Check Send a confirmation email to the respondent.
The three configuration sections (Who receives it, Email content, Attach a file) become editable once the toggle is on.
1. Who receives it
The system needs to know which field on the form holds the respondent's email address. Use the Recipient email (form field) dropdown to pick that field.
The dropdown lists every email-type field on the current form. If you don't see the field you expect, open the form in the builder and confirm the field is set to type Email.
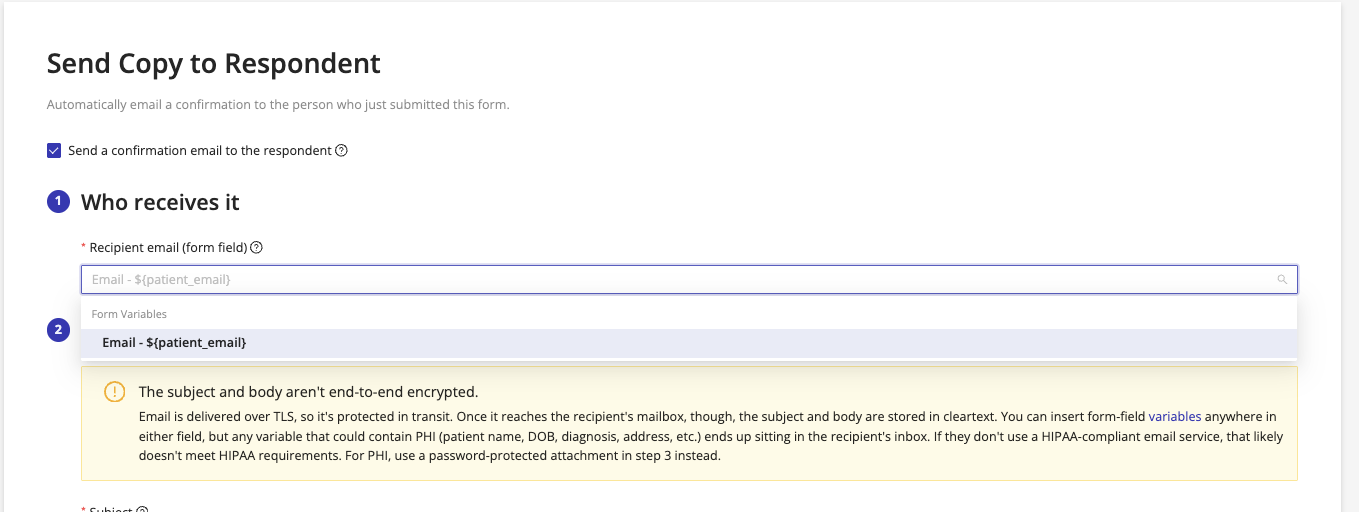
Each form has its own recipient field setting. If you have multiple forms, repeat this on each one.
2. Email content
This is where you write the message the respondent will receive. You can edit both the subject and the body, and insert form-field or profile variables anywhere in either.
Subject
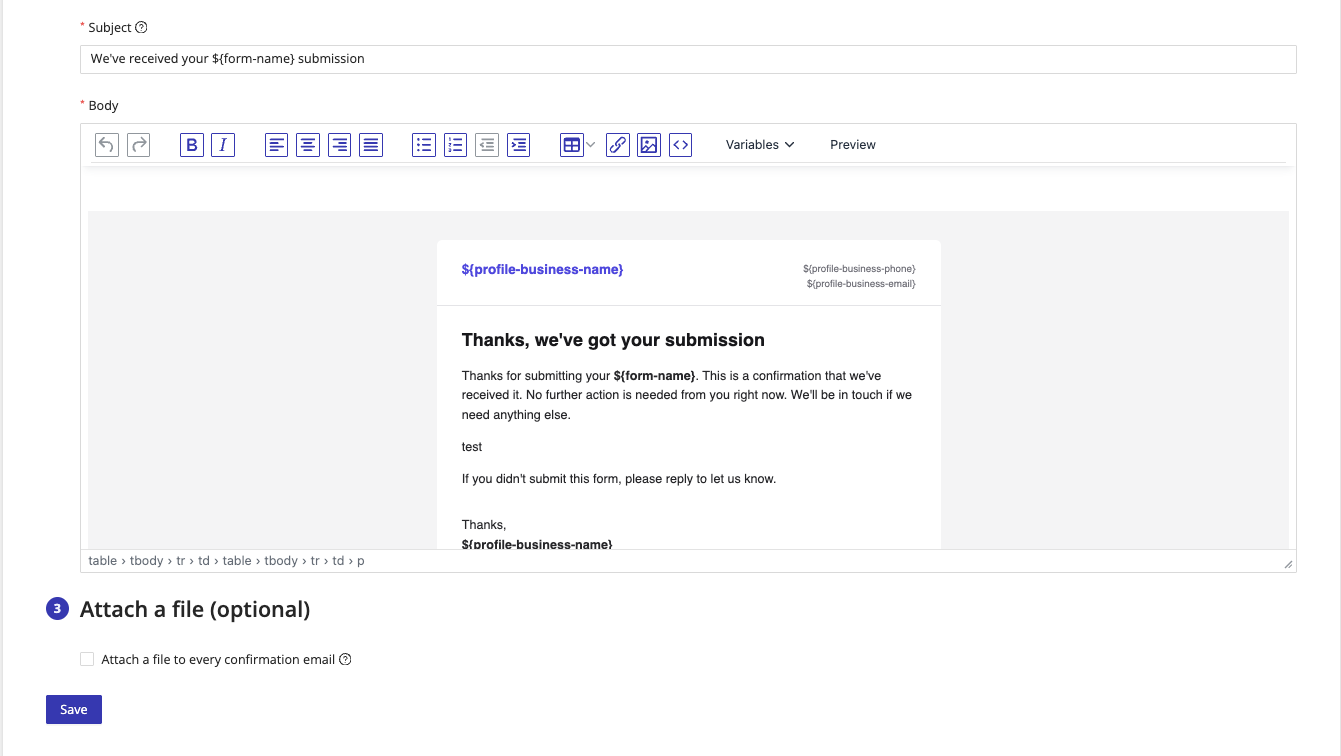
A single-line field. The default is We've received your ${form-name} submission, but you can replace it with anything.
Body
A rich text editor with formatting (bold, italic, alignment, lists, tables, links, images) and a Variables menu for inserting dynamic content. Use the Preview button to see how the email will render before you save.
The default body is a ready-to-send confirmation email with:
- A header bar showing your business name, phone, and email from your profile.
- A heading: Thanks, we've got your submission.
- A short confirmation paragraph referencing the submitted
${form-name}and noting that no further action is needed. - A line inviting the respondent to reply if they didn't submit the form.
- A signature signed off with your
${profile-business-name}. - A footer noting that replies go to your
${profile-business-email}.
It uses a table-based HTML layout with inline styles so it renders consistently across Outlook, Gmail, Apple Mail, and most mobile clients. You can replace any of it from the rich text editor.
Available variables
You can drop variables into the subject or body using the Variables menu, or type them directly with the ${variable-name} syntax. Common ones:
${form-name}: name of the form that was submitted${profile-business-name}: your business name from profile${profile-business-phone}: your business phone${profile-business-email}: your business email- Any form field by its Unique Name, for example
${first_name}
See the full variables reference for more.
The subject and body are not end-to-end encrypted. Email is delivered over TLS, so it's protected in transit, but once it reaches the respondent's mailbox the subject and body sit in their inbox in cleartext.
Any variable that could contain Protected Health Information (patient name, date of birth, diagnosis, address, phone number) ends up readable in their inbox. If the respondent's email provider isn't HIPAA-compliant, that likely doesn't meet HIPAA requirements.
For PHI, use an attachment in step 3 with Attachment may contain PHI. Protect with password instead, and keep the subject and body generic.
3. Attach a file (optional)
Two independent checkboxes. Use either, or both.
Attach form submission attaches a PDF of what the respondent just submitted, generated from the form's Printable Form template. Use this to send the respondent their own copy of what they signed: a completed consent, a countersigned agreement, an intake summary.
Attach a file to every confirmation email attaches the same static file to every confirmation sent from this form: an aftercare PDF, an instructions sheet, a welcome letter. This one is not the submitted data.
PHI in this attachment
Once either box is checked, you must choose how the attachment is handled:
- No PHI, or recipients use HIPAA-compliant email: the attachment is sent as-is, with no password.
- Attachment may contain PHI. Protect with password: the attachment is encrypted before it is sent.
Pick the second whenever the submission could contain PHI and you can't be sure the respondent's mailbox is HIPAA-compliant.
Password
Choosing Attachment may contain PHI reveals a required password setting:
- Use default password for email attachments: the account-wide password from My Profile → Email Attachments Password. Use the Change in Account Settings link to set or update it.
- Use a custom password for this form: a password used only for this form's attachments.
Once a custom password is set on a form, that form's password becomes independent. It will no longer update if you later change the account-wide default password.
Respondents are external users, so they have no HIPAAtizer dashboard to look the password up in. Send it to them through some channel other than this email.
The View Password link you may have seen is a different feature: it appears in the submission notification emails your team members receive, and it opens your dashboard, so it only works for signed-in users. It is not part of Send Copy to Respondent. See Email Notifications.
Both send the respondent a PDF of their submission. Attach form submission sends it automatically to the email field you chose in step 1, using a password you control. Send PDF to Submitter on the Success Page instead prompts each respondent, after they submit, for an email address and a password they choose themselves, so there is no password for you to communicate.
Saving and testing
Click Save at the bottom of the panel to apply changes.
To test, submit the form yourself using an email address you control and confirm the message arrives, the variables resolve correctly, and the formatting renders the way you want.
Troubleshooting
The dropdown in "Who receives it" is empty. The form doesn't have an email-type field. Open the form in the builder, add an Email component, save, and reload Form Settings.
Respondents aren't receiving the email.
Check three things: the Recipient email field is set in step 1, the form actually collects an email address from the respondent, and the respondent isn't filtering messages from no-reply@hipaatizer.com to spam.
Variables show as raw ${...} text in the email.
Confirm the variable name matches a form field's Unique Name exactly, or a valid profile/system variable. Typos or extra spaces break substitution.
Related
- Success Page: what the respondent sees in the browser after submission
- Email Notifications: PDF submissions sent to your internal team
- Submission Recipients: managing which team members get notified
- Variables reference: full list of variables you can use in subject and body