How to Create a Custom PDF for HIPAAtizer's Online Forms
Here is an example online form for which we will create a custom PDF: https://hptz.io/0uuwruC
Opening the Form in Adobe Acrobat
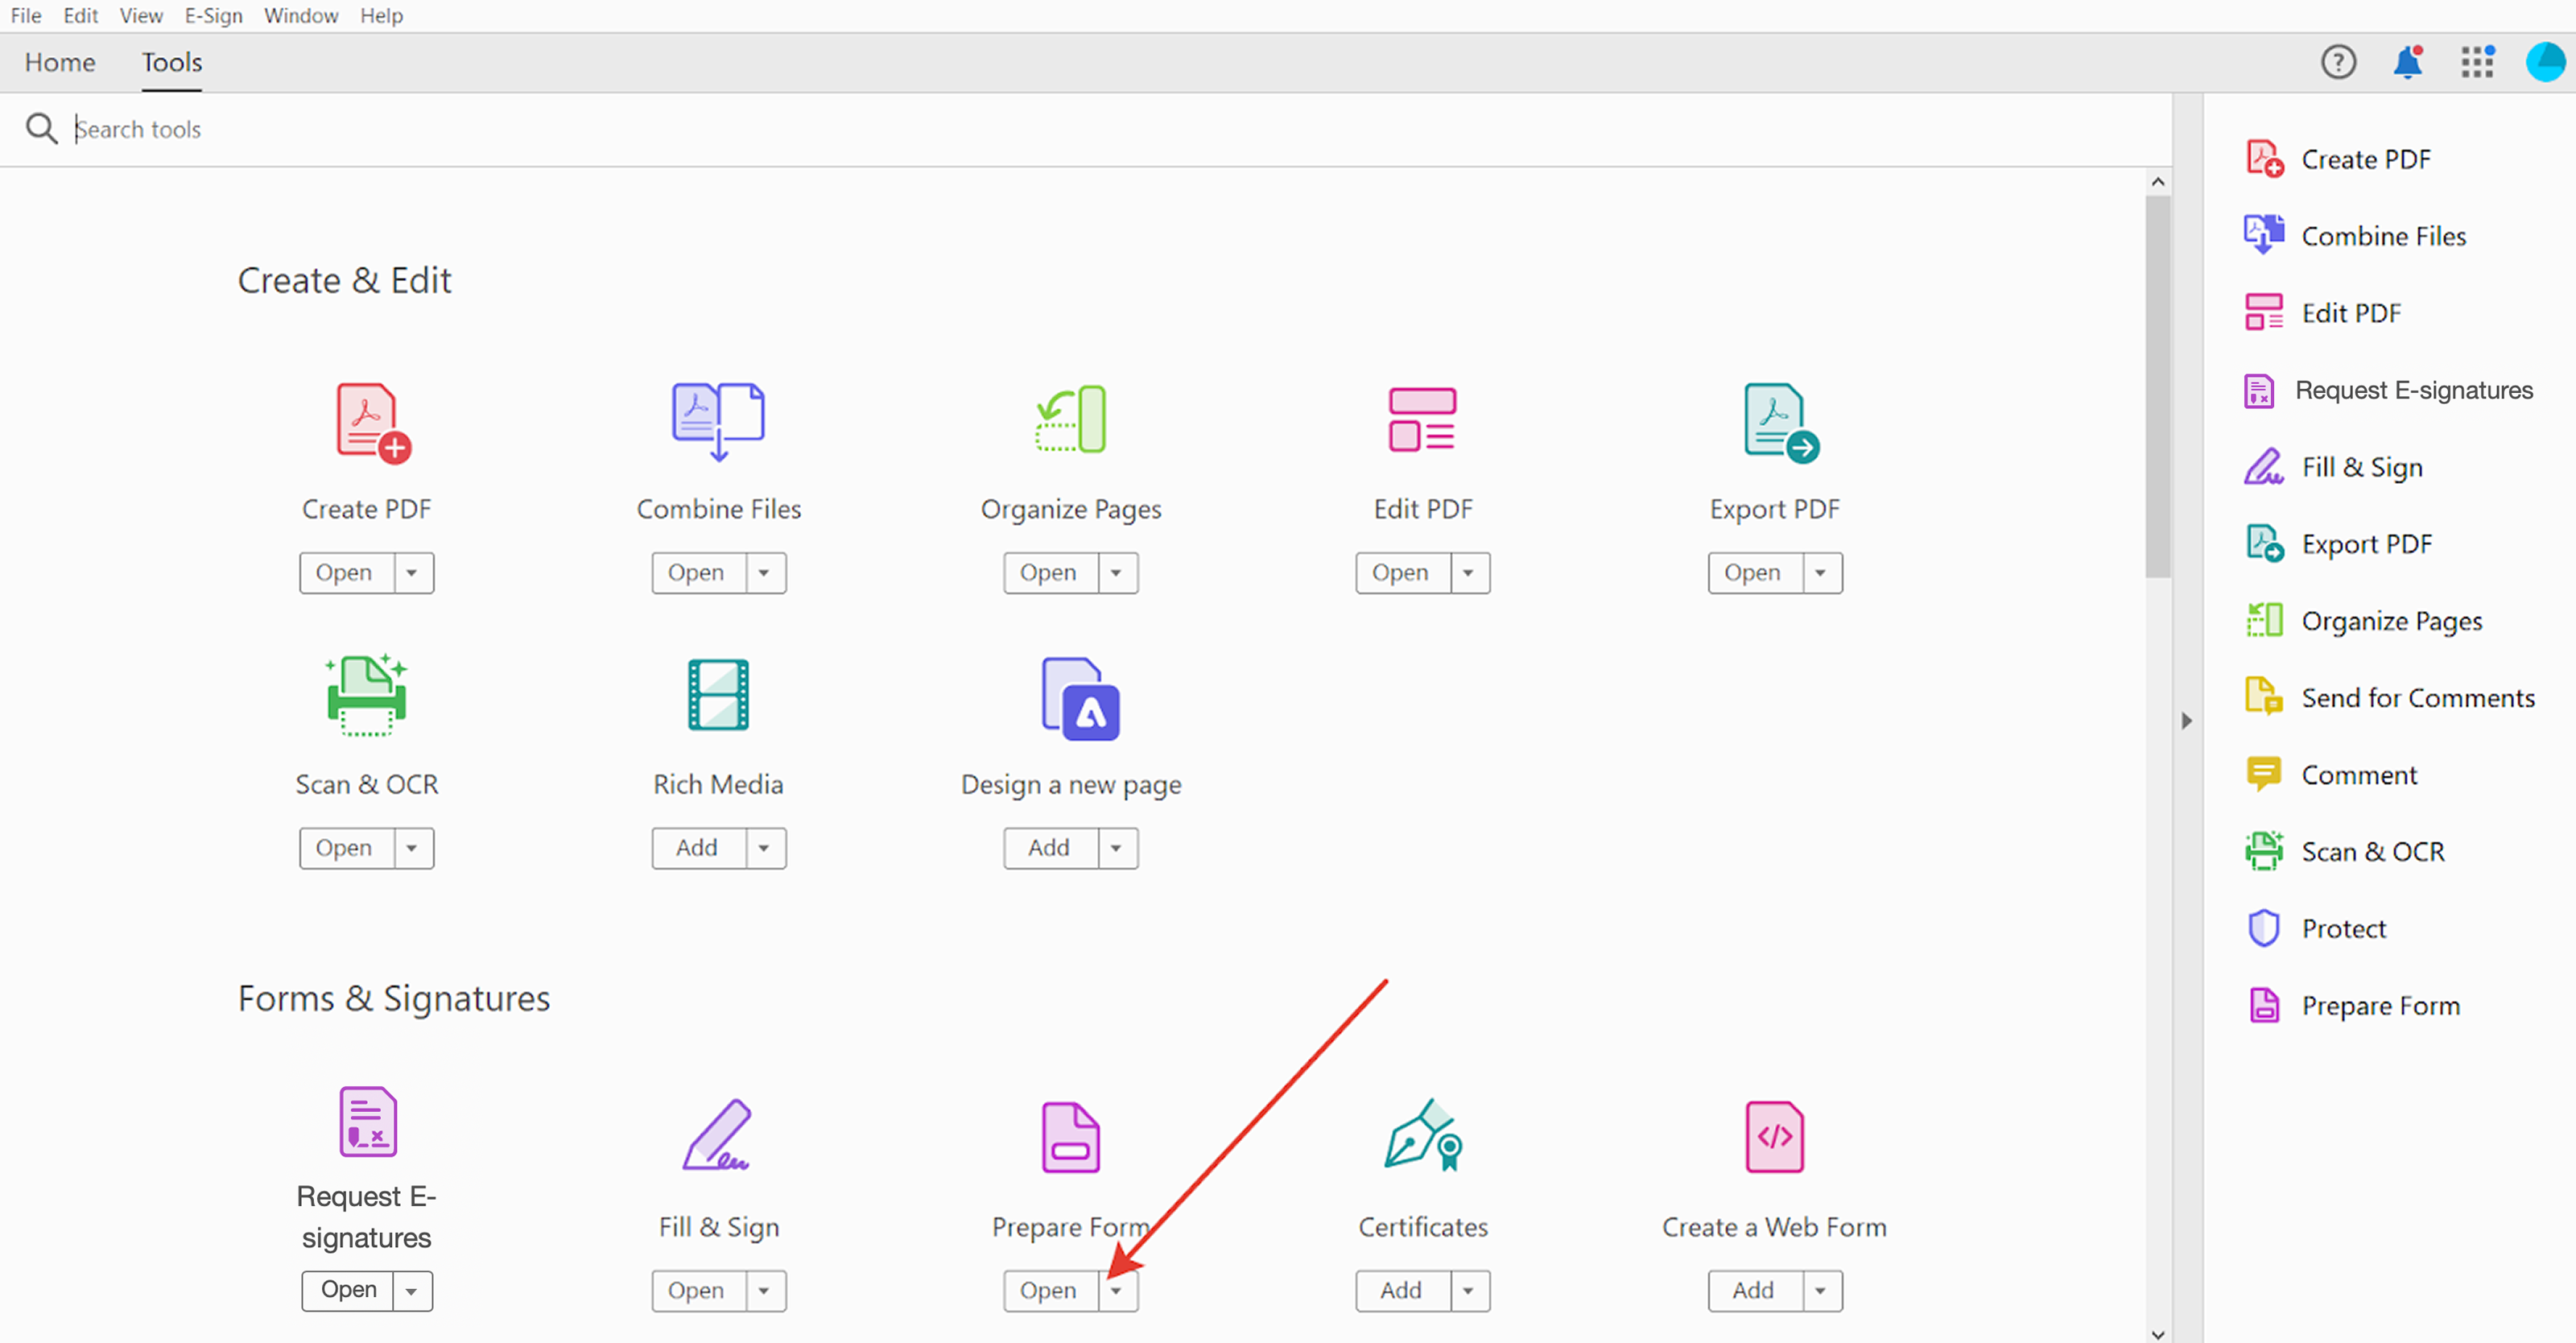
Open Adobe Acrobat and select the "Tools" tab from the top menu. Click on the "Prepare Form" option and select the PDF file that you want to work with.
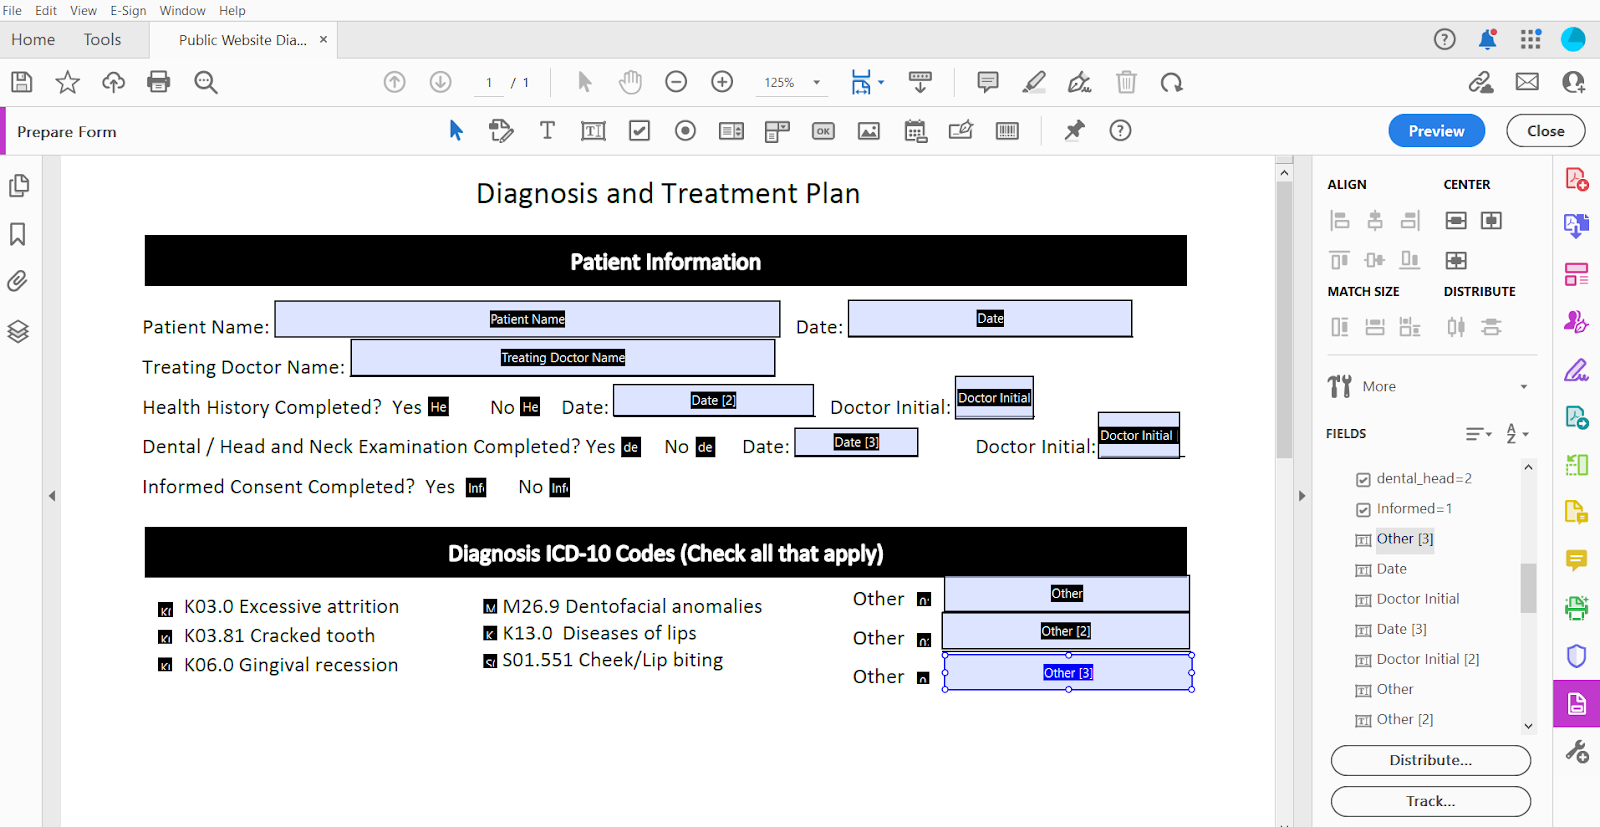
Acrobat will automatically detect any interactive form fields in the PDF document. If it doesn't, you can manually add text fields, checkboxes, and radio buttons by clicking on the respective icons in the toolbar on the right side of the screen.

Working with Text Fields
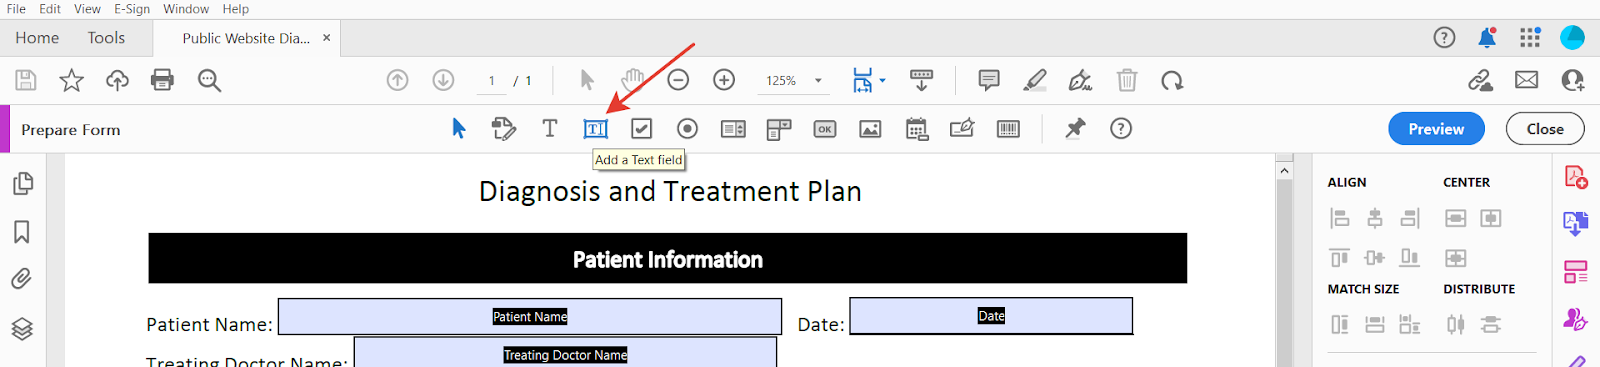
- Click on the "Add Text Field" icon and click on the location where you want to place the field. You can adjust the size and shape of the text field by dragging its corners.

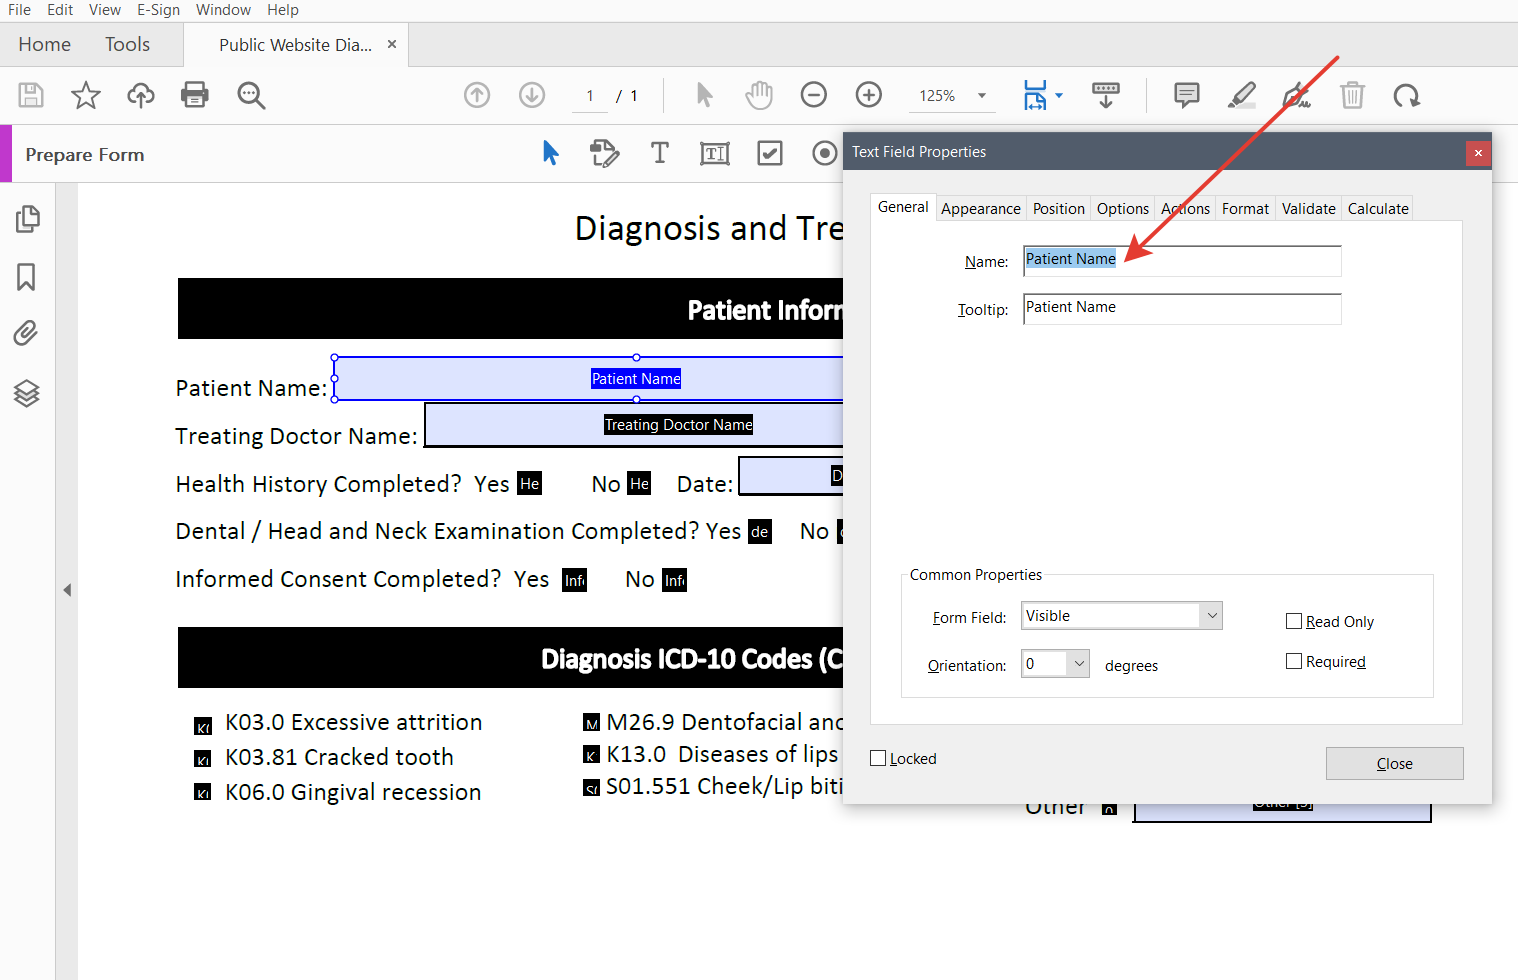
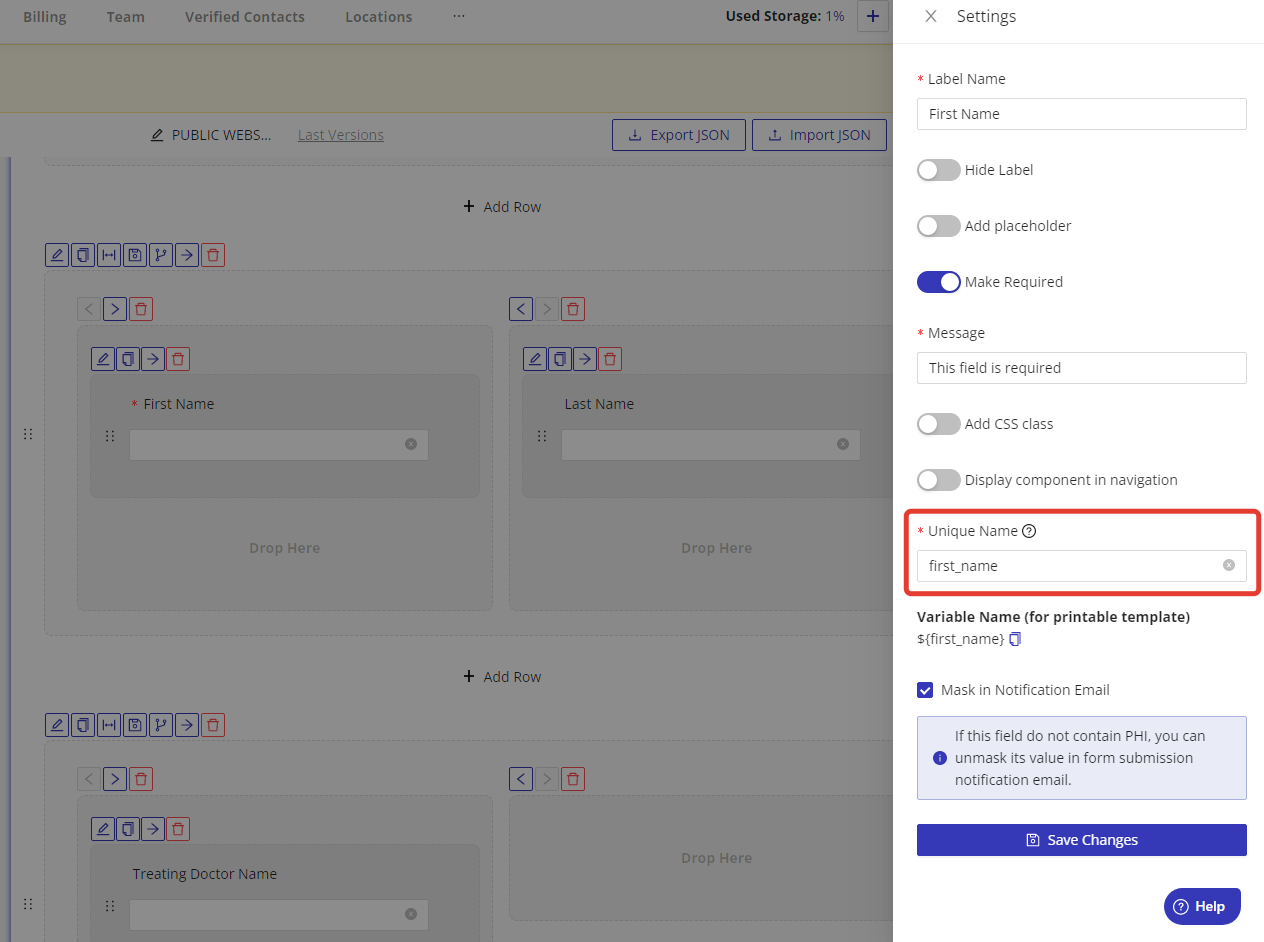
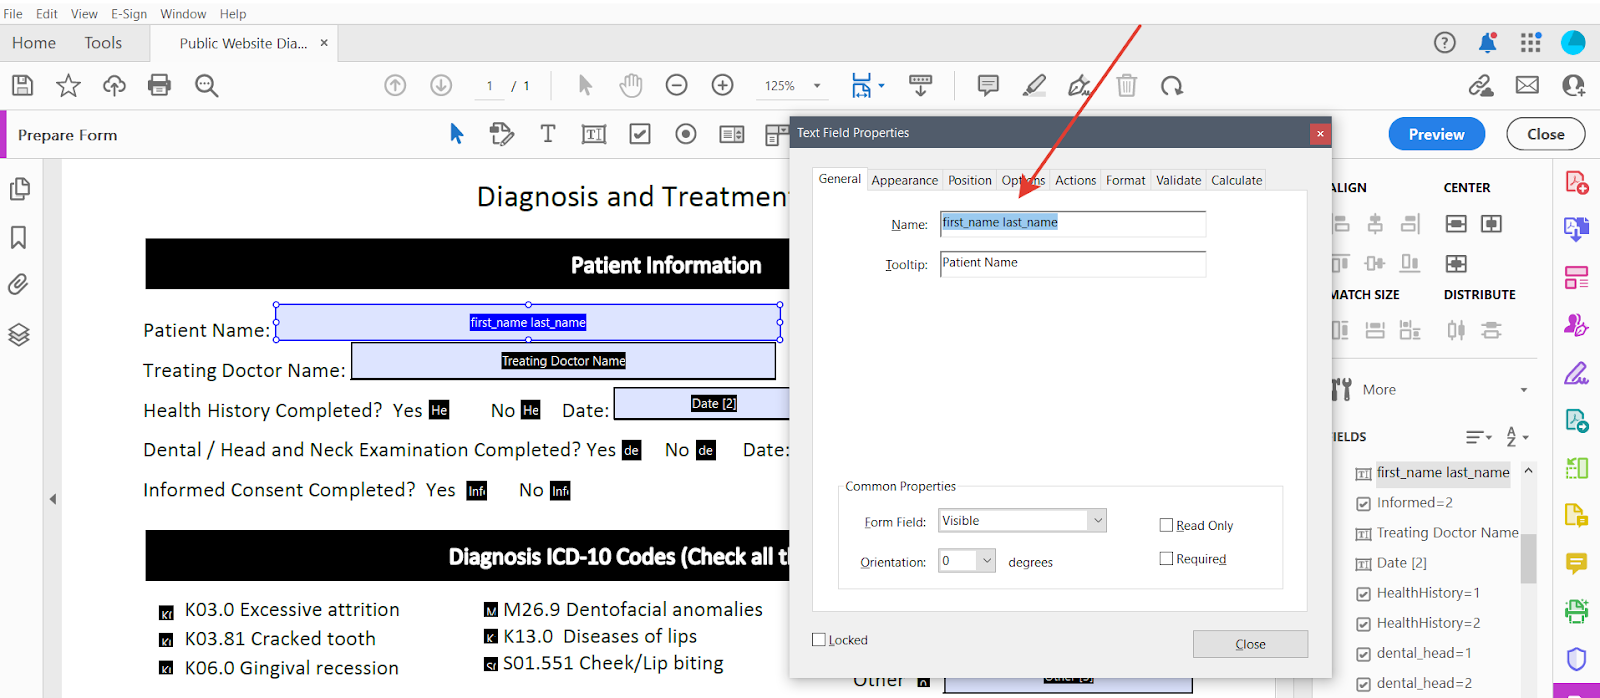
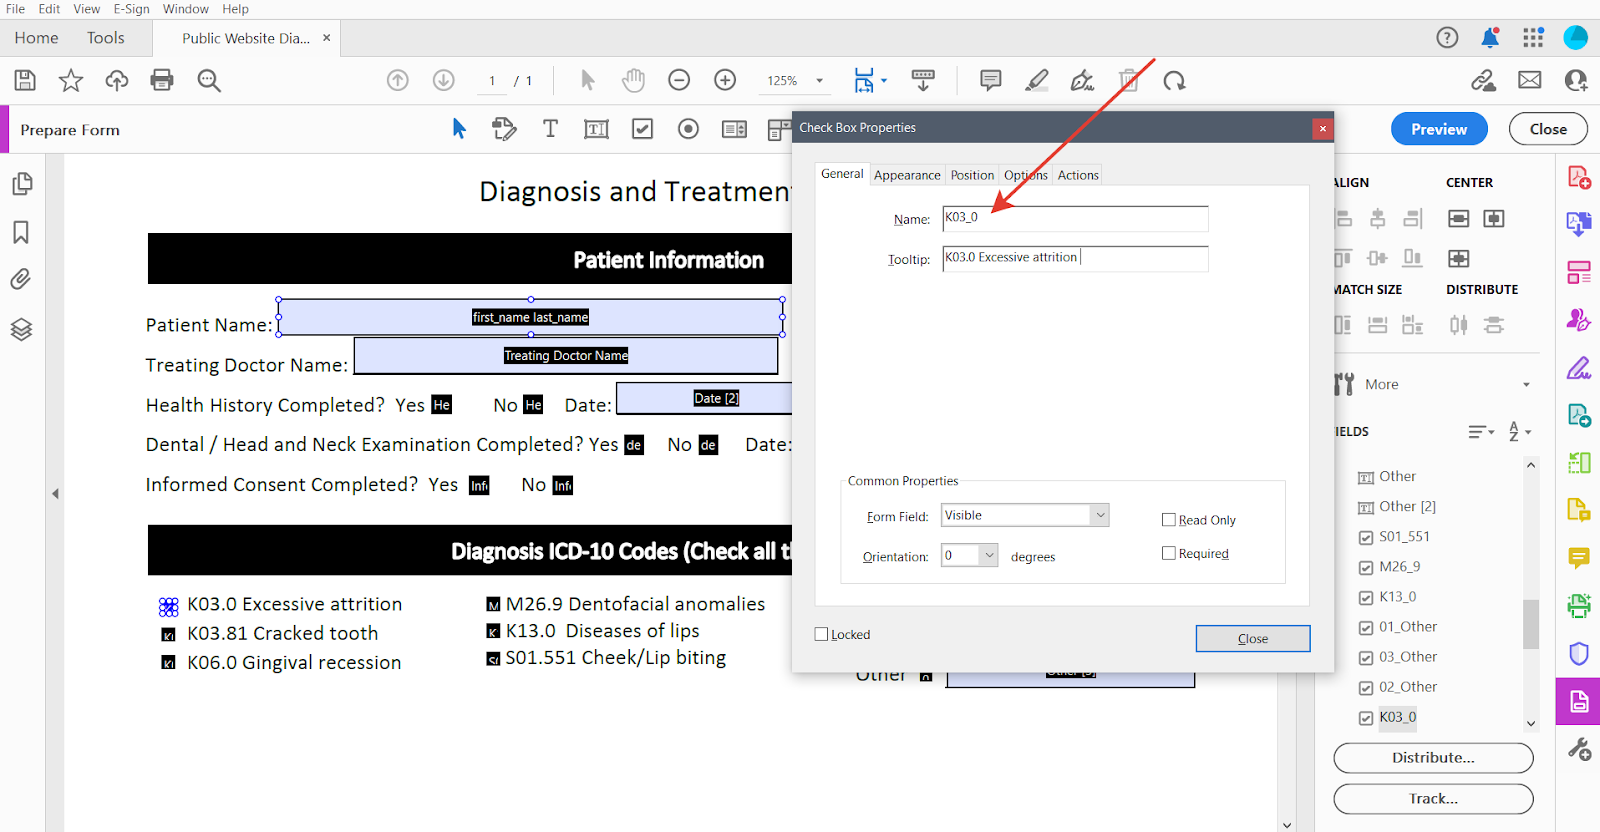
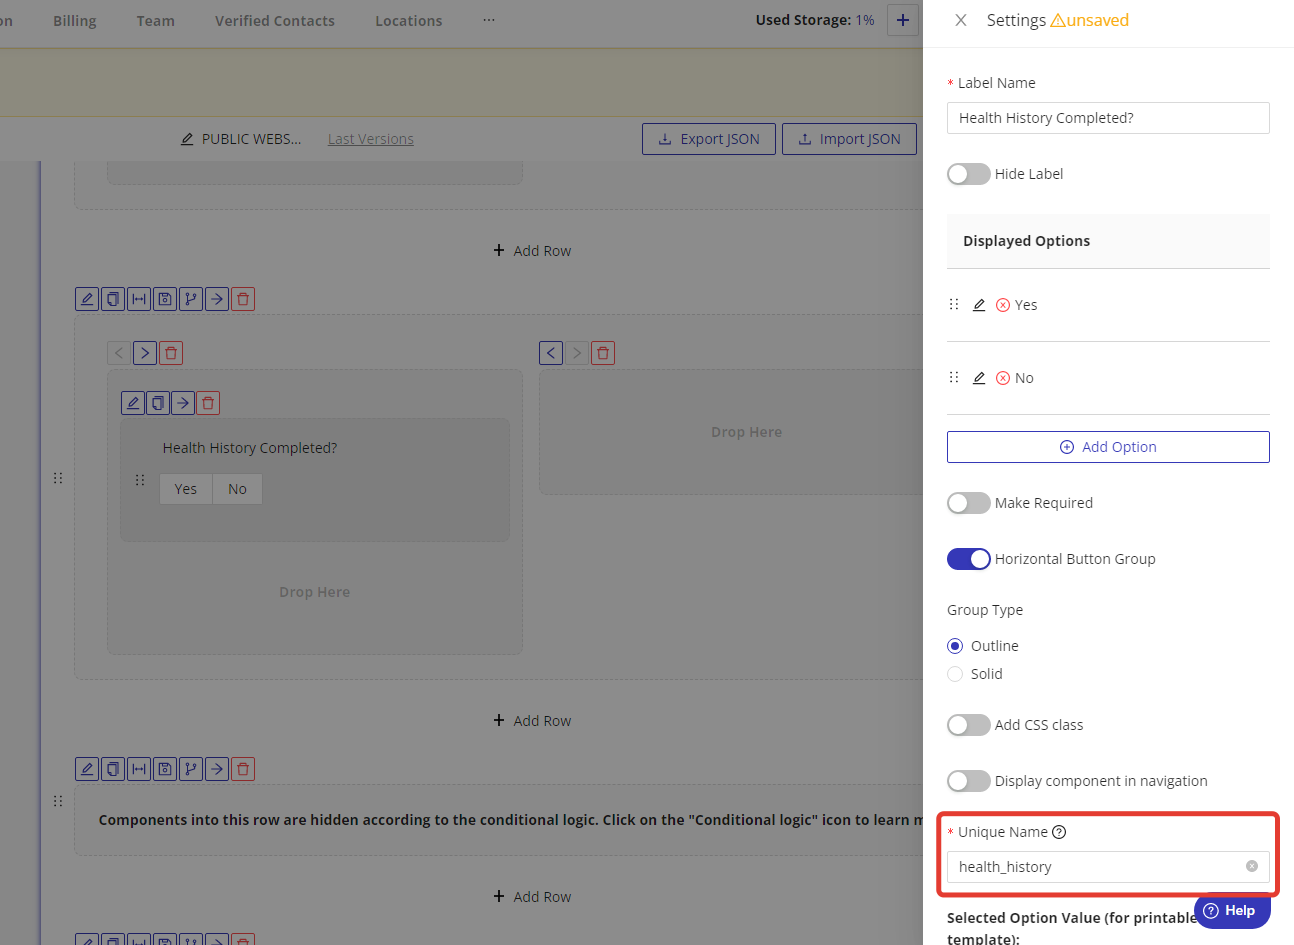
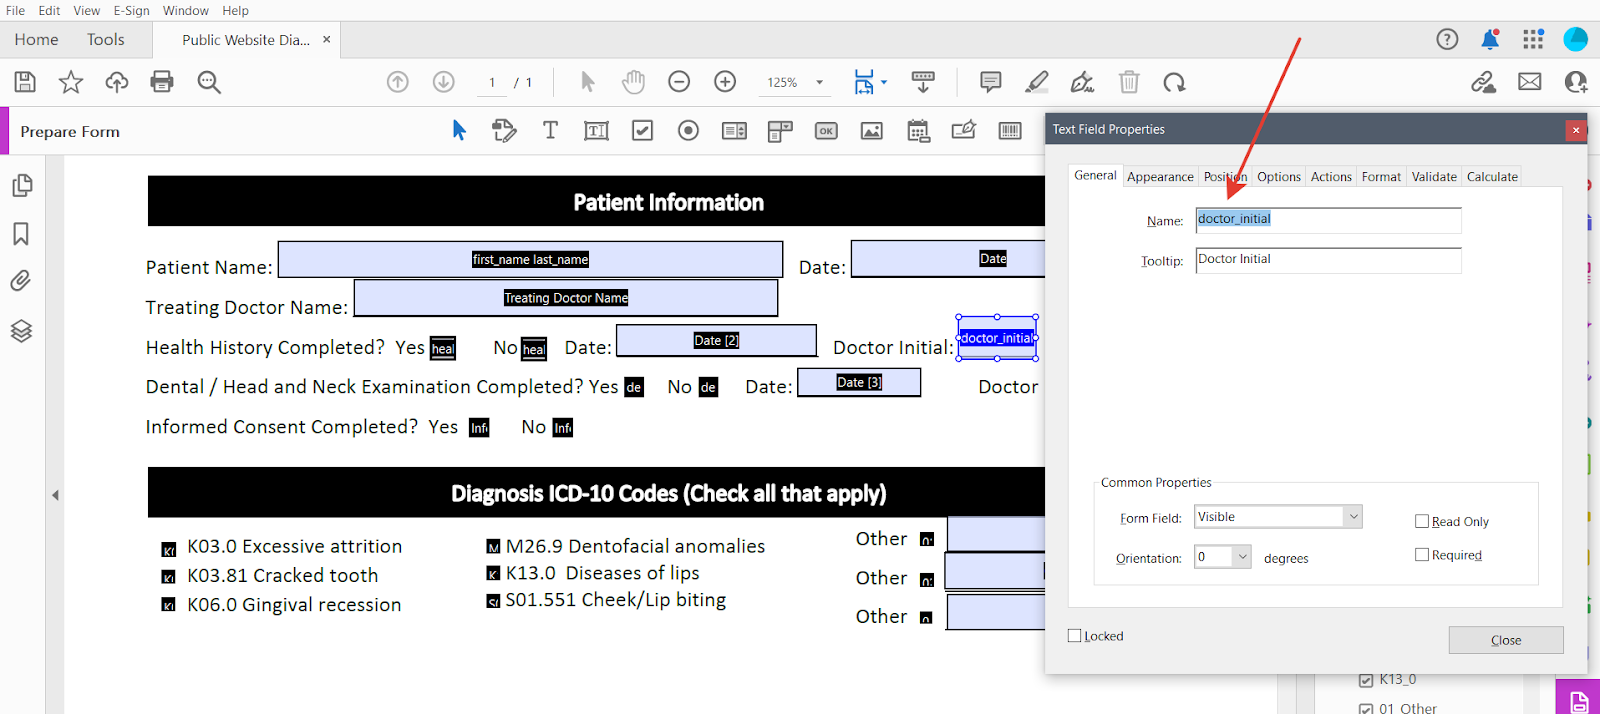
- Right-click on the field and select "Properties" from the dropdown menu. In the Properties dialog box insert the unique name of related field from your online form to the "Name" field. If you want to include several unique names, please insert these names to the "Name" field and divide them with a space or comma.
Please note: for correct work of custom forms, we recommended you to write the unique name with underline between the words (e.g. "first_name")
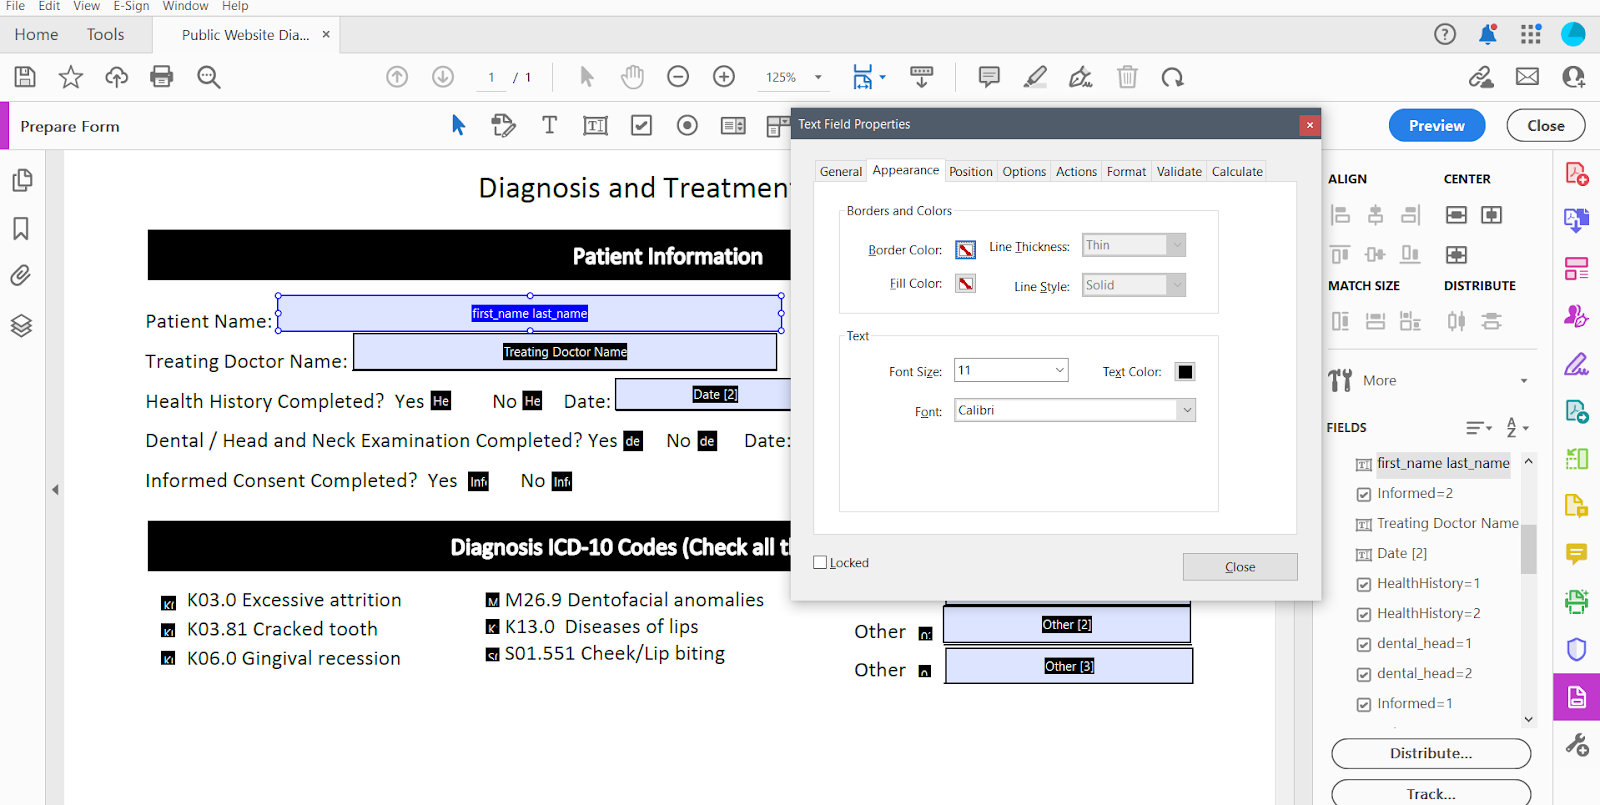
- In the Properties dialog box, you can change the appearance, behavior, and options for the field. For example, choose a font family, adjust a font size, etc.
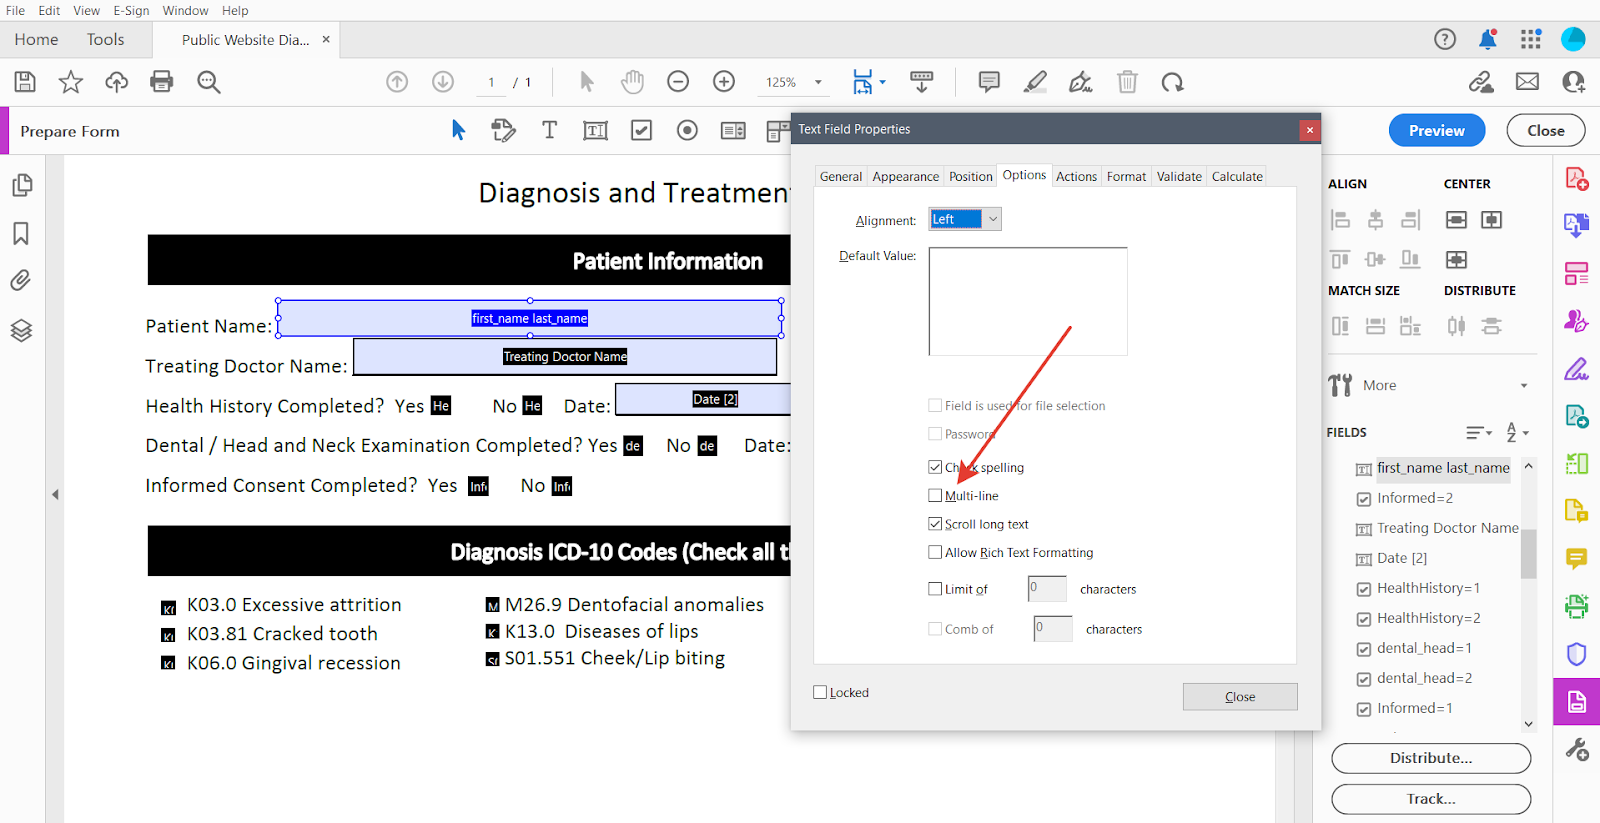
If you need to use a Text area component in your online form that can accommodate multiple lines of text, make sure to check the "Multi-line" checkbox in the "Options" tab.
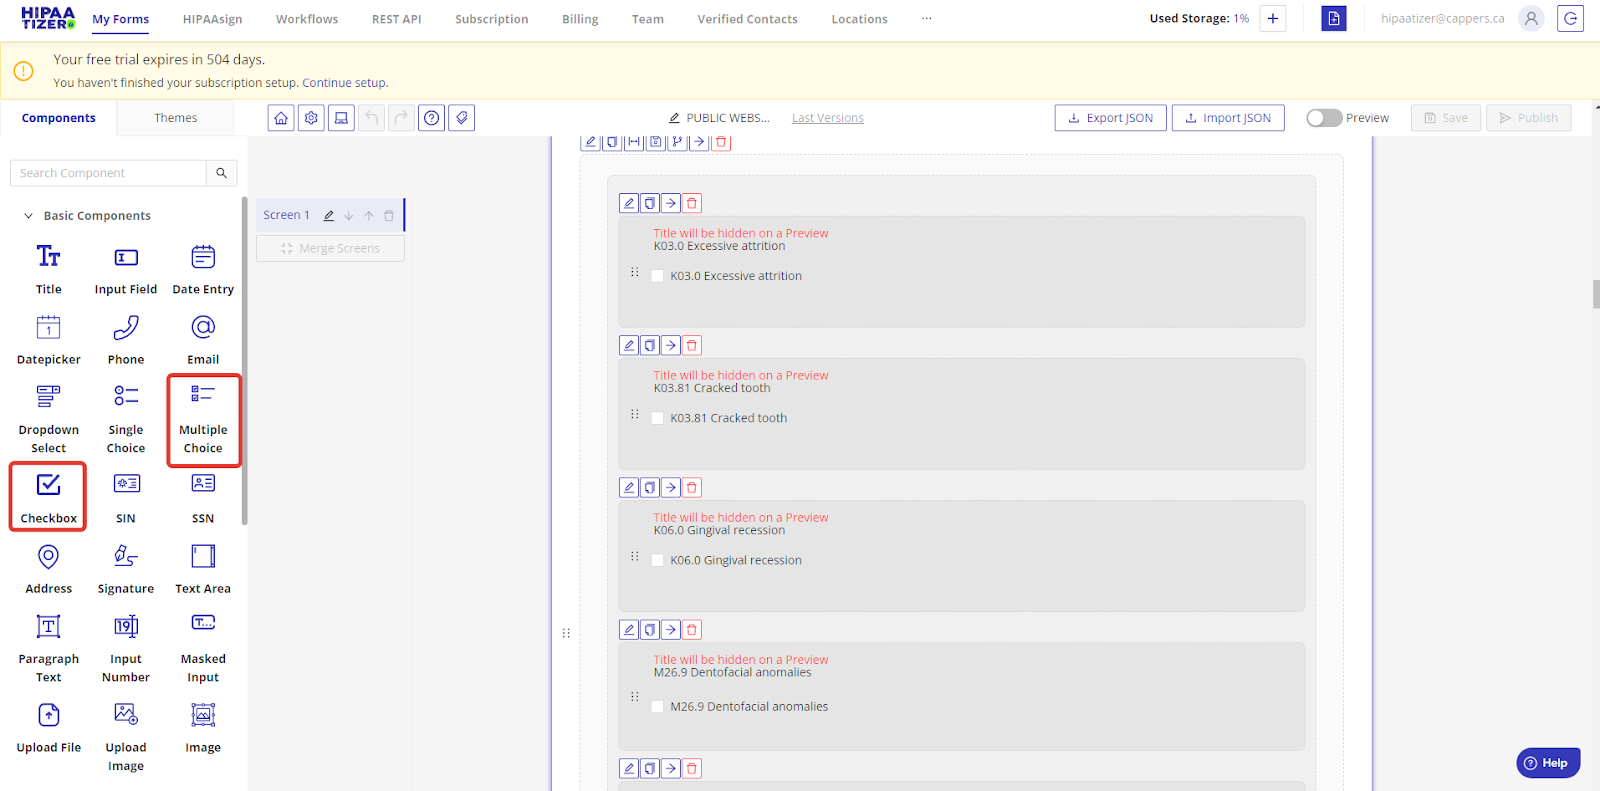
Working with Checkboxes
Checkboxes are used to create multiple-choice options. In the HIPAAtizer form builder, you can use either the single "Checkbox" component or the "Multiple Choice" component.
Click on the "Add Checkbox" icon and click on the location where you want to place the checkbox. You can adjust the size of the checkbox by dragging its corners. Right-click on the field and select "Properties" from the dropdown menu. In the Properties dialog box insert to the "Name" field:
- the unique name of "Checkbox" component
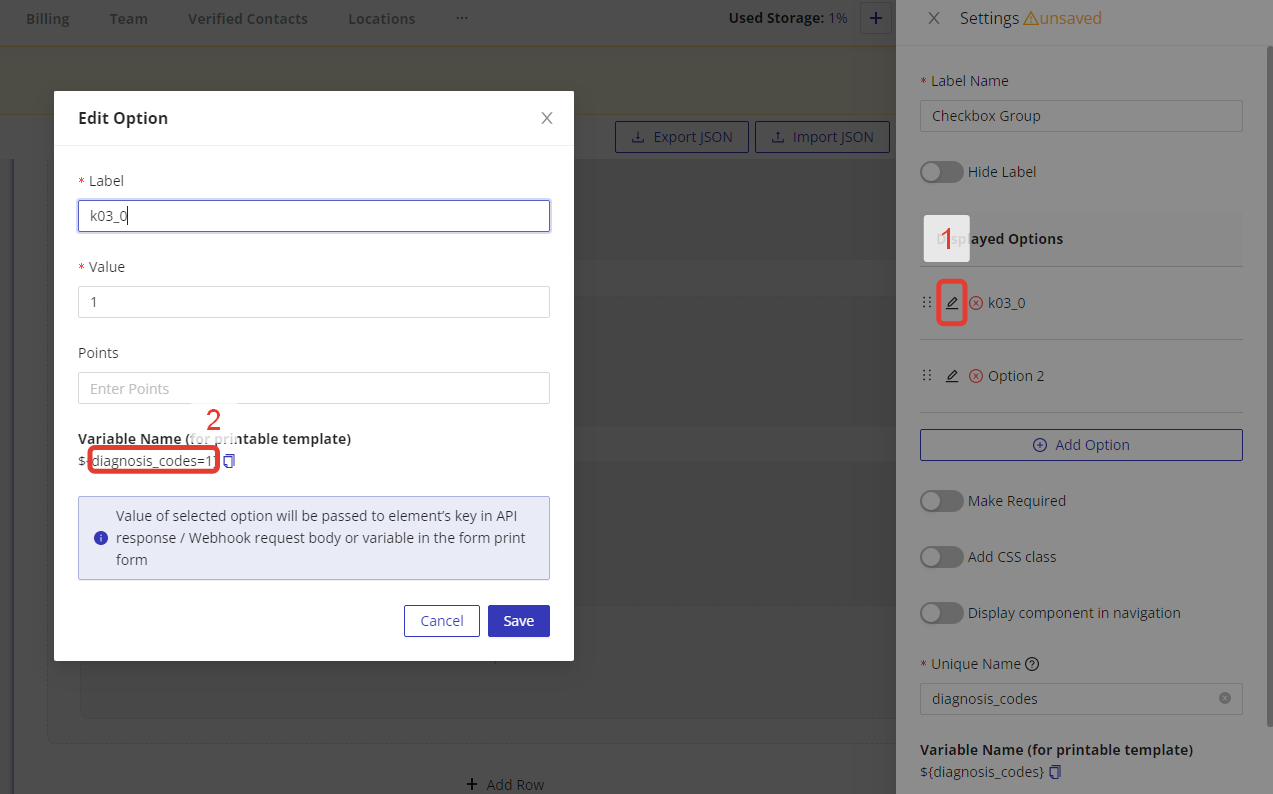
- the unique name of "Option" if you use "Multiple Choice" component


Working with Radio Buttons
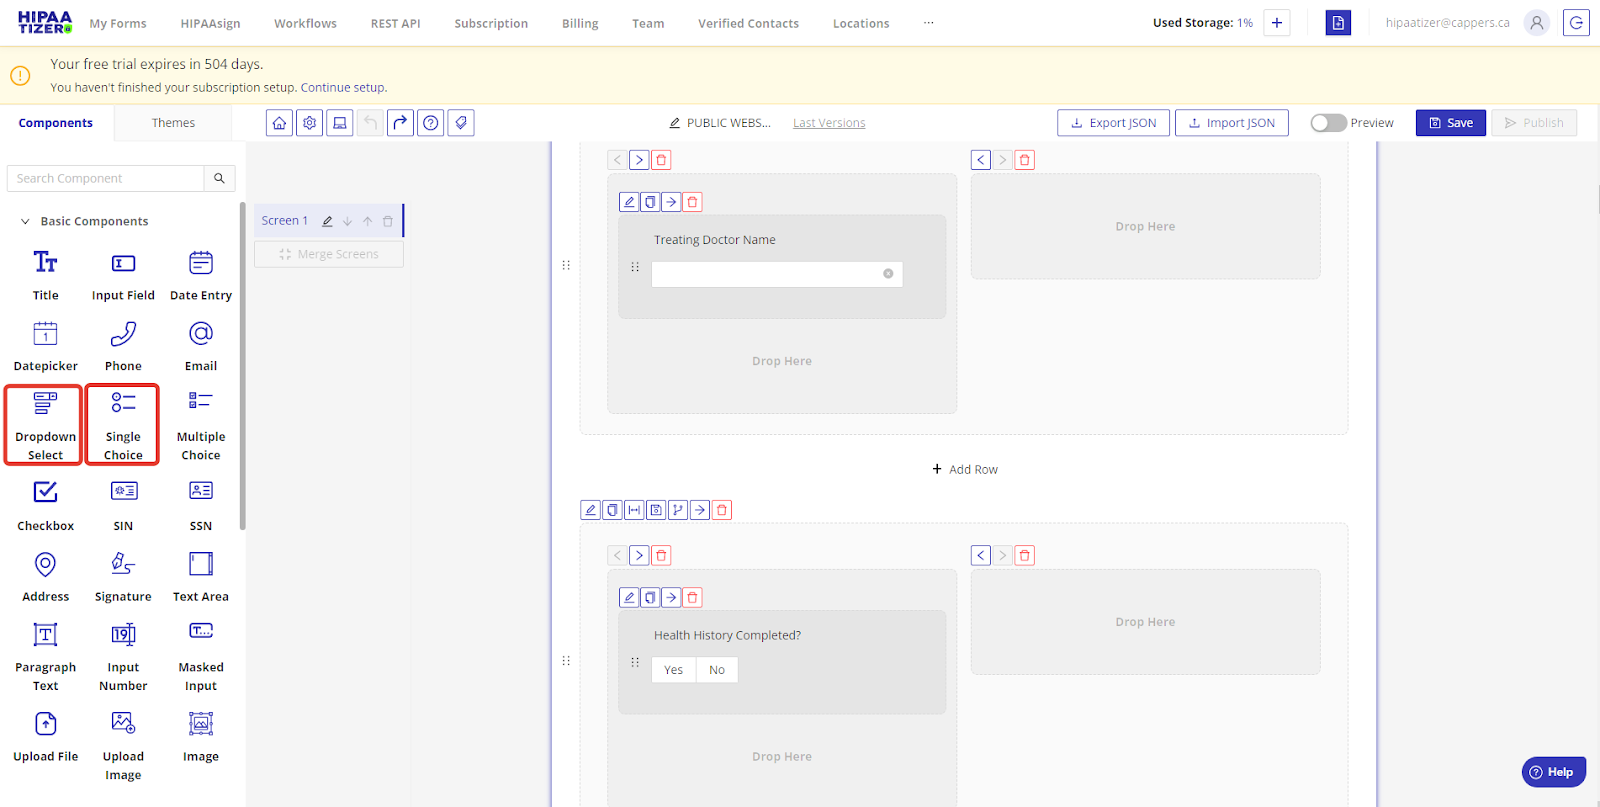
Radio buttons are used to create single-choice options. In the HIPAAtizer form builder, you can use either the "Single Choice" component or the "Dropdown Select" component.
To add a radio button:
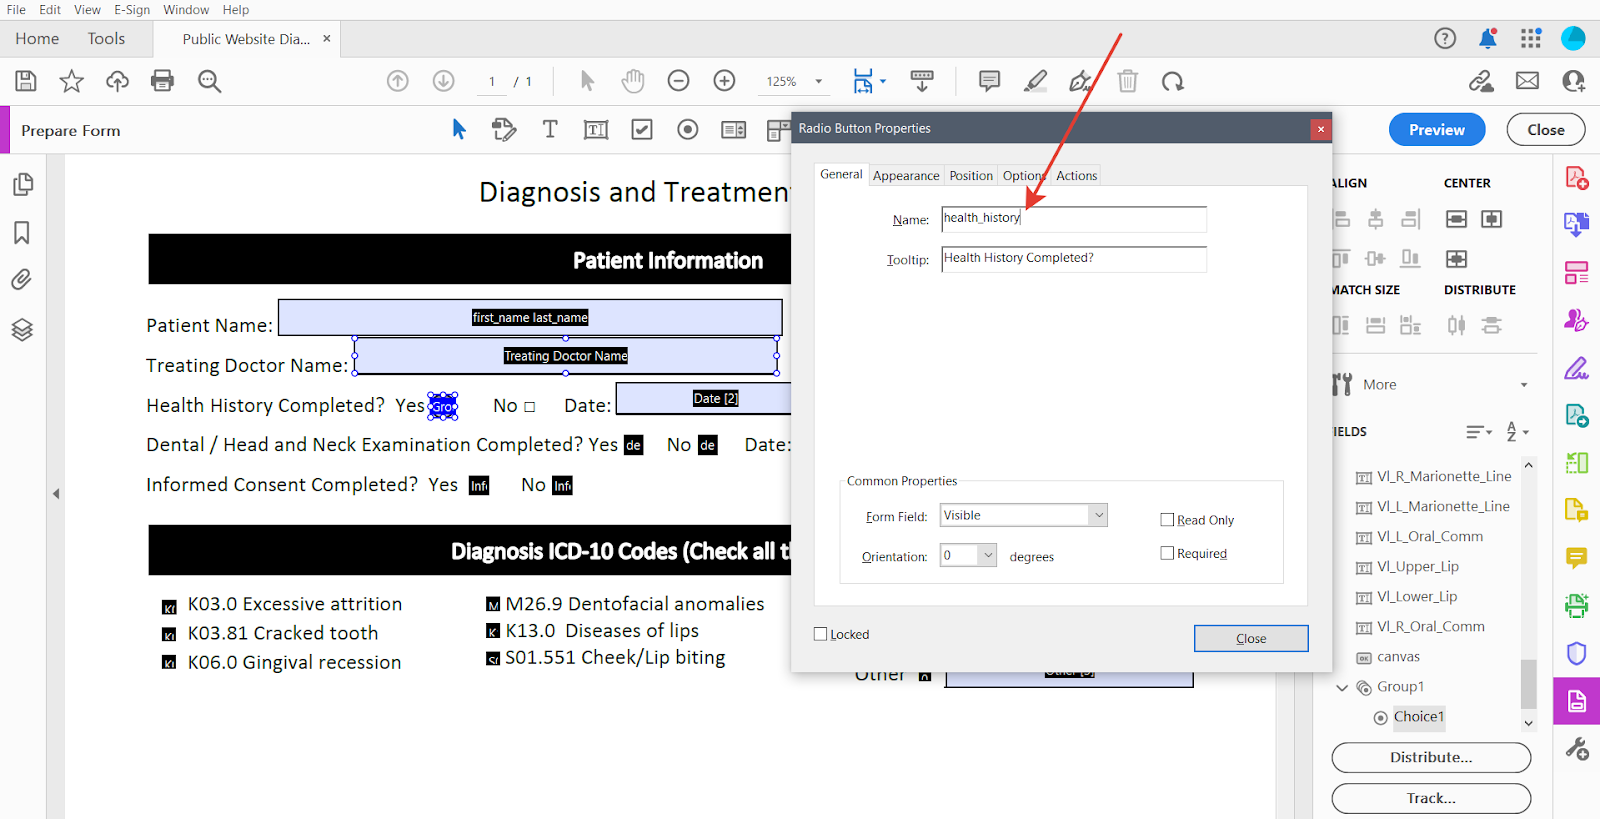
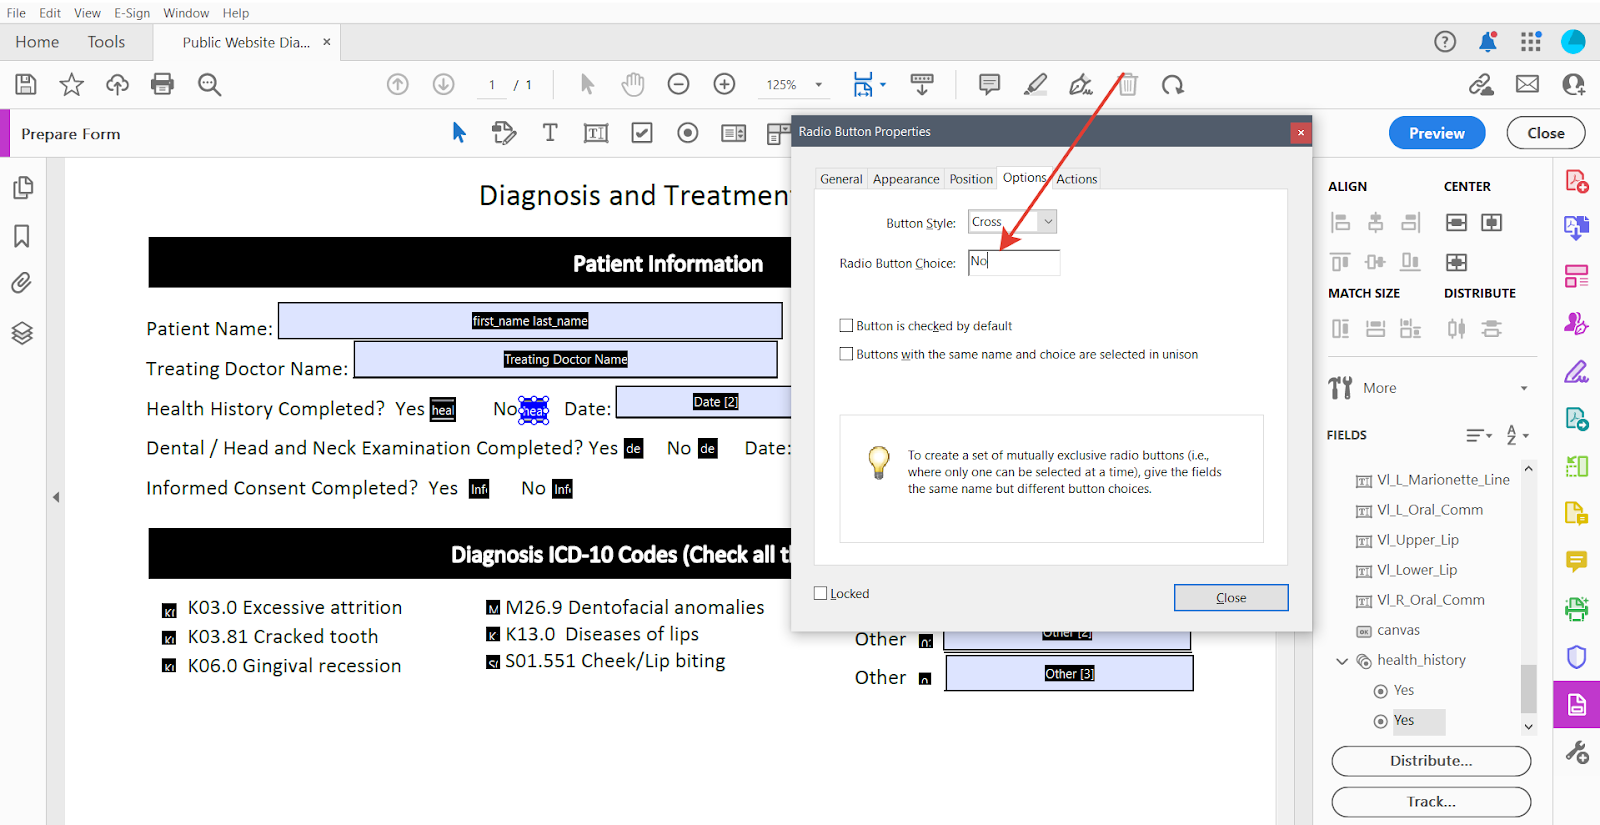
- Click on the "Add Radio Button" icon and click on the location where you want to place the radio button. You can adjust the size of the radio button by dragging its corners. Right-click on the field and select "Properties" from the dropdown menu. In the Properties dialog box insert the unique name of "Single Choice" or "Dropdown Select" component to the "Name" field.
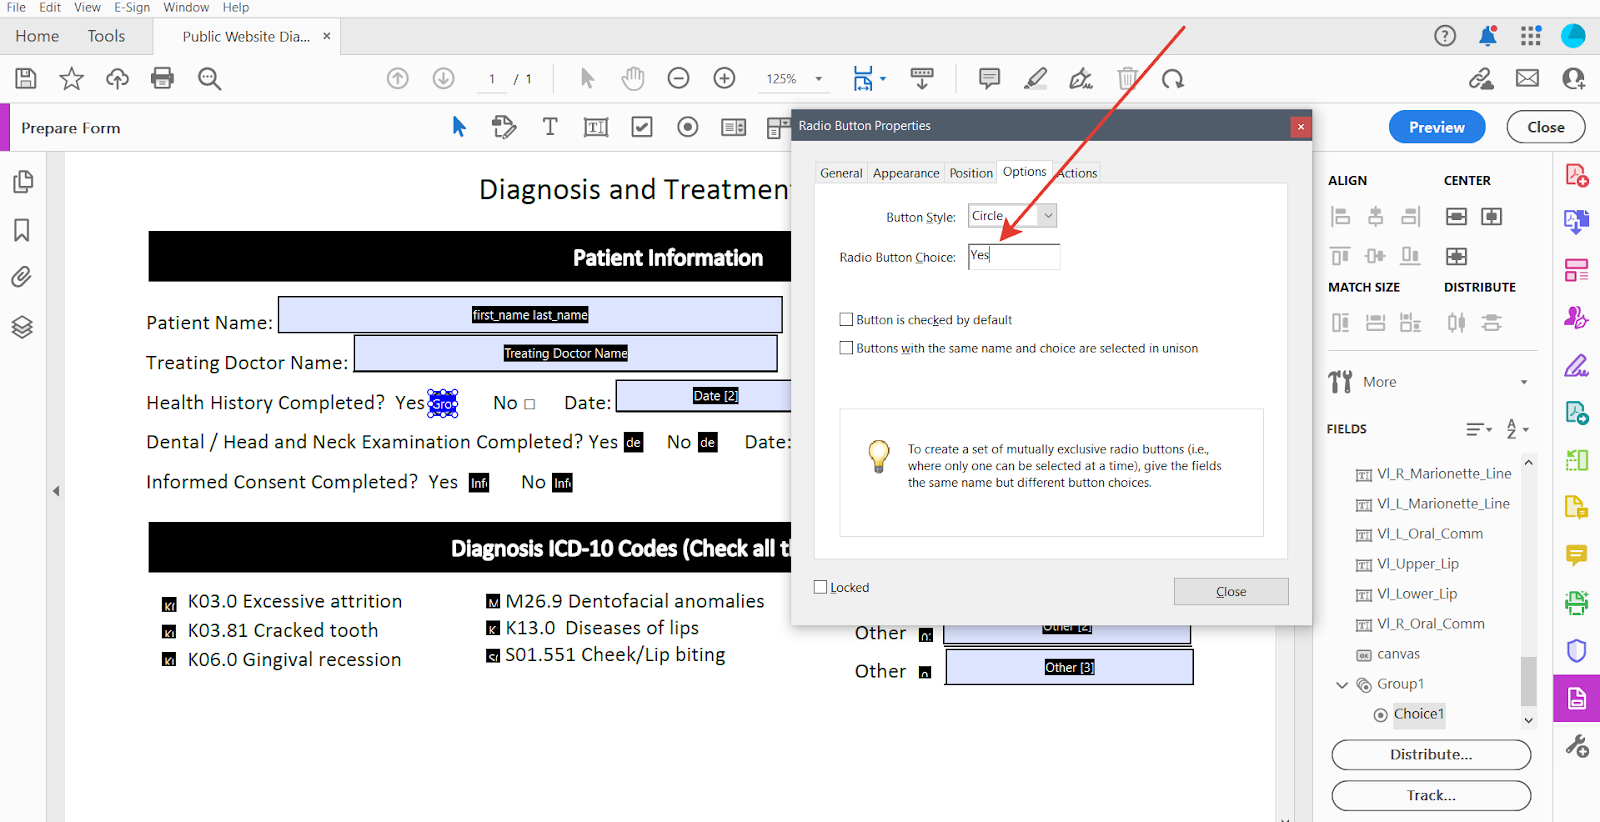
- Insert the first option name to the "Radio Button Choice" field. To change the appearance of radio buttons, select your preferred view from the "Button Style" field. This will allow you to customize the look and feel of your radio buttons to better suit your form design.
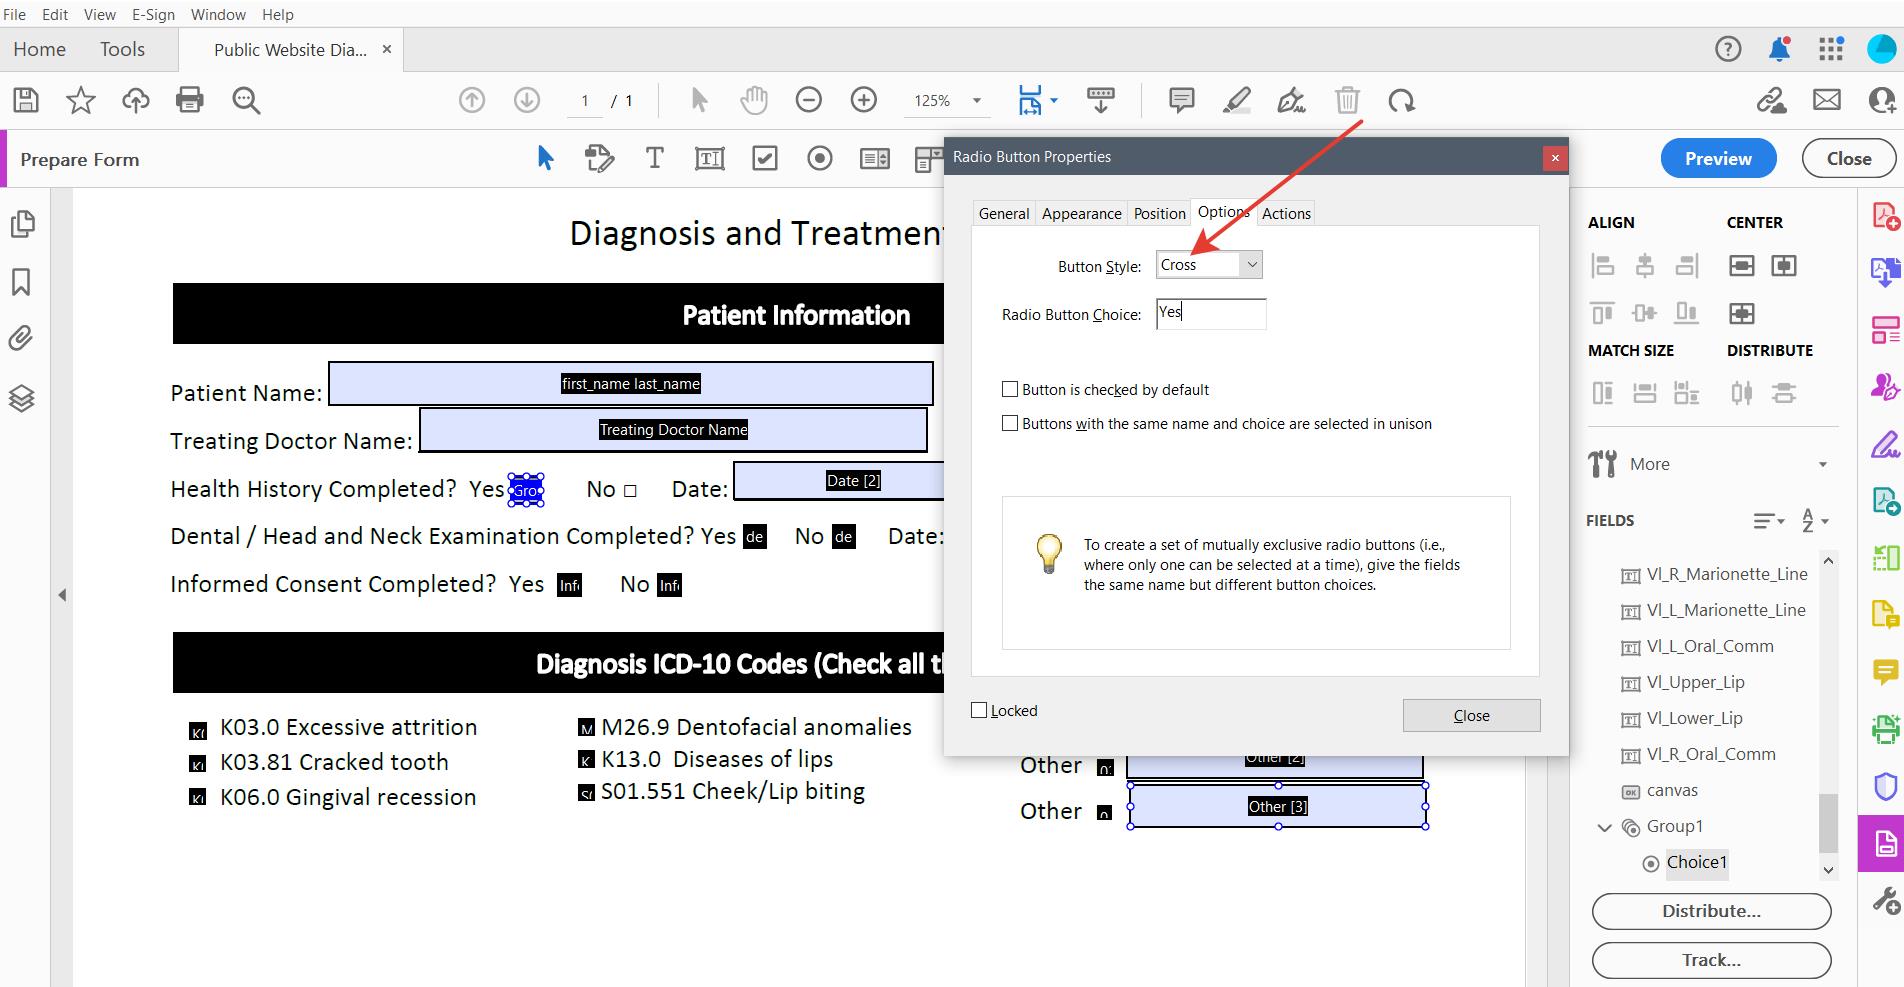
- Copy and paste the already created radio button and change the "Radio Button Choice" to the name of your second option. Continue adding and naming each option until you have listed all the choices for this question. Once you have completed this step, you can proceed to the next question in the form.
When creating radio buttons, it's important to change the "Name" field first before making any other settings. This will ensure that your radio buttons are properly labeled and function as intended.
Working with Text
Select the "Add Text" icon and click on the location where you want to place the label or text. Type in the text you want to appear next to the form field.

Working with Signatures
Click on the "Add Text Field" icon and click on the location where you want to place the signature. You can adjust the size and shape of the text field by dragging its corners. Right-click on the field and select "Properties" from the dropdown menu. In the Properties dialog box insert the unique name of related "Signature" component from your online form to the "Name" field.
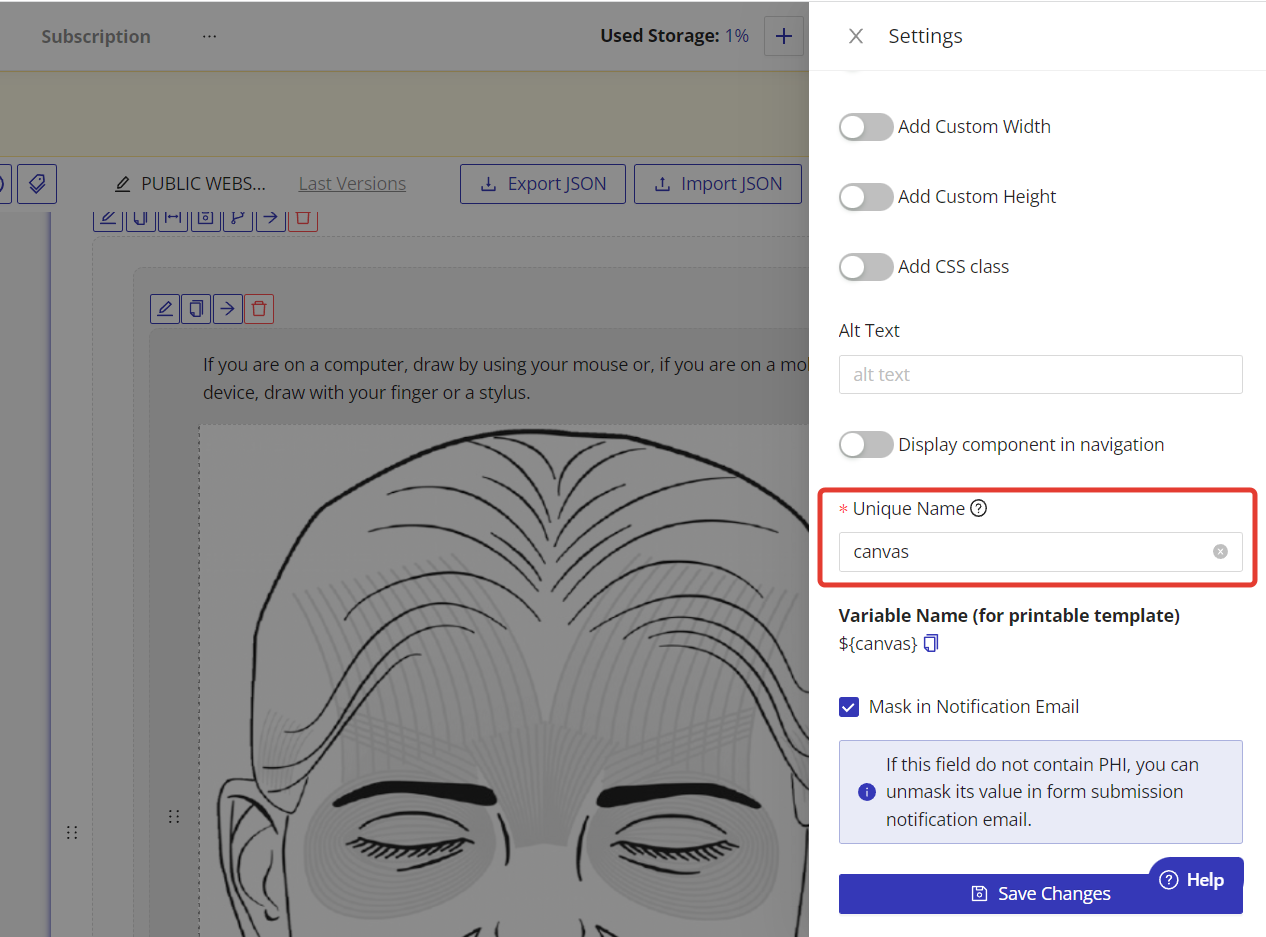
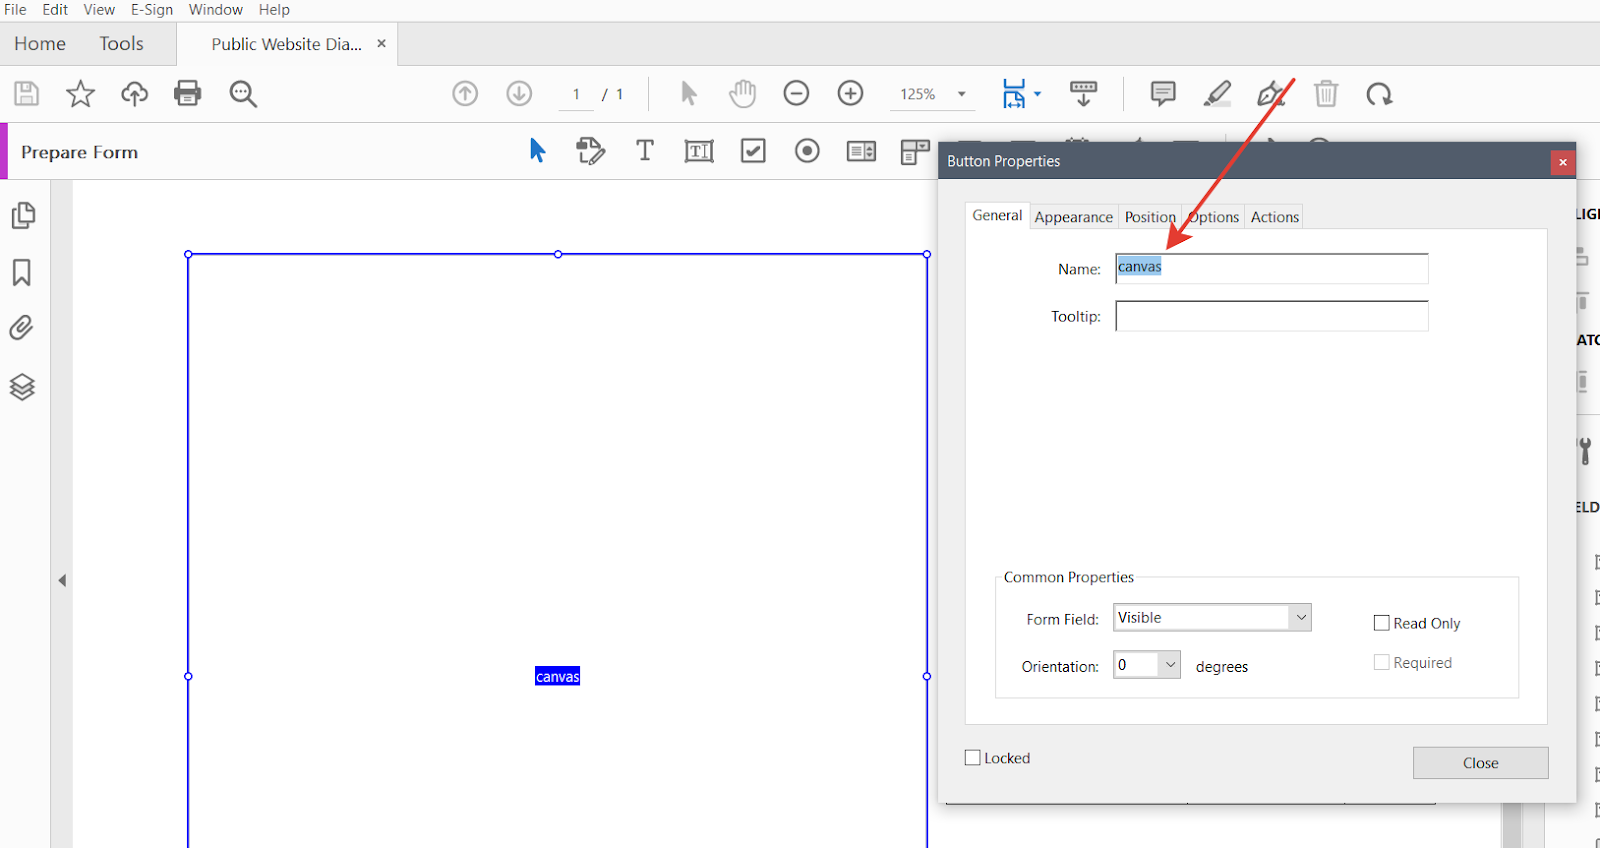
Working with Canvas
Click on the "Add "Print" or "Clear"…" icon and click on the location where you want to place the field. You can adjust the size and shape of the text field by dragging its corners. Right-click on the field and select "Properties" from the dropdown menu. In the Properties dialog box, insert the unique name of the related "Canvas" component from your online form into the "Name" field.
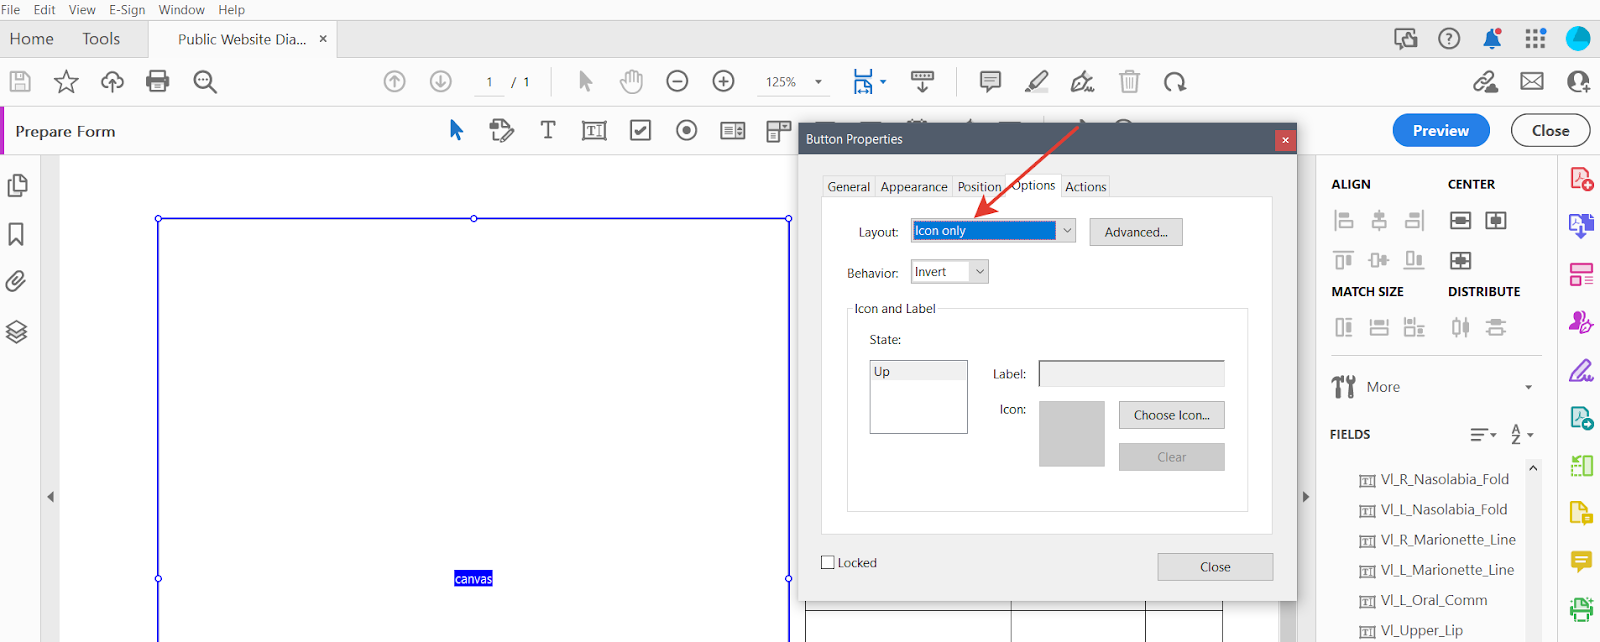
Go to the "Options" tab and select the layout type "Icon Only." Click on the "Choose Icon" button and upload the image you need.


Updating PDF Form Template
If you updated the webform in the web builder and you need help updating the PDF form template, just send us the relevant form's JSON file and we'll do the rest. Send your JSON files to support@hipaatizer.com. Here are the steps to export the form's JSON file to your computer:
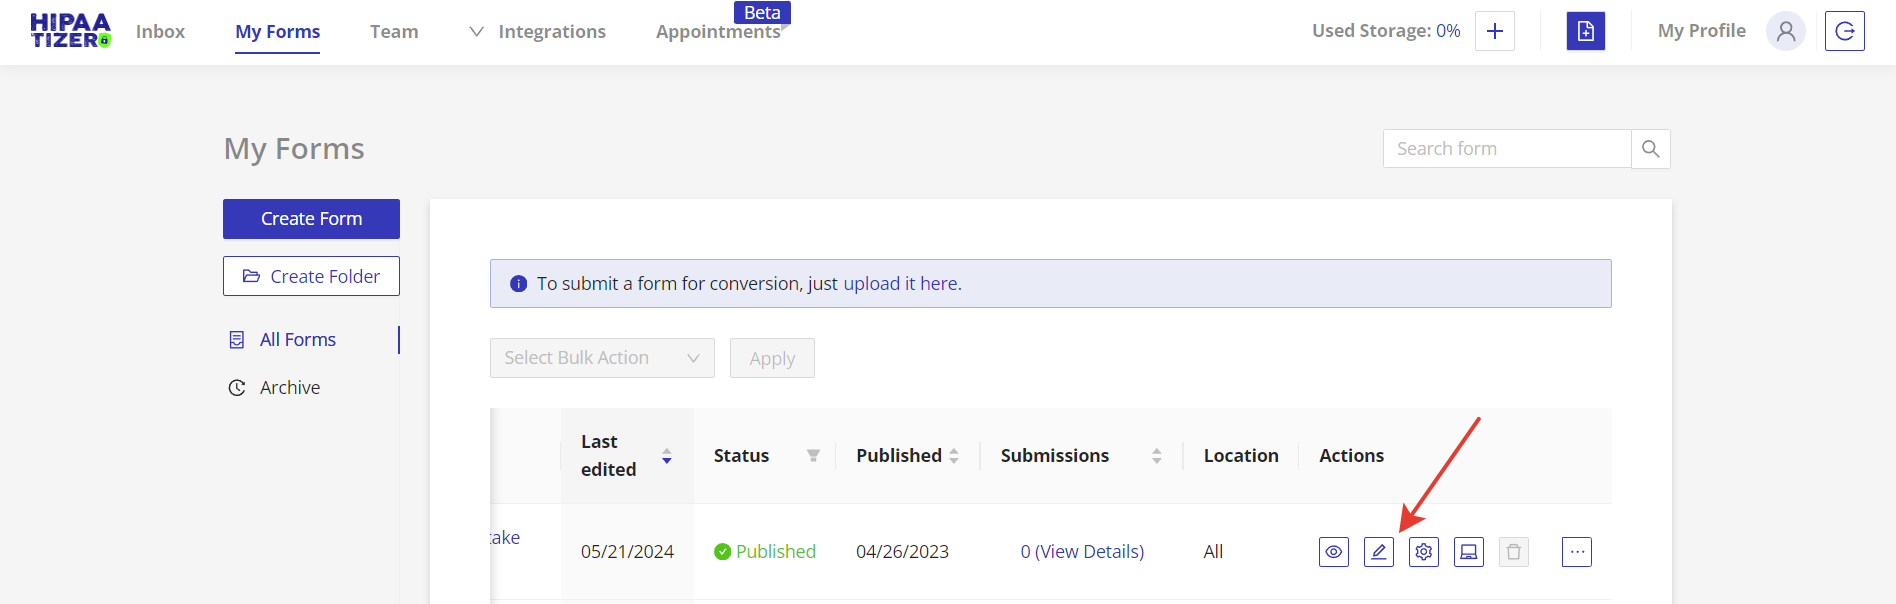
Go to My Forms. Click on the "Edit" icon for the selected form. Click on the "Download JSON" button.