Microsoft Word
This page has a step by step guide on how you can convert your online form created in the HIPAAtizer™ Form Builder into a printable form.
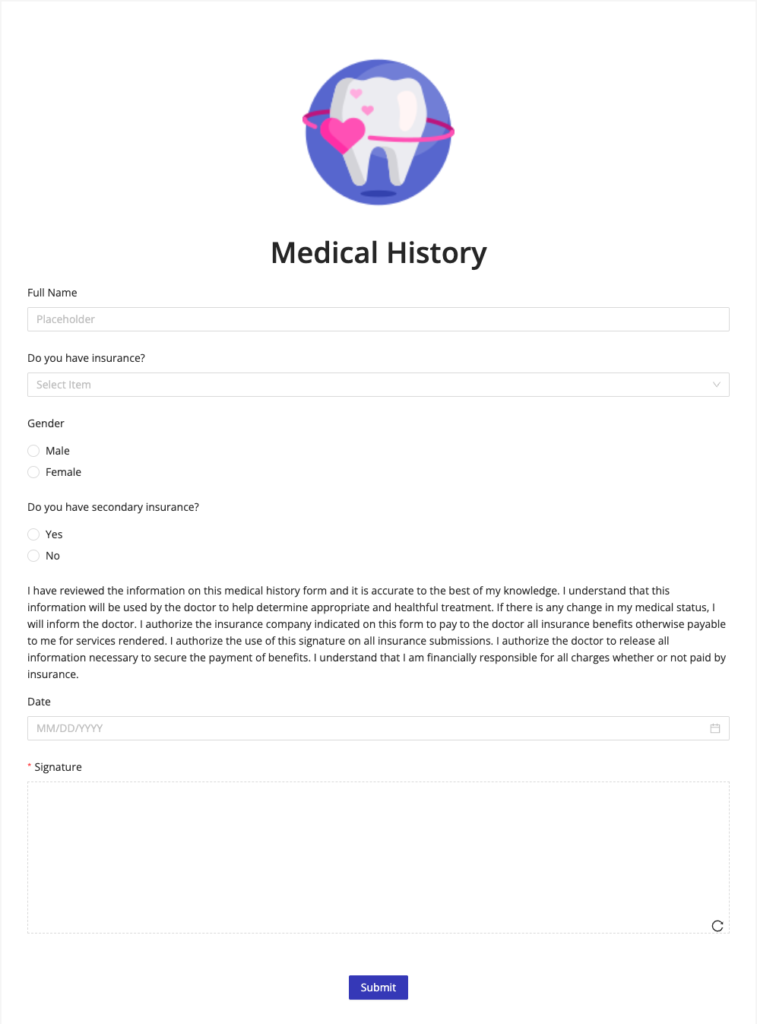
Here is the form we are going to convert:
Preparing your Form
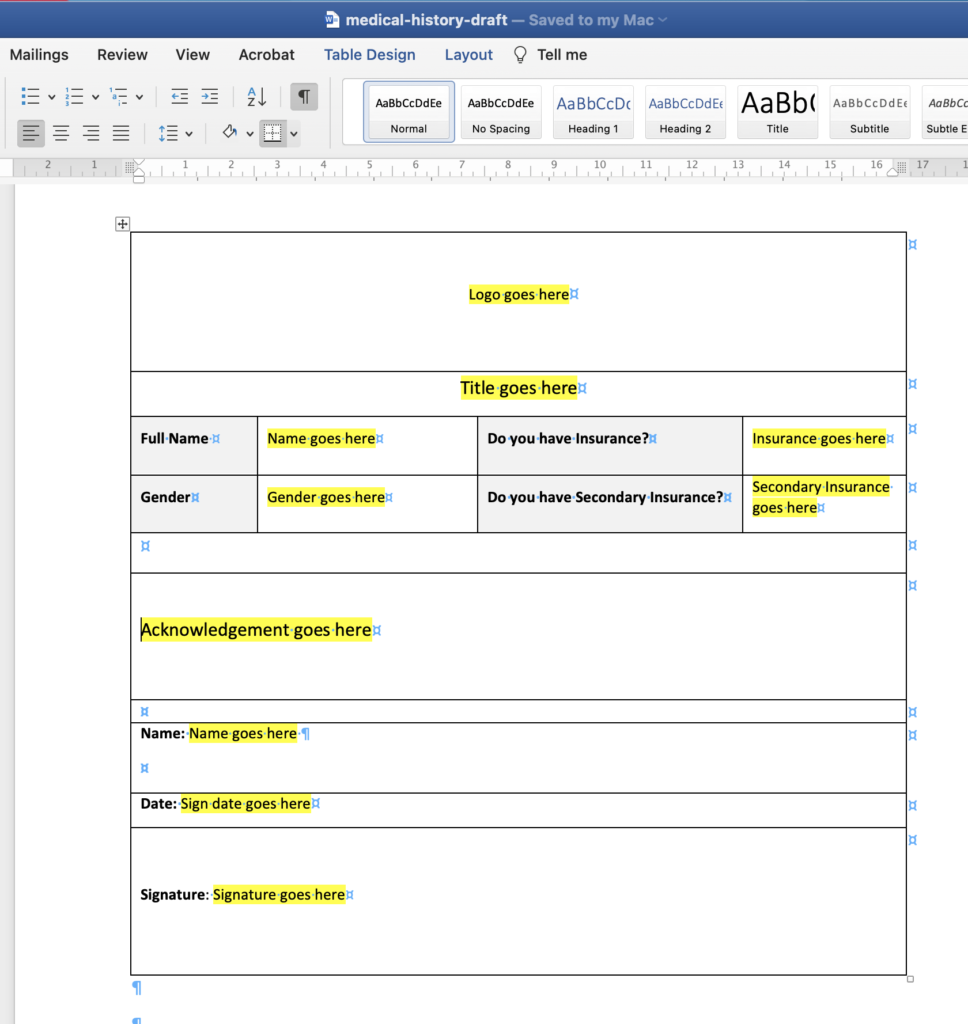
Open Microsoft Word and create a new file. Create a table according to the required arrangement of the form. In our sample case, we need 10 rows and 4 columns. Some of the columns will be merged as required.
We recommend creating a table and hiding the borders, as needed. The table will help keep the proper structure of the form. Also, switch on the "paragraph mark" function to ensure the proper alignment.
Retrieving Field Variables
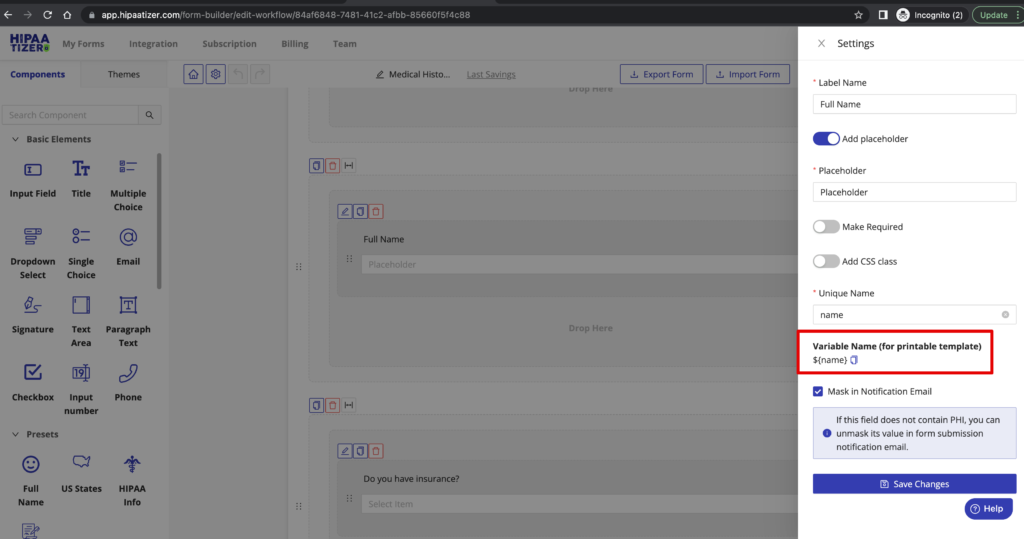
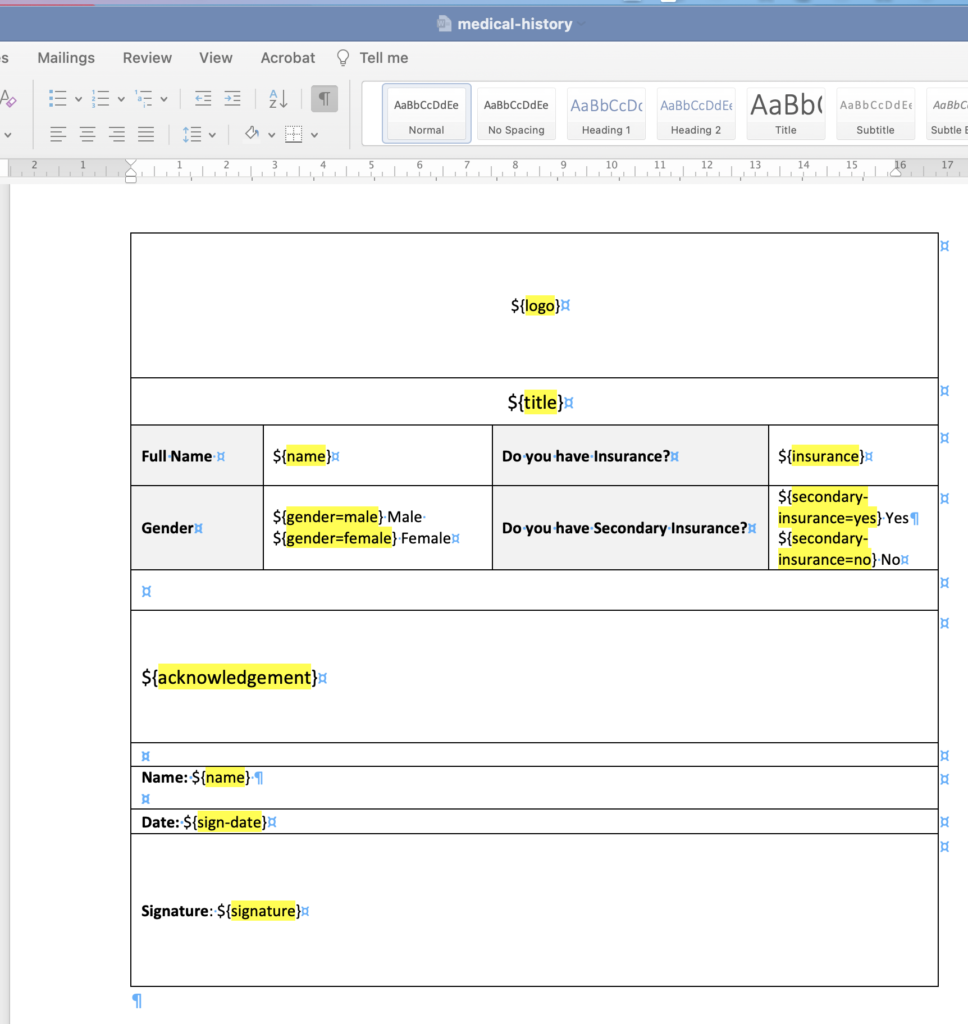
Go to the HIPAAtizer™ online form and find the variable name for each field in the "Settings" bar. Variables are replaced in the printable form template by the data submitted by the customer.
There are also predefined variables that pull data from your profile.
Creating Checkboxes
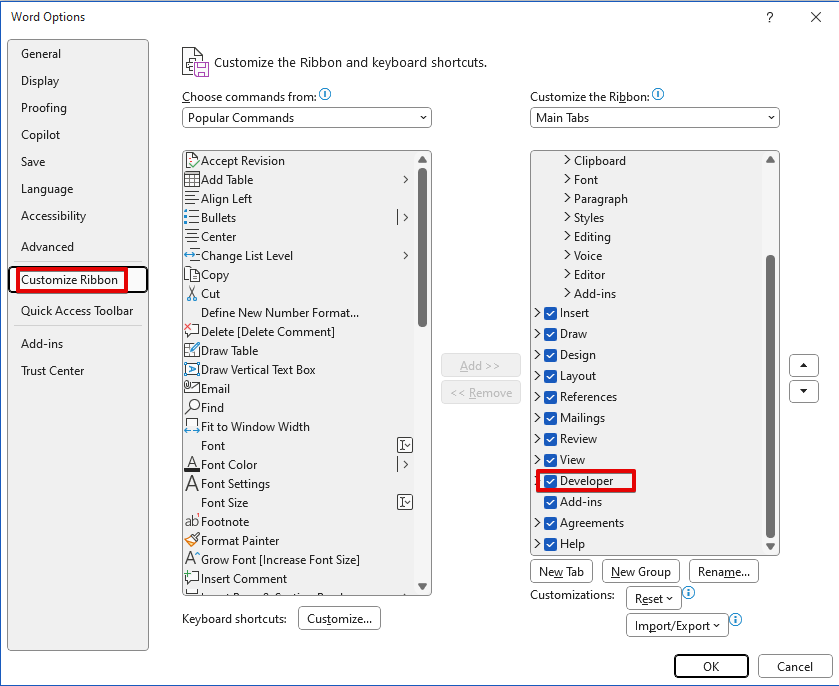
Some basic elements from the form builder (Single Choice, Multiple Choice and Checkbox) can be rendered as checkboxes using 'Developer' options in Word.
First, enable the 'developer' tab by selecting 'File', then 'Options', then 'customize ribbon', and finally check 'Developer'.
To add a check box, click the 'Developer' tab from the ribbon at the top, then find 'Check Box Control' in the 'Controls' box. Click this button to insert a check box into the document.
Save the template and upload it to the HIPAAtizer™ Form Builder (Form Settings -> Advanced Settings -> Upload a custom print form template)
Your custom printable form template is ready!

Assets
The printable form template that is used in this article: Download
The HIPAAtizer™ form shown in this article (you can unzip the attached json file and import it into the HIPAAtizer™ Form Builder): Download