Appointments
Setting Up Locations
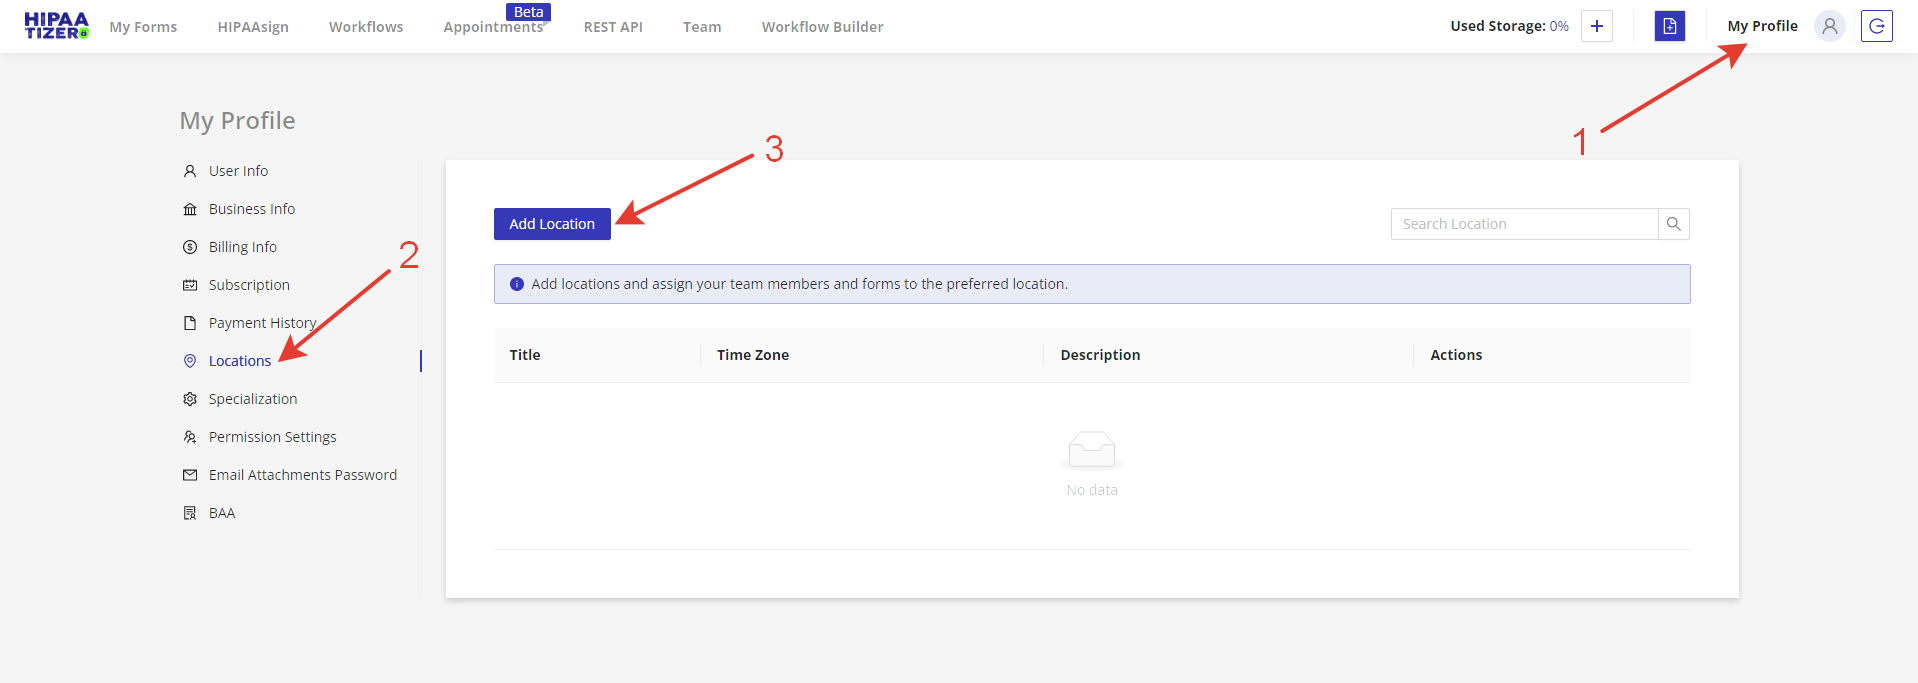
Before you start creating and managing appointments, ensure that you have provided information about your office location.
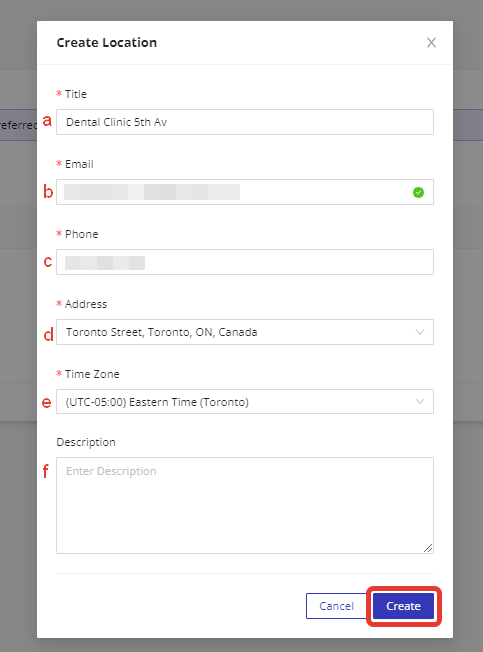
Log in to your HIPAAtizer dashboard. Navigate to the "My Profile" menu at the top (1), then go to the "Locations" tab (2) and click "Add Location" (3). Enter the following information: a. Location Title: For example, "Dental Clinic 5th Av." b. Email address c. Phone d. Address e. Timezone (The system will automatically detect your current timezone, but you can change it if needed.) f. Description (optional)
Click the "Create" button to save your location.
Company-Wide Appointment Settings
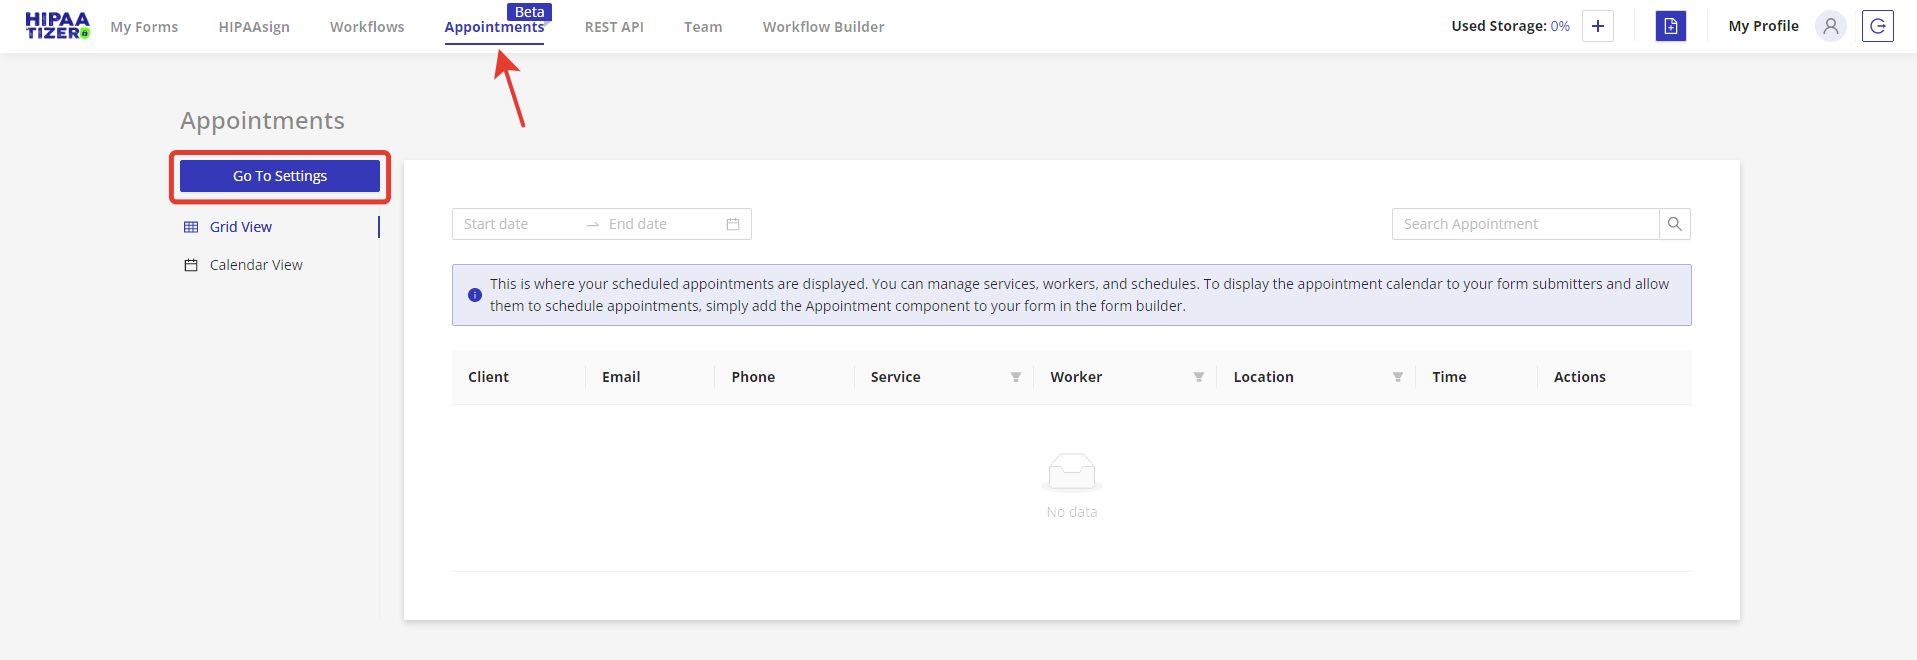
To set up company-wide appointment settings, navigate to the "Appointments" menu at the top of your HIPAAtizer dashboard. You will need to manage the following:
Services
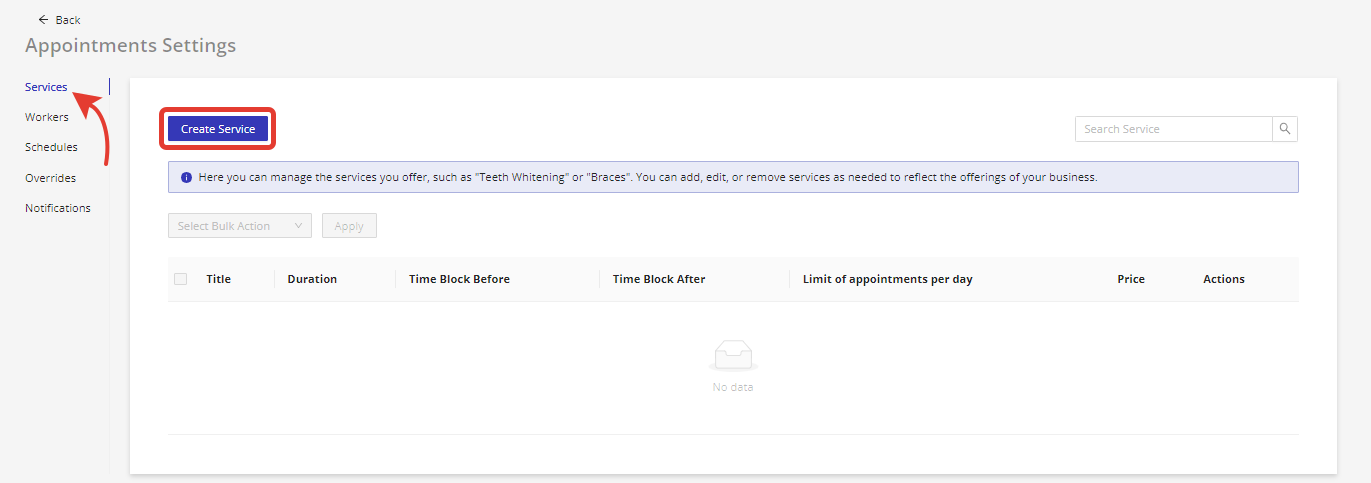
Manage the services you offer, such as "Teeth Whitening" or "Braces." You can add, edit, or remove services as needed to reflect the offerings of your business.
Workers
Add, edit, or remove employees who provide your services. Assign them to specific services to ensure seamless scheduling.
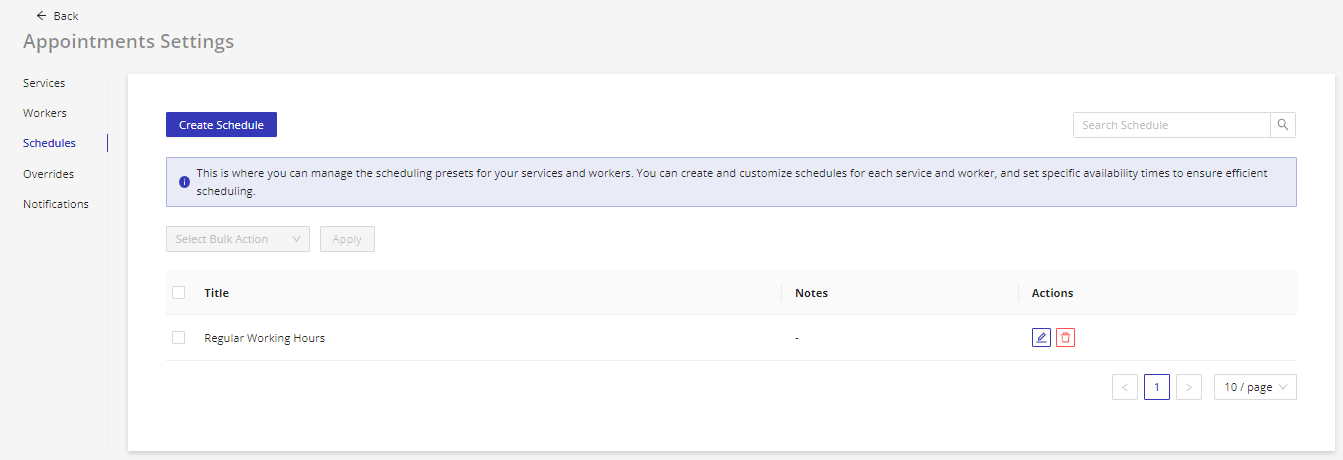
Schedules
Manage the scheduling presets for your services and workers. Create and customize schedules for each service and worker, and set specific availability times to ensure efficient scheduling.
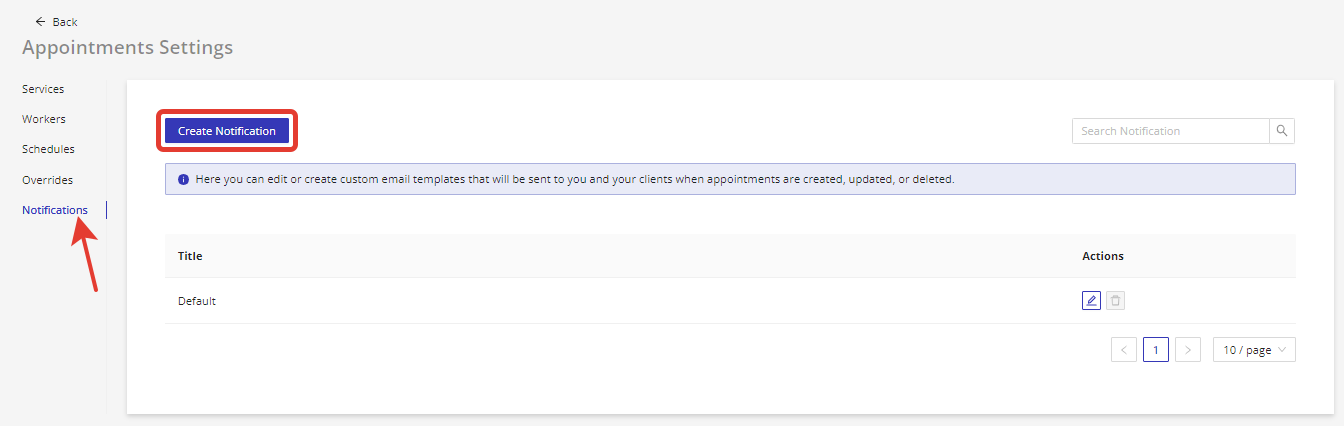
Notifications
Edit or create custom email templates that will be sent to you and your clients when appointments are created, updated, or deleted.
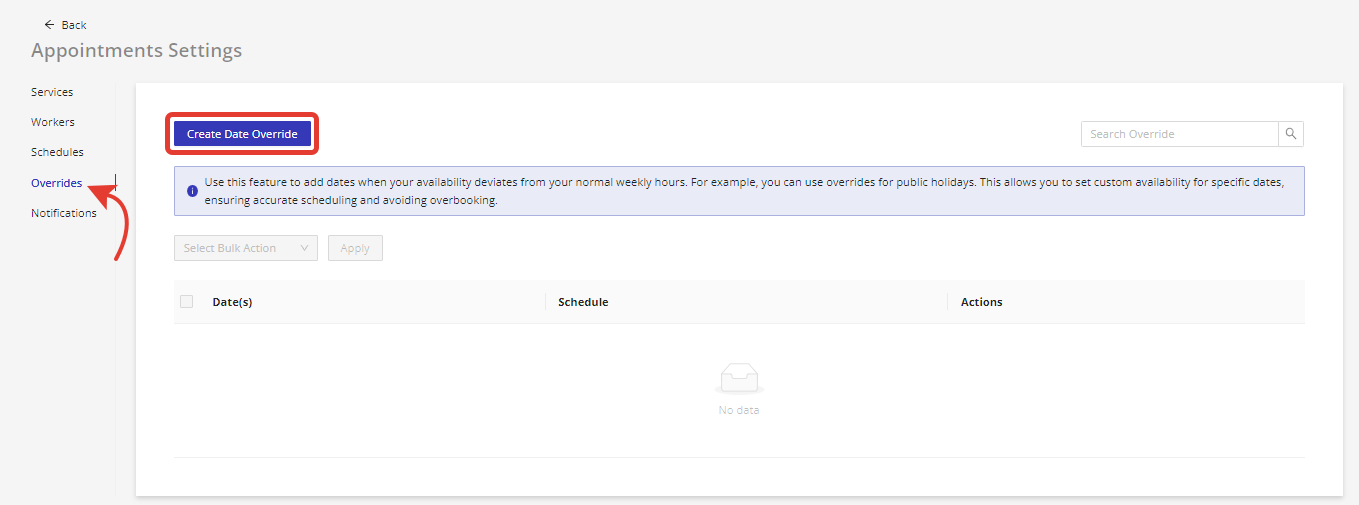
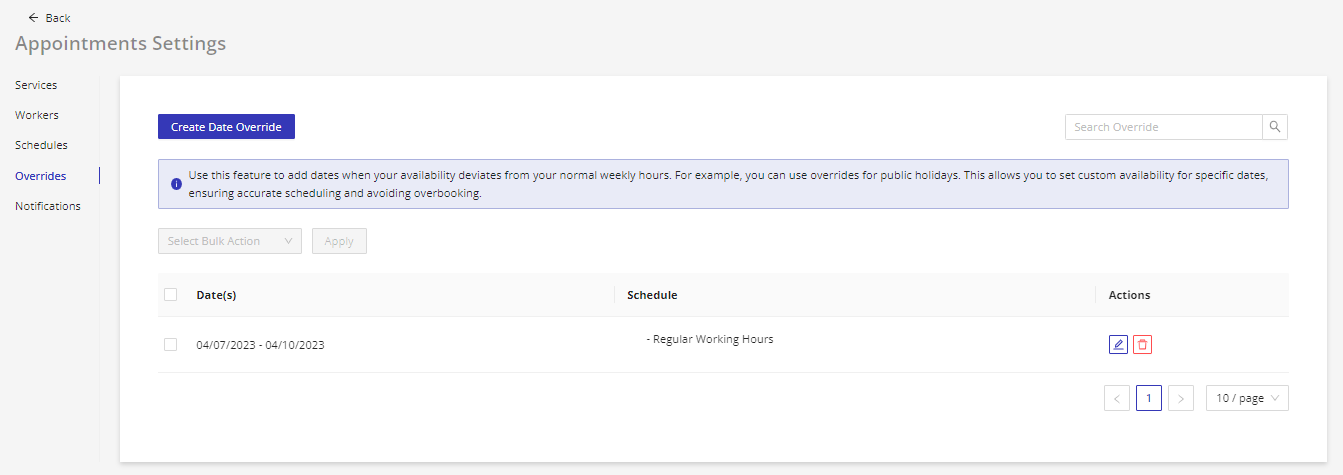
Overrides
Use this feature to add dates when your availability deviates from your normal weekly hours. For example, you can use overrides for public holidays. This allows you to set custom availability for specific dates, ensuring accurate scheduling and avoiding overbooking.

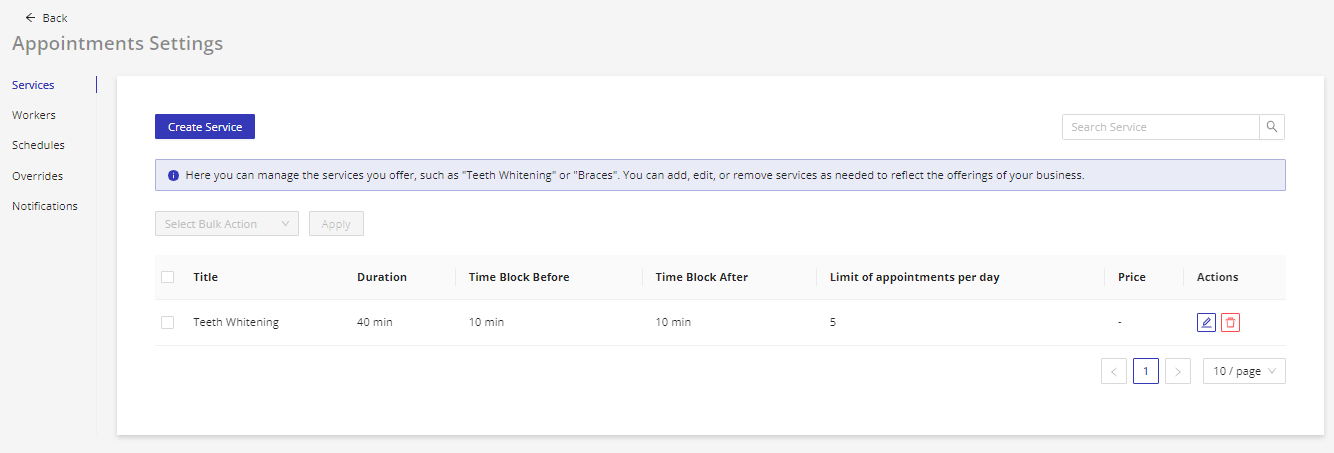
Creating a Service
Navigate to the "Appointments" menu at the top of your HIPAAtizer dashboard. Click on "Services," which will direct you to the list of available services. Click the "Create Service" button to start creating a new service. Enter the following required information for your new service:
a. Title: Provide a descriptive name for the service (e.g., Teeth Whitening). b. Duration: Indicate the length of the service in minutes. c. Booking availability: Set a date range in which services can be booked in advance. When a date range is set, services cannot be booked beyond the set date range. If you do not need to limit the date range, choose the 'Indefinite' option. d. Optionally, you can also set the following advanced settings for your service: i. Time Block Before: Specify the number of minutes you want to block before the service, which can be used as a buffer or preparation time. ii. Time Block After: Specify the number of minutes you want to block after the service, which can be used as a buffer or cleanup time. iii. Limit of Appointments per Day: Set a maximum number of appointments allowed per day for this particular service to prevent overbooking. iv. Set Minimum Booking Notice: Define the minimum amount of time required before an appointment when clients are unable to schedule an appointment.
After filling in the necessary information, click the "Create" button to create your new service. Please note that the booking windows are tied to specific services, so you will need to edit the 'Date Range' field for each service that needs its window extended.


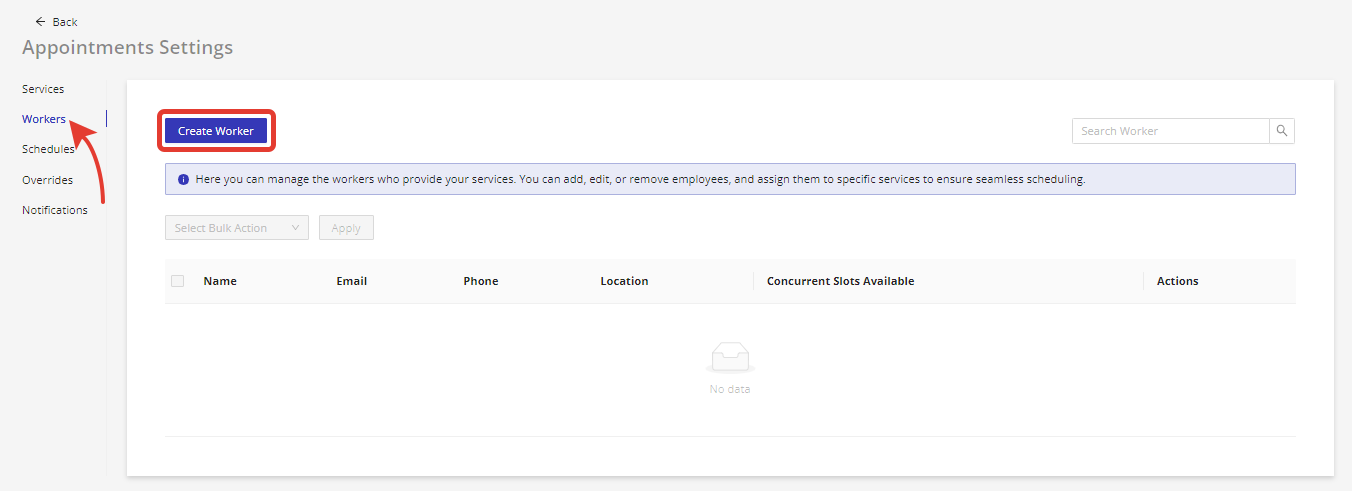
Creating a Worker
Navigate to the "Appointments" menu at the top of your HIPAAtizer dashboard. Click on "Workers," which will direct you to the list of available workers. Click the "Create Worker" button to start creating a new worker Enter the following required information for your new worker: a. Name: Provide the full name of the worker. b. Email: Enter the worker's email address, which will be used for communication and notifications. c. Location: Assign the worker to a specific office location. d. Concurrent Slots Available: Indicate the maximum number of appointments the worker can handle simultaneously. This helps prevent overbooking and ensures proper scheduling. e. Optionally, you can also provide the worker's phone number for additional contact information.
After filling in the necessary information, click the "Create" button to create your new worker.

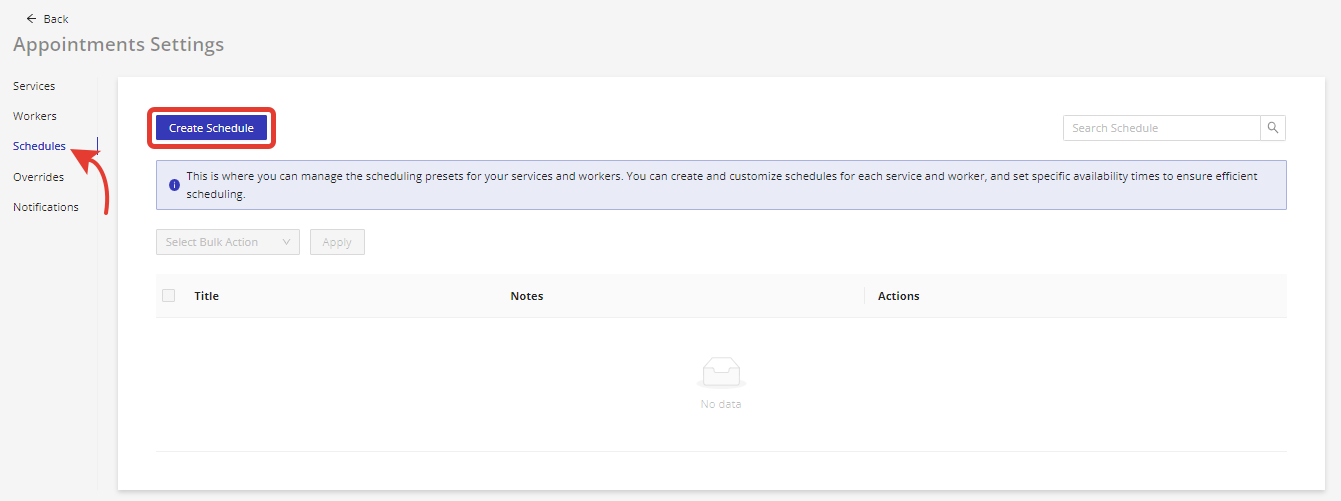
Creating a Schedule
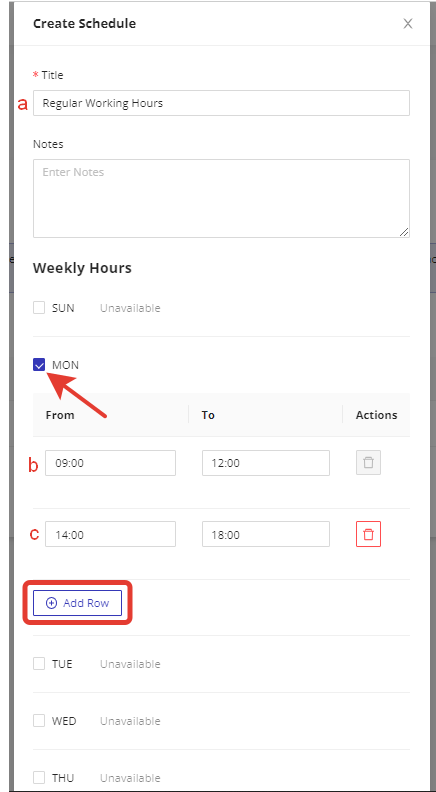
Navigate to the "Appointments" menu at the top of your HIPAAtizer dashboard. Click on "Schedules," which will direct you to the list of available schedules. Click the "Create Schedule" button to start creating a new schedule. Enter the following required information for your new schedule: a. Title: Provide a descriptive name for the schedule (e.g., Regular Working Hours).
Optionally, you can add notes for your reference.
Set the Weekly Hours: For each weekday that you want to make a working day, check the corresponding checkbox. Specify the "From" and "To" hours for each working day (b, c). You can define several working intervals for each day by clicking the "Add Row" button and entering the additional "From" and "To" hours.
After filling in the necessary information, click the "Save" button to create your new schedule.
Creating a Date Override
Navigate to the "Appointments" menu at the top of your HIPAAtizer dashboard. Click on "Overrides," which will direct you to the list of available date overrides. Click the "Create Date Override" button to start creating a new override.
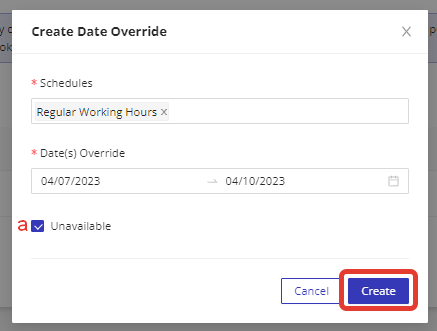
Select all schedules for which this override will be applied. You can choose multiple schedules by holding down the Ctrl key (or Command key on Mac) and clicking on each desired schedule. Select the date range when the override will be applied by choosing the start date and end date from the calendar.
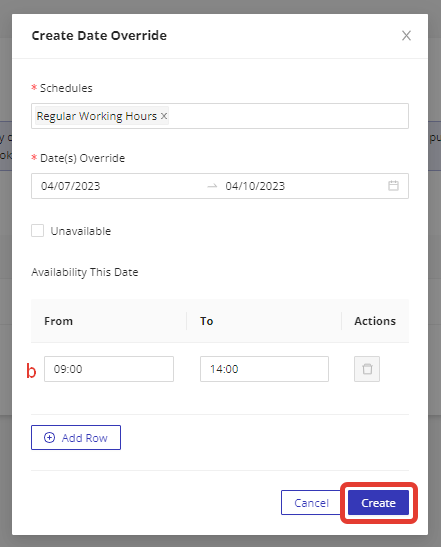
Choose one of the following options for the selected date range: a. Check the "Unavailable" checkbox if you want to make this date range a holiday or non-working period for the selected schedules. b. If you want to specify new working hours for this date range, leave the "Unavailable" checkbox unchecked and enter the new "From" and "To" hours for each working day within the date range.
After filling in the necessary information, click the "Create" button to create your new date override.
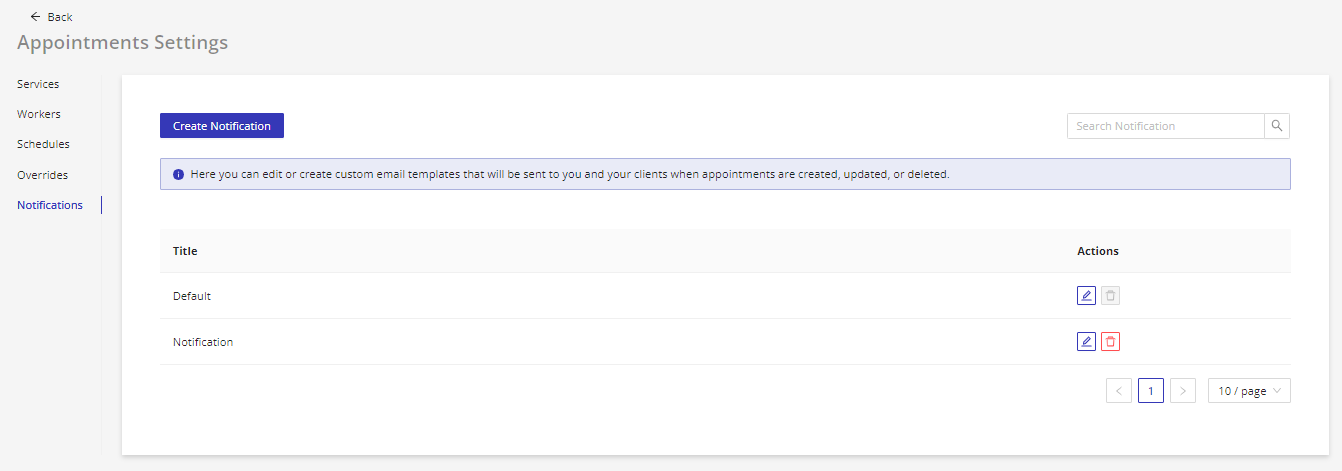
Creating Notification Templates
Navigate to the "Appointments" menu at the top of your HIPAAtizer dashboard. Click on "Notifications," which will direct you to the list of available notification templates. Click the "Create Notification Template" button to start creating a new template.
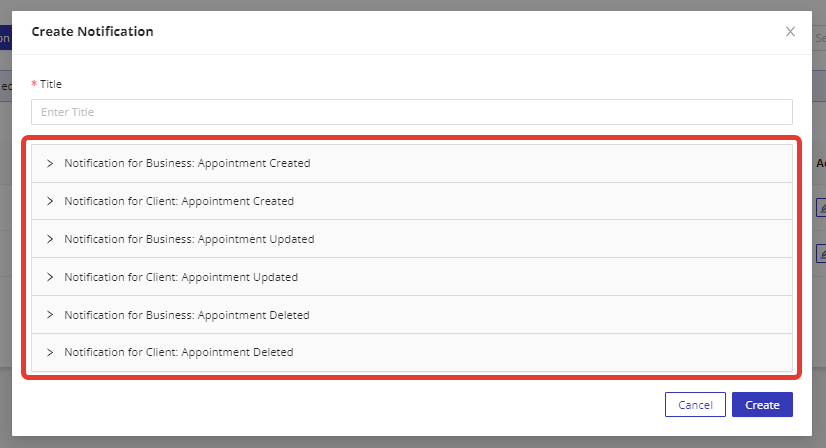
Each template contains 6 email templates for different scenarios:
- Notification for Business: Appointment Created
- Notification for Business: Appointment Updated
- Notification for Business: Appointment Deleted
- Notification for Client: Appointment Created
- Notification for Client: Appointment Updated
- Notification for Client: Appointment Deleted
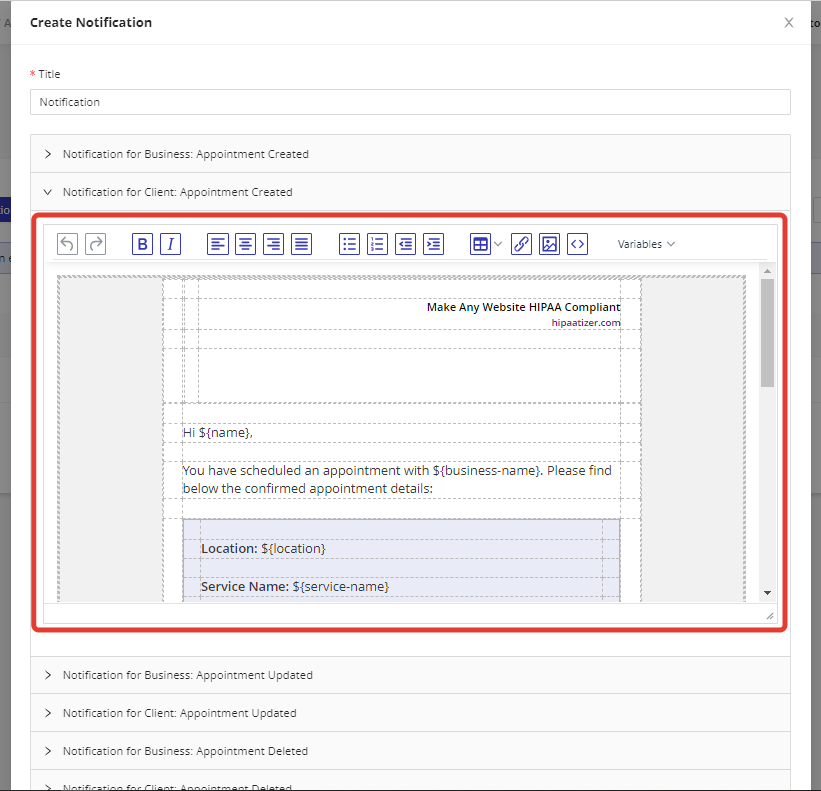
Use the WYSIWYG editor to customize email templates. You can use the following appointment variables in your templates to personalize the content:
${business-name}${business-phone}${business-email}${date}${time}${name}${first-name}${last-name}${email}${phone}${location}${service-name}${worker-name}${reschedule-link}${cancel-link}
After customizing the email templates, click the "Save" button to create your new notification template.
Adding the Appointment Component to Your Form
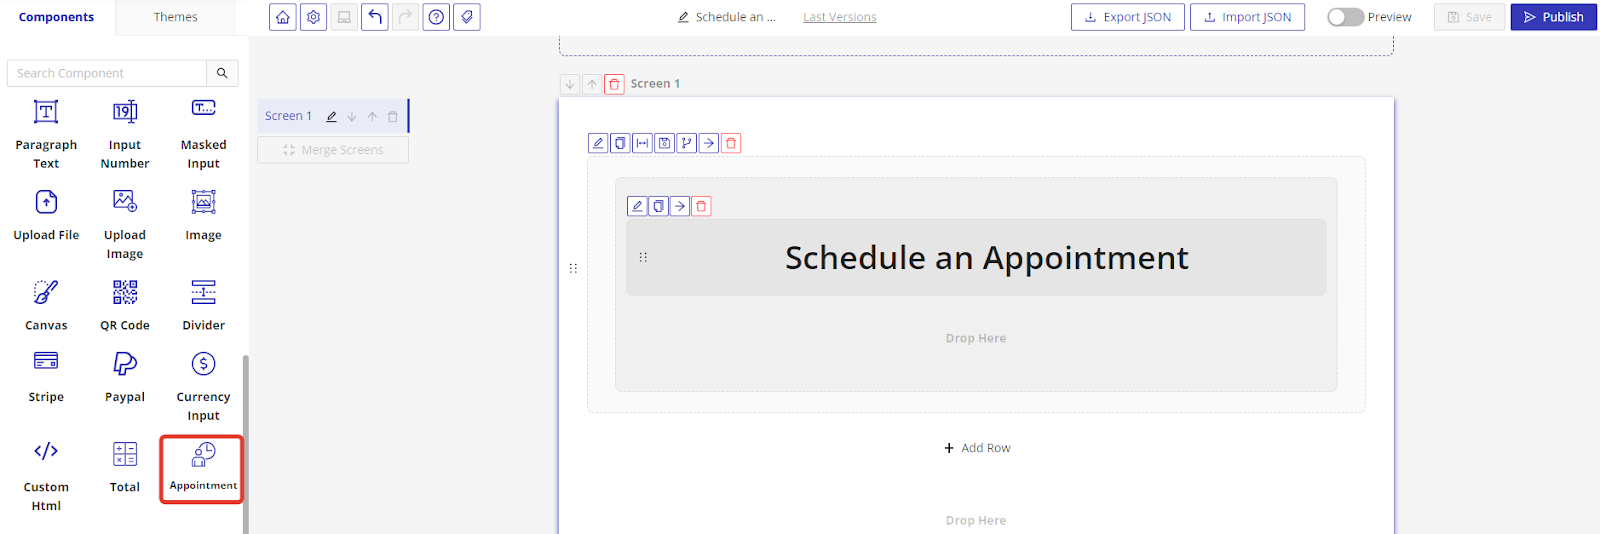
Adding the Appointment Component
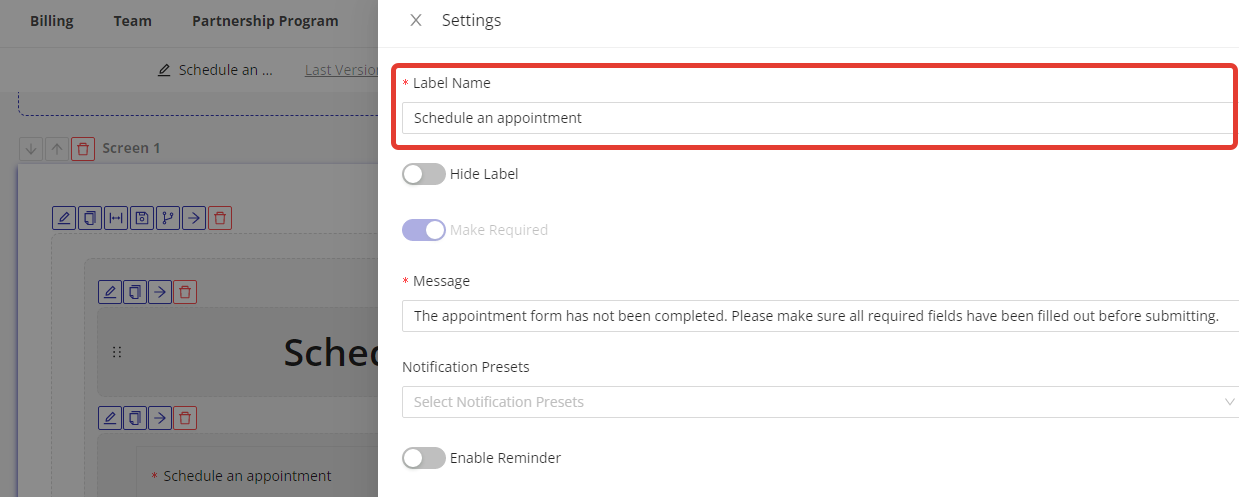
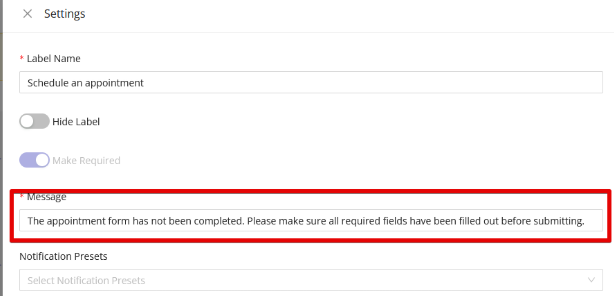
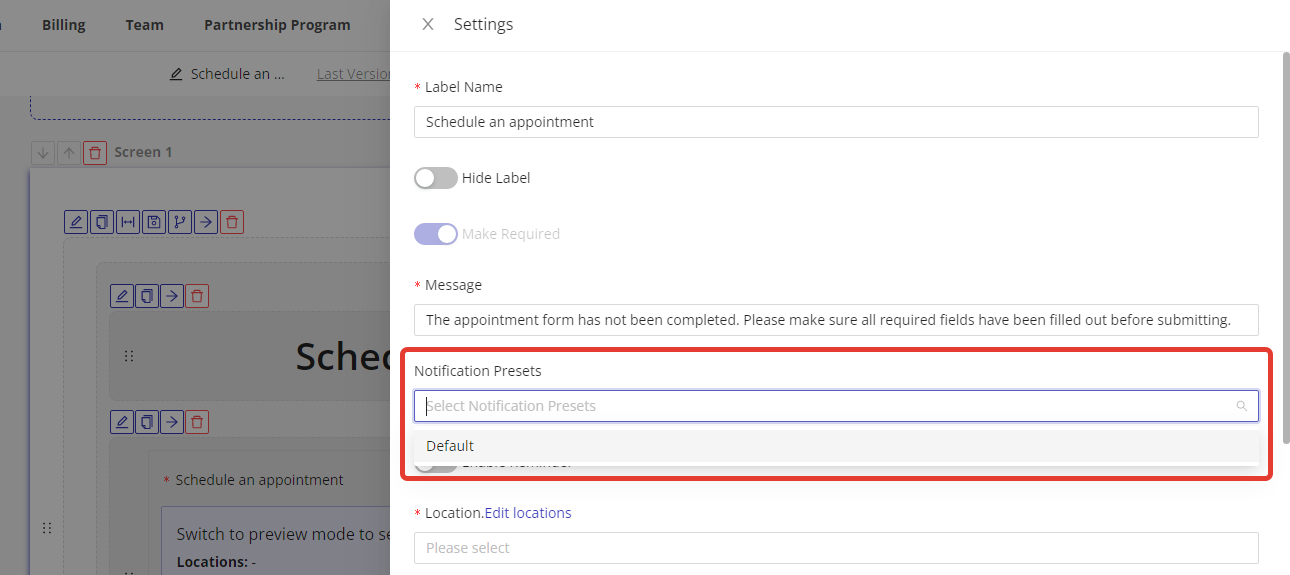
Drag the "Appointment" component from the "Components" menu on the left-hand side of the form builder to the desired location on your form. Change the label of the component by clicking on the "Label" field and entering your desired text. Change the text of the additional message row by clicking on the "Message" field and entering your desired text.
Notifications and Reminders
Choose a notification preset from the "Notification Preset" dropdown menu. This will determine the content of the email notifications that you and your clients receive.
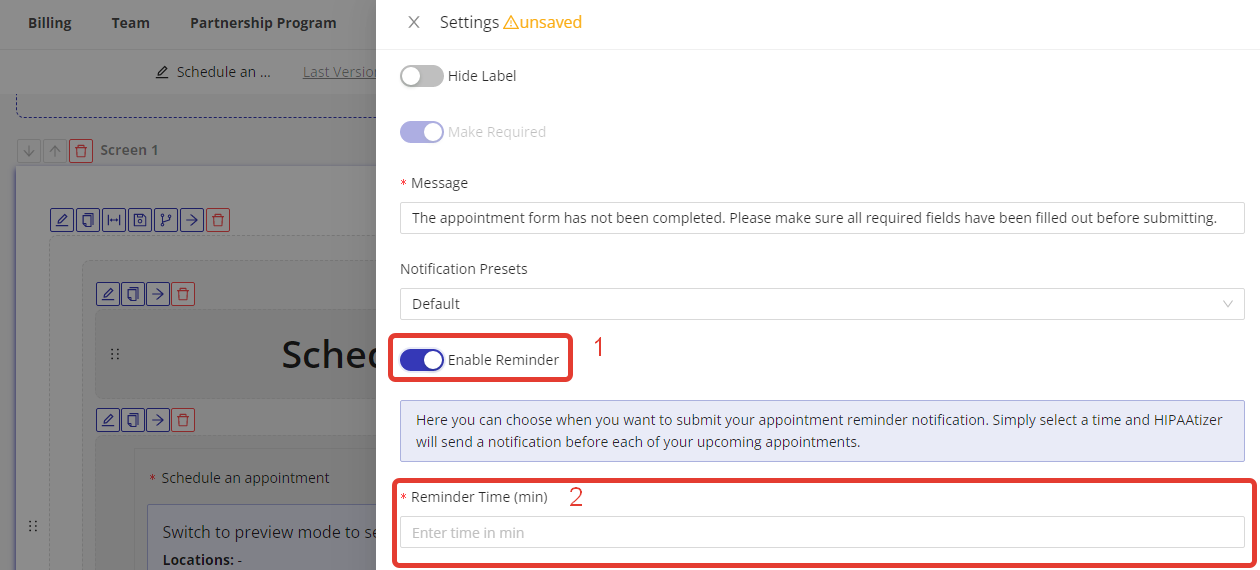
Enable reminders (this optional) by clicking on the "Enable reminders" toggle switch (1). Then reminders are enabled, you can choose when you want to submit your appointment reminder notification (2).
Locations and Workers
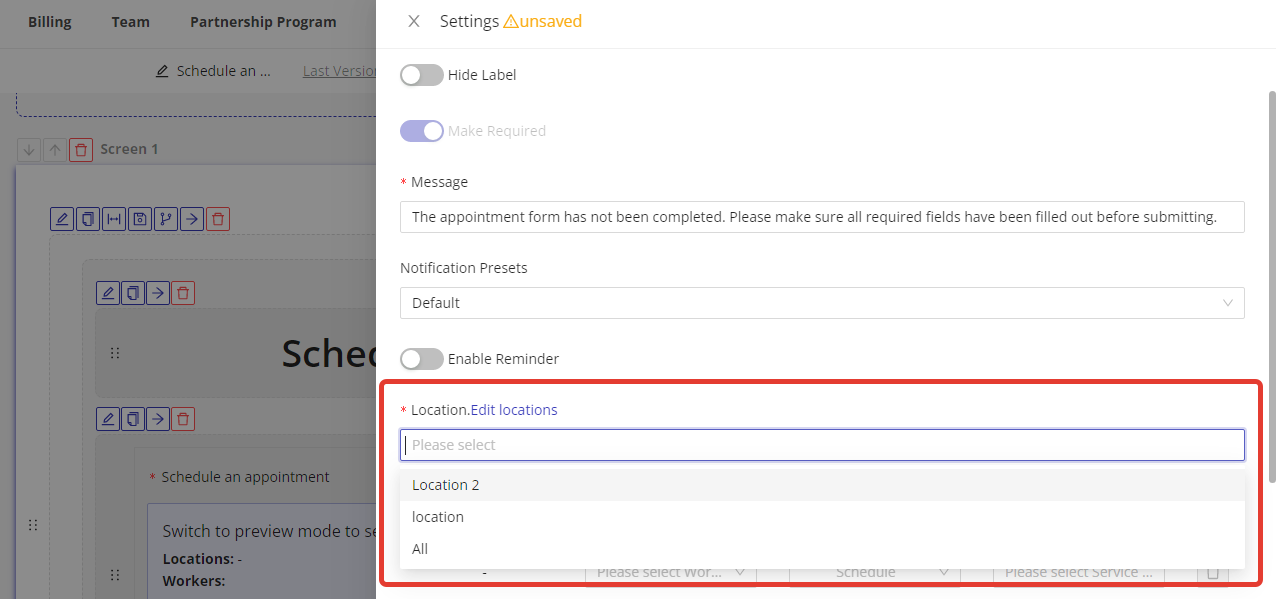
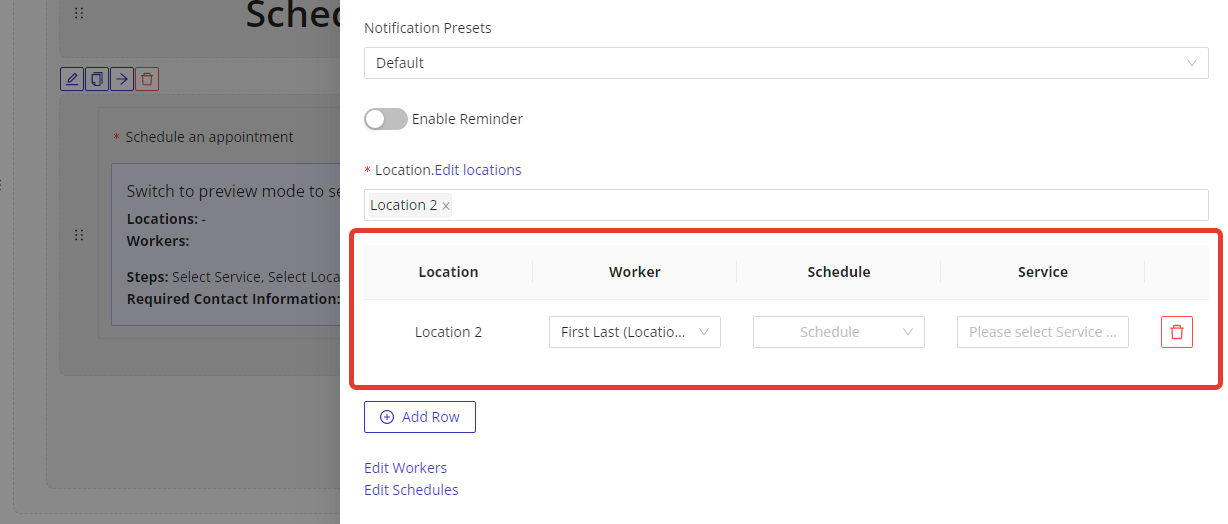
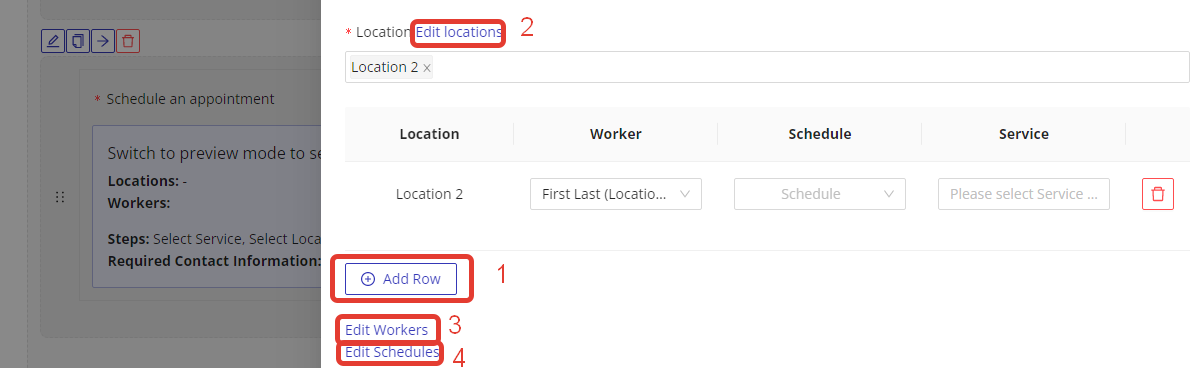
Choose the locations for which this appointment component can be used by clicking on the "Locations" field and selecting the desired location(s) from the dropdown menu. For each selected location, select the related worker(s), schedule(s), and service(s) by clicking on the "Worker", "Schedule", and "Service" fields and selecting the desired options from the dropdown menus.
To add an additional row with location, worker, schedule, and service, click on the "Add Row" button (1) below the table. If you want to add an additional location/worker/schedule/service or edit the already existing, you can do so by clicking the related buttons: "Edit Locations" (2), "Edit Workers" (3), "Edit Schedules" (4).
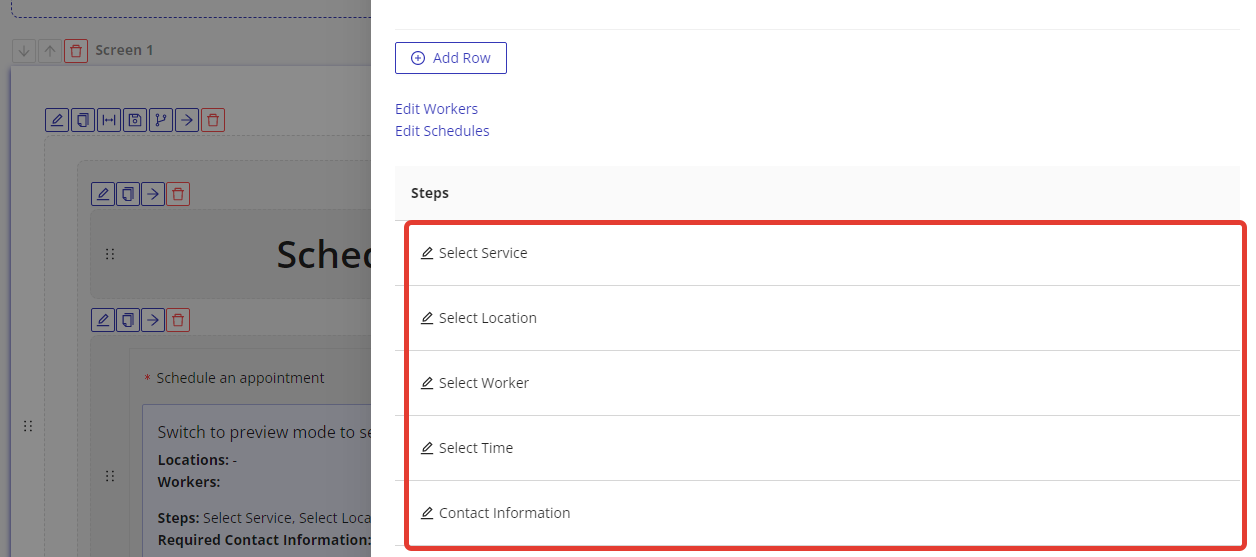
Steps and Fields
Rename the steps of the appointment component by clicking on the "Edit" icon next to the related field and entering your desired text.
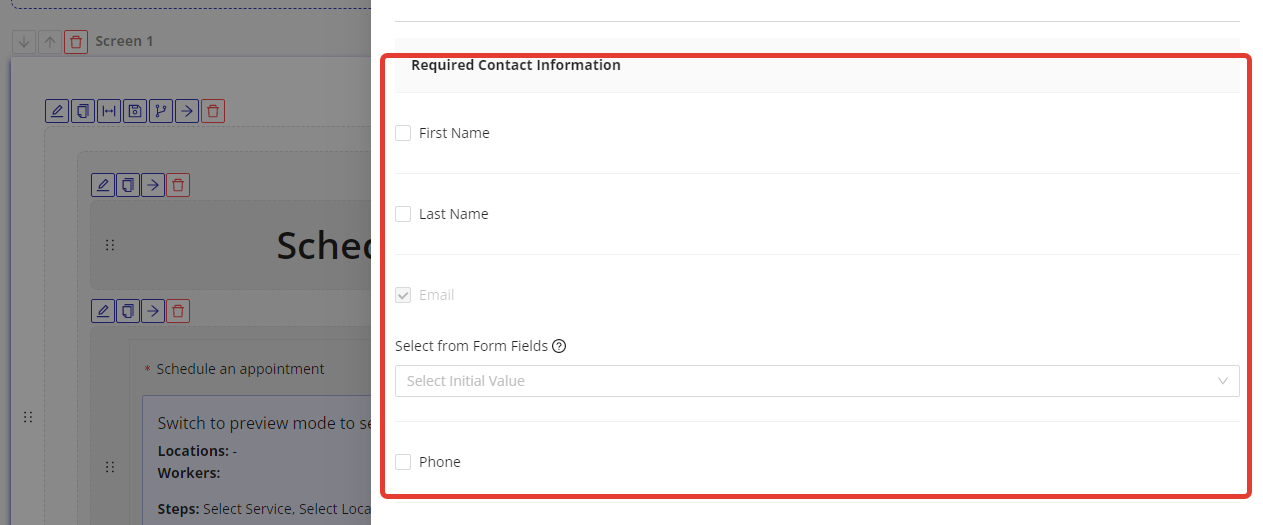
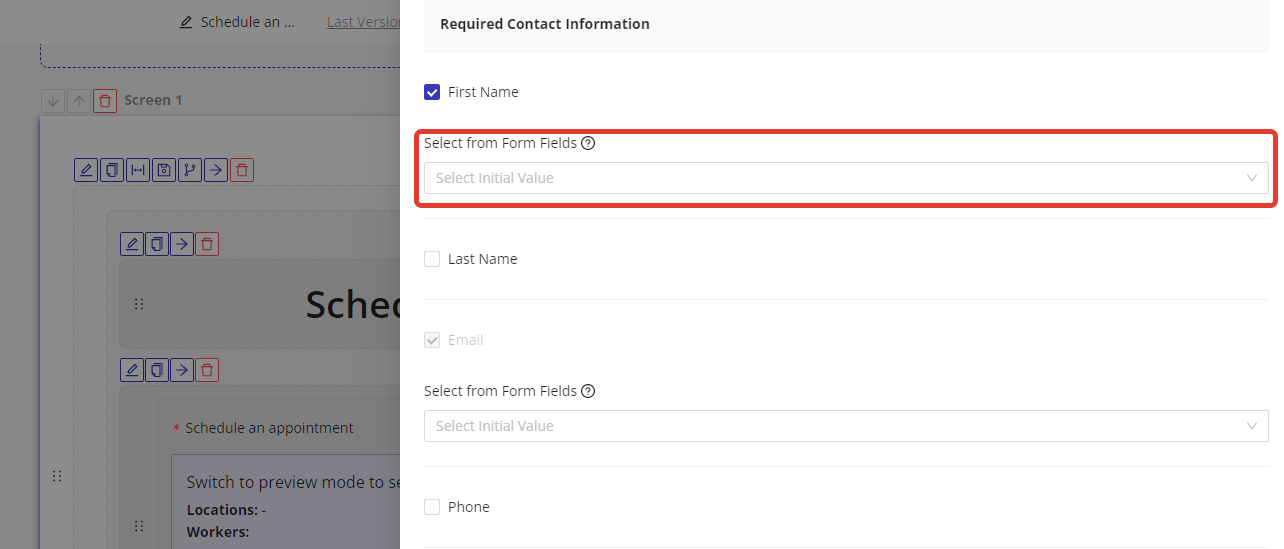
Mark the "First Name", "Last Name", and "Phone" fields as "Required Contact Information" by clicking on the "Required" toggle switch next to each field. Please note that the "Email" field is always required.
If you have already created a field in your form for any of the required contact information, you can additionally connect it to the appointment component by clicking on the "Select from Form Fields" button and selecting the desired field from the dropdown menu. If you have not created any fields they will be generated automatically.
Managing Existing Appointments
To reschedule or manually edit an appointment, including setting a time outside publicly available slots:
- Go to Appointments > Grid View: https://app.hipaatizer.com/appointments/gridView
- Find the appointment and click the Edit (pencil) icon in the Actions column.
- In the pop-up, click Edit.
- Update the date, time, or other details as needed.
When editing this way, you can select any date and time regardless of whether that slot is publicly available on the booking calendar. This is useful for special scheduling situations or accommodating clients outside normal availability.
After saving, the client will automatically receive the notification email and/or text configured under Appointments Settings > Notifications for the Notification for Client: Appointment Updated template.