Post-Submission Actions
Customizing Actions After Form Submissions
HIPAAtizer provides two options for customizing what happens after a web form is submitted: "Display Success Page" and "Redirect". Follow these steps to customize the actions after the form submissions in HIPAAtizer:
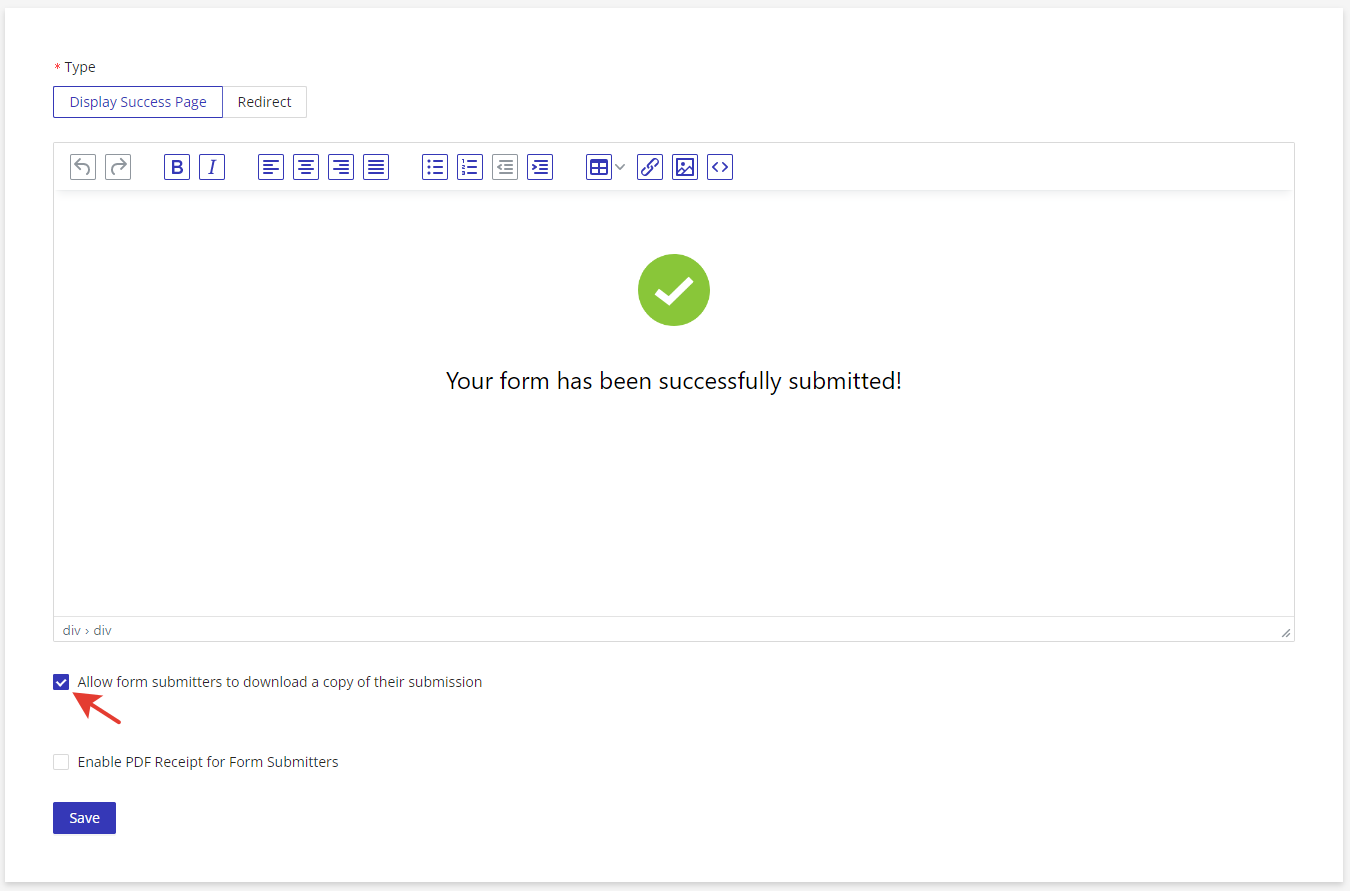
Display Success Page
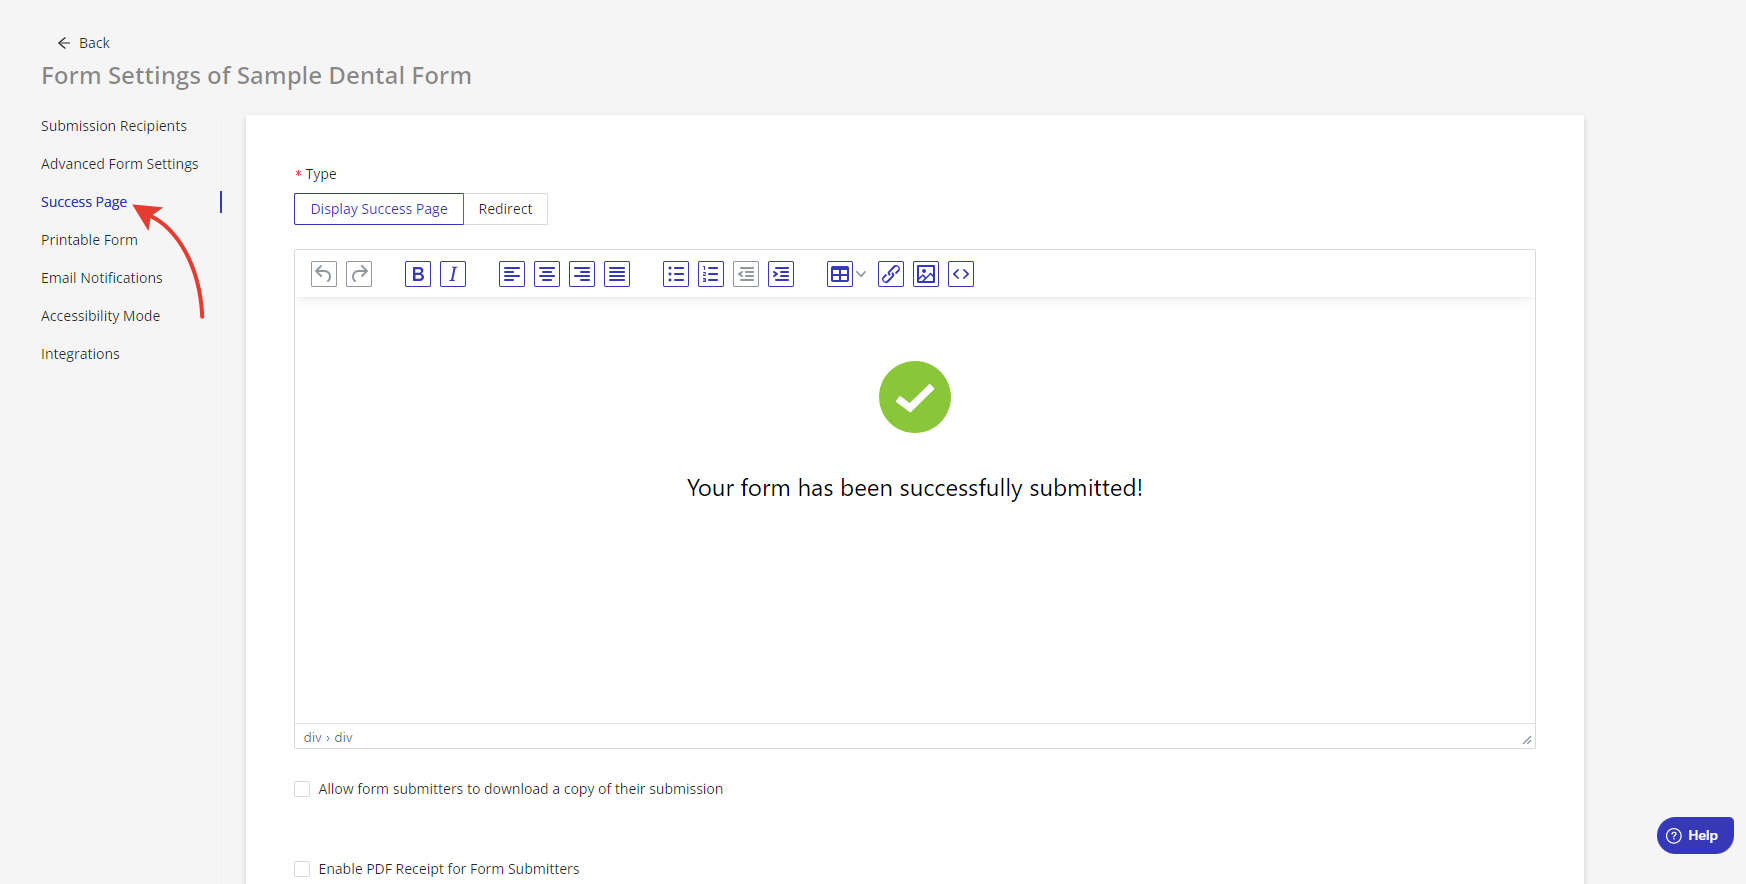
Finding Display Success Page Settings
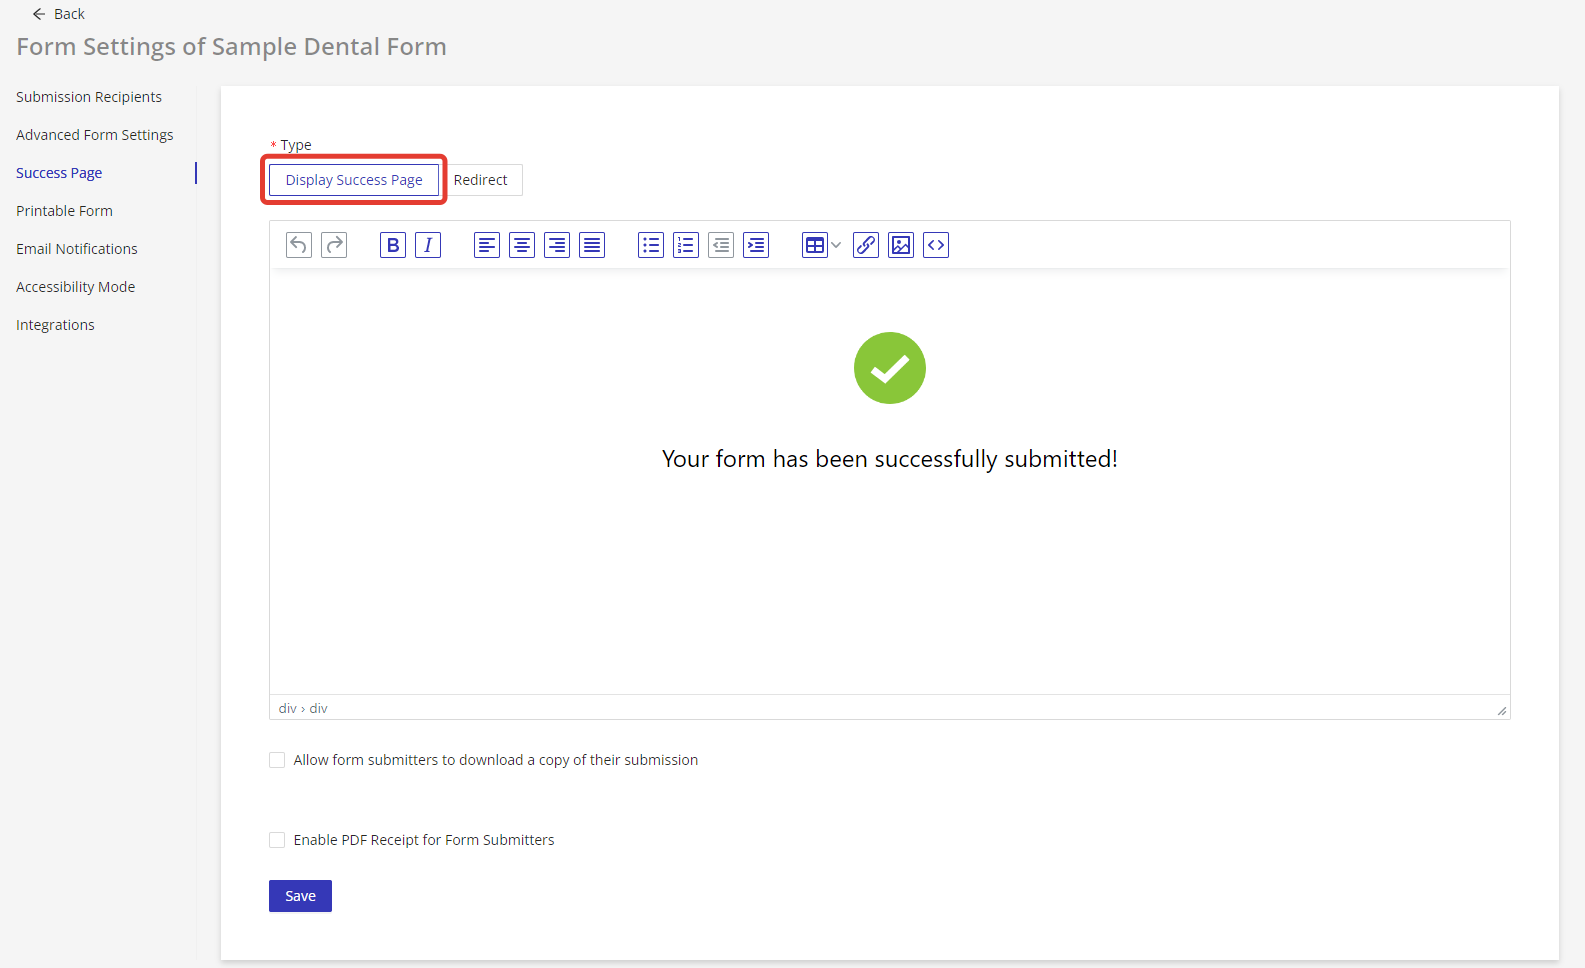
Log in to your HIPAAtizer account and navigate to My Forms. Click on the gear icon for the desired form to open the Form Settings, then select the "Success Page" tab. From here, choose "Display Success Page".

Editing Display Success Page Settings
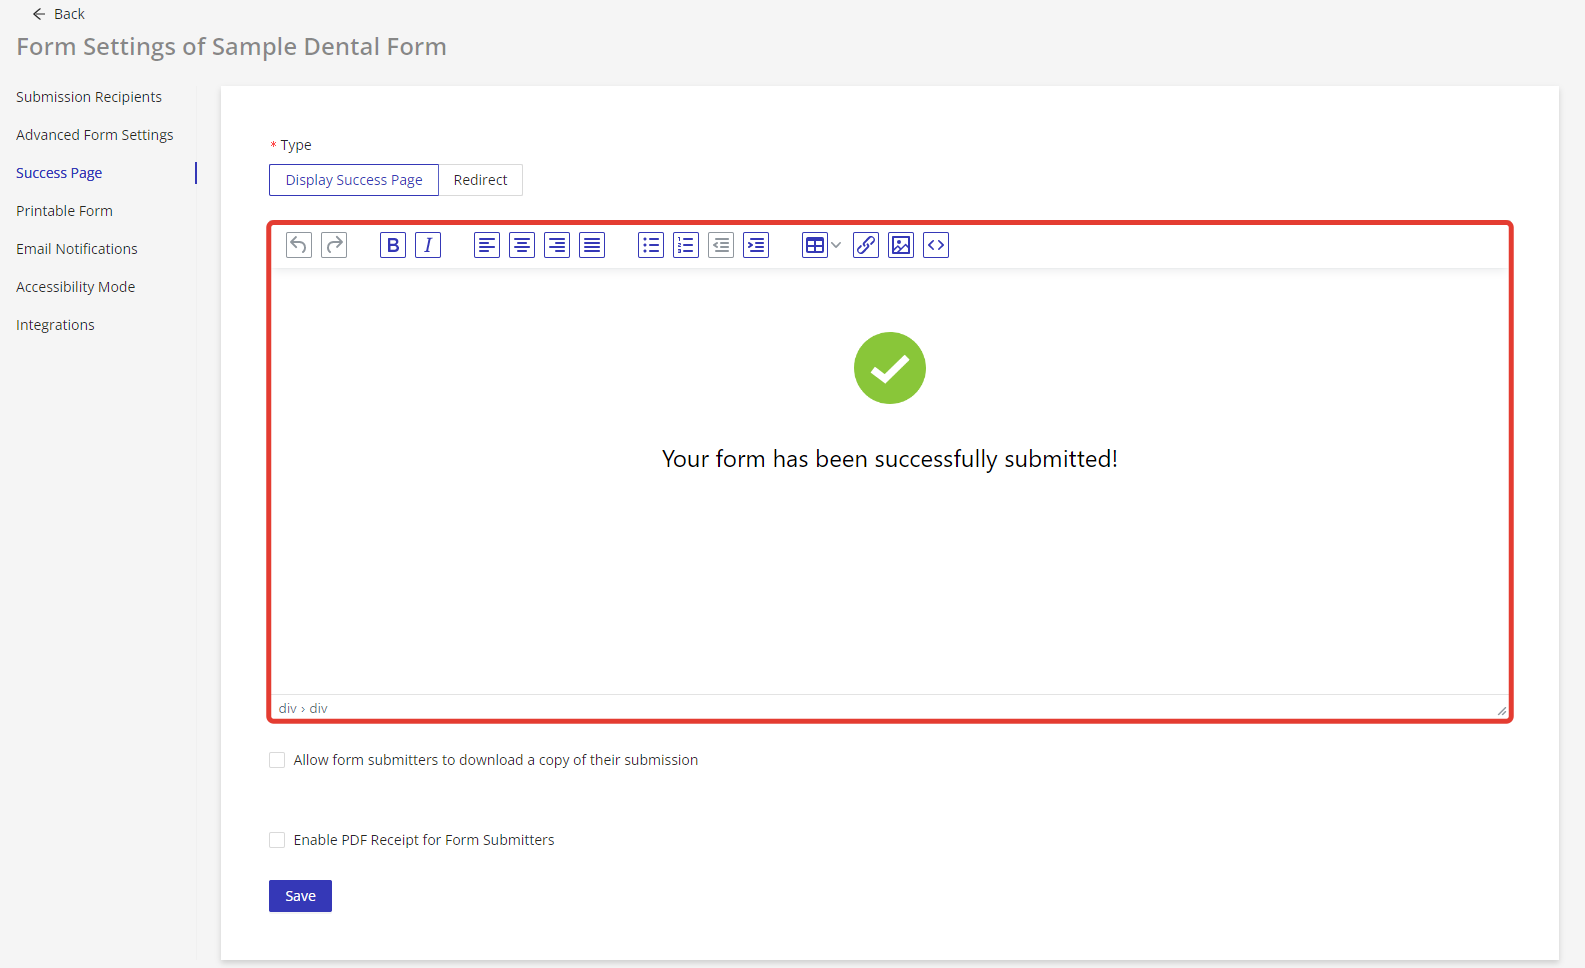
Use the WYSIWYG editor to customize the page that will be displayed for the user after the form is submitted. Note that HIPAAtizer provides a default page template, but you can customize it to match your website's styling and branding.
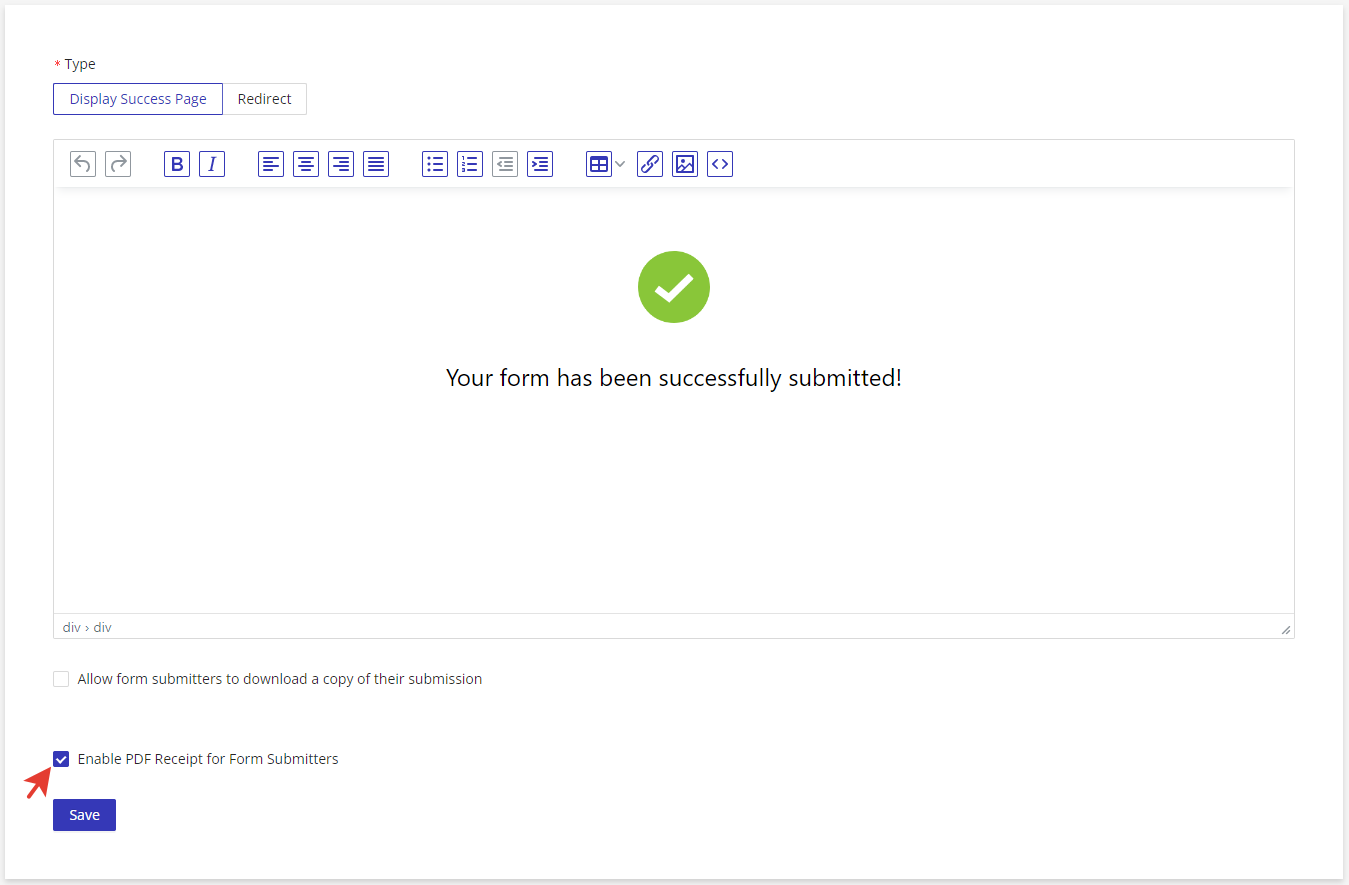
If you choose to enable the PDF Receipt for Form Submitters, the user will be prompted for their email and create a password. After the form is submitted, the user will receive an encrypted printable PDF with the submission to their email.
Allow form submitters to download a copy of their submission by selecting the corresponding checkbox if desired.
Redirect
Follow the steps above under "Finding Display Success Page Settings".
From this page, choose "Redirect". Specify the redirect URL in the field that appears, then select the target browser tab: "Same Tab" or "New Tab".
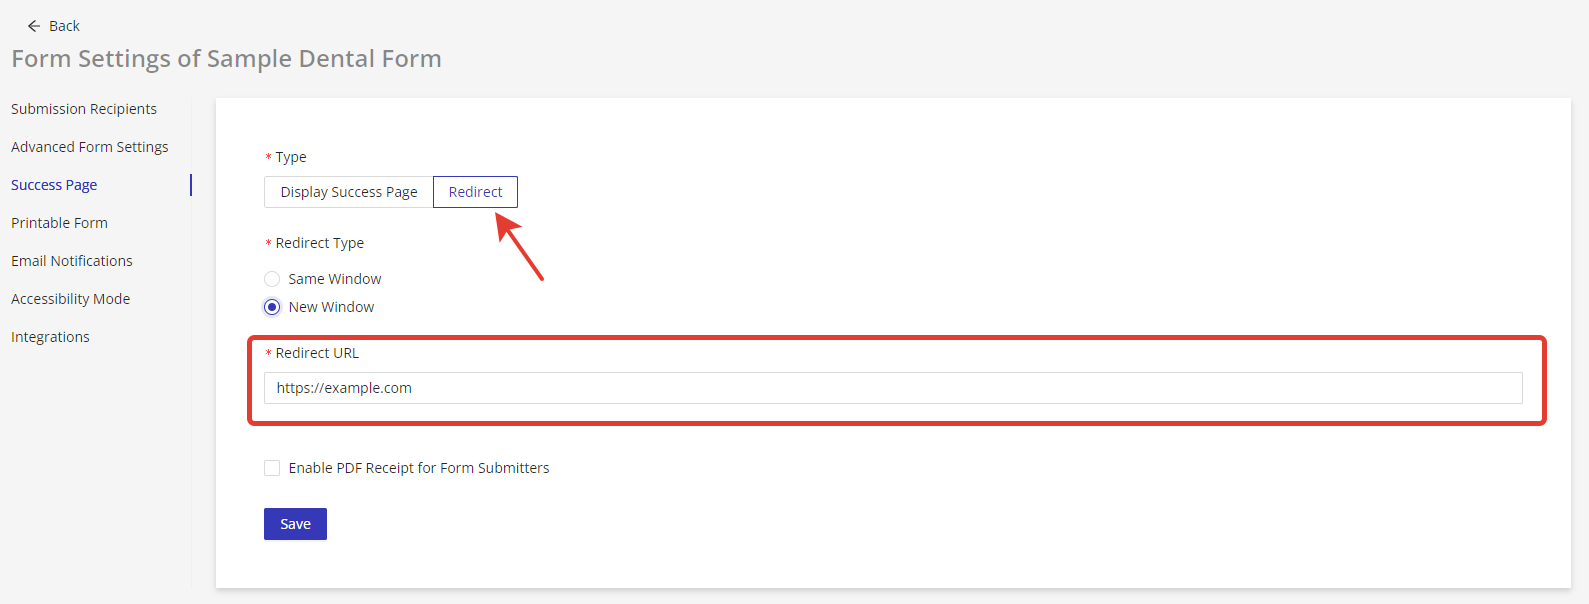
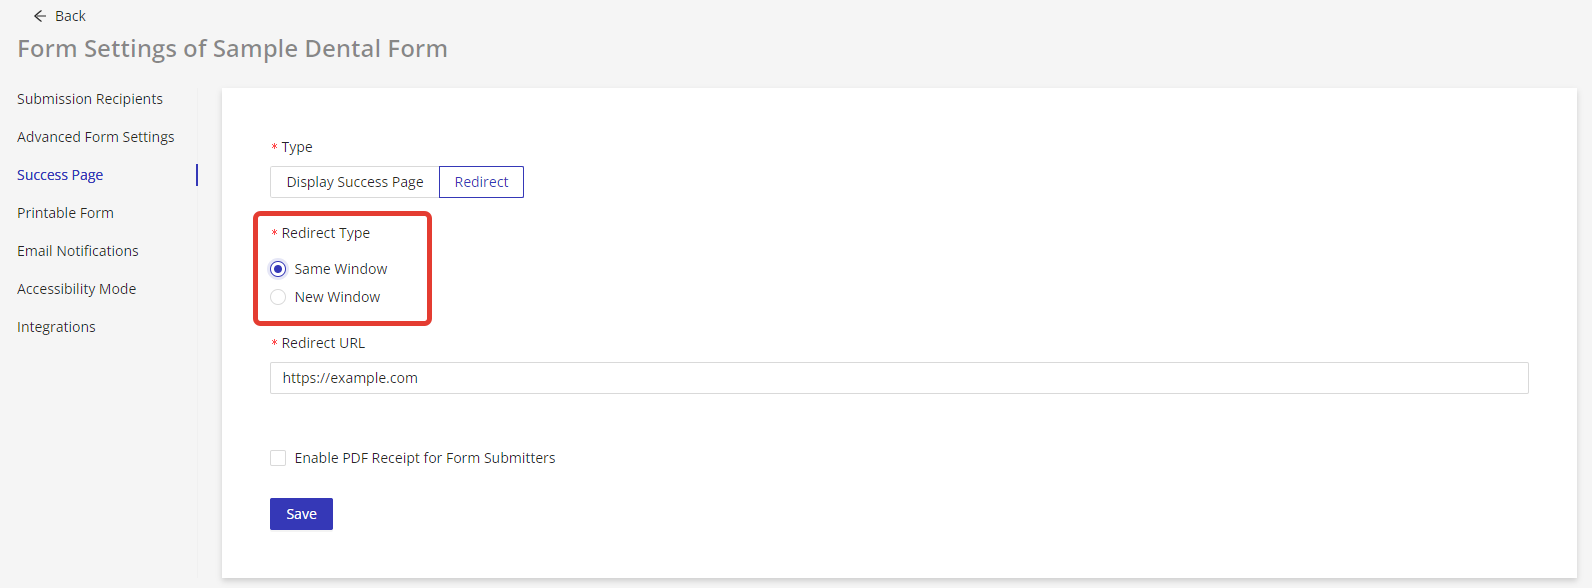
If you want patients to complete a payment after submitting a form (for example, via Stripe, Square, or another payment processor), set the Redirect URL to your existing payment page URL. No new payment account is needed. Patients will be automatically sent to your checkout after they submit the form.
You can also pass form field values as URL parameters to pre-populate the payment page. For example: https://buy.stripe.com/checkout?email={{email}}