

Security
Overview
The Security section in your profile settings lets you control authentication and session behavior for your HIPAAtizer account.
We strongly recommend enabling the options below to reduce the risk of unauthorized access.
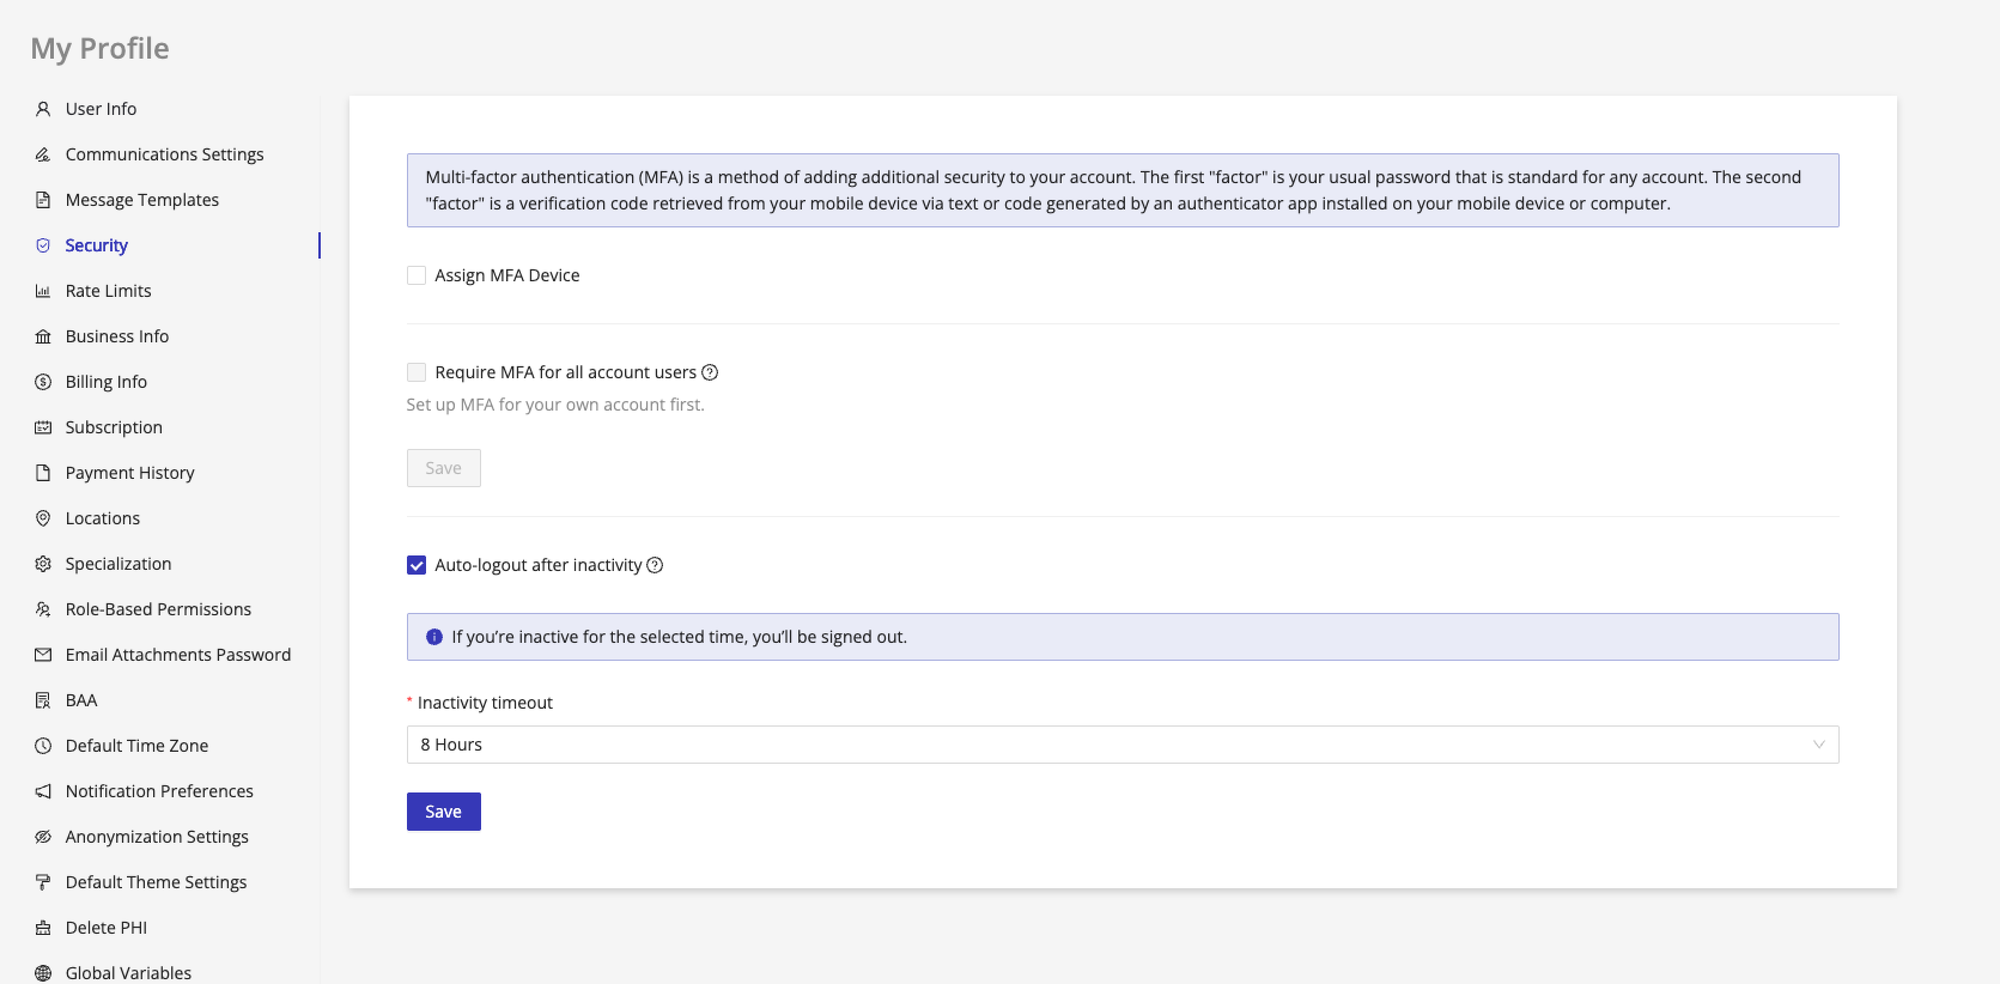
Multi-Factor Authentication (MFA)
Multi-Factor Authentication adds an extra layer of security by requiring a one-time code from an authenticator app each time you sign in.
Supported authenticator apps
You can use any standard TOTP-compatible authenticator, including:
- Google Authenticator
- Duo Mobile
- Authy
These apps can be installed on a mobile device or desktop.
How MFA works
When MFA is enabled:
- You enter your email and password as usual
- You are then prompted to enter a time-based code generated by your authenticator app
- Login is completed only after the code is verified
Set up MFA for your own account
- Open your HIPAAtizer dashboard.
- Navigate to: My Profile → Profile Settings → Security
- Enable Assign MFA Device.
- For MFA Device, select Authenticator App.
- A QR code will be displayed.
- Scan the QR code using your authenticator app.
- Enter the verification code generated by the app.
- Click Confirm Code.
Once confirmed, MFA will be required for all future logins.
Require MFA for all account users
Account administrators can make MFA mandatory for everyone in the account. Once the setting is on, team members are prompted to set up MFA immediately, and they cannot use the HIPAAtizer dashboard until they finish.
Require MFA for all account users is available only to account administrators and applies to all users in the account.
Set up your own MFA device first
You cannot turn on the requirement until MFA is active on your own account. Until then the Require MFA for all account users checkbox stays disabled, with the reminder Set up MFA for your own account first. shown beneath it.
If you have not done this yet, follow Set up MFA for your own account above, then return to this section.
Turn on the requirement
- Go to: My Profile → Profile Settings → Security
- Confirm that Assign MFA Device is enabled for your own account.
- Enable Require MFA for all account users.
- Click Save.
What your team members see
After you save the setting:
- Each user is prompted to set up MFA the next time they open the dashboard.
- Until a user completes the setup, they cannot use the dashboard.
- The setup process is the same one described above: scan the QR code with an authenticator app, then confirm the generated code.
Users who already have an MFA device assigned are not asked to set one up again.
Every user is blocked from the dashboard until they finish MFA setup, so let your team know in advance and make sure they have an authenticator app available.
Check who has set up MFA
Open the Team page to see where your team stands. A blue shield icon next to a user's Active status means MFA is set up on their account. A user with no shield has not set it up yet.
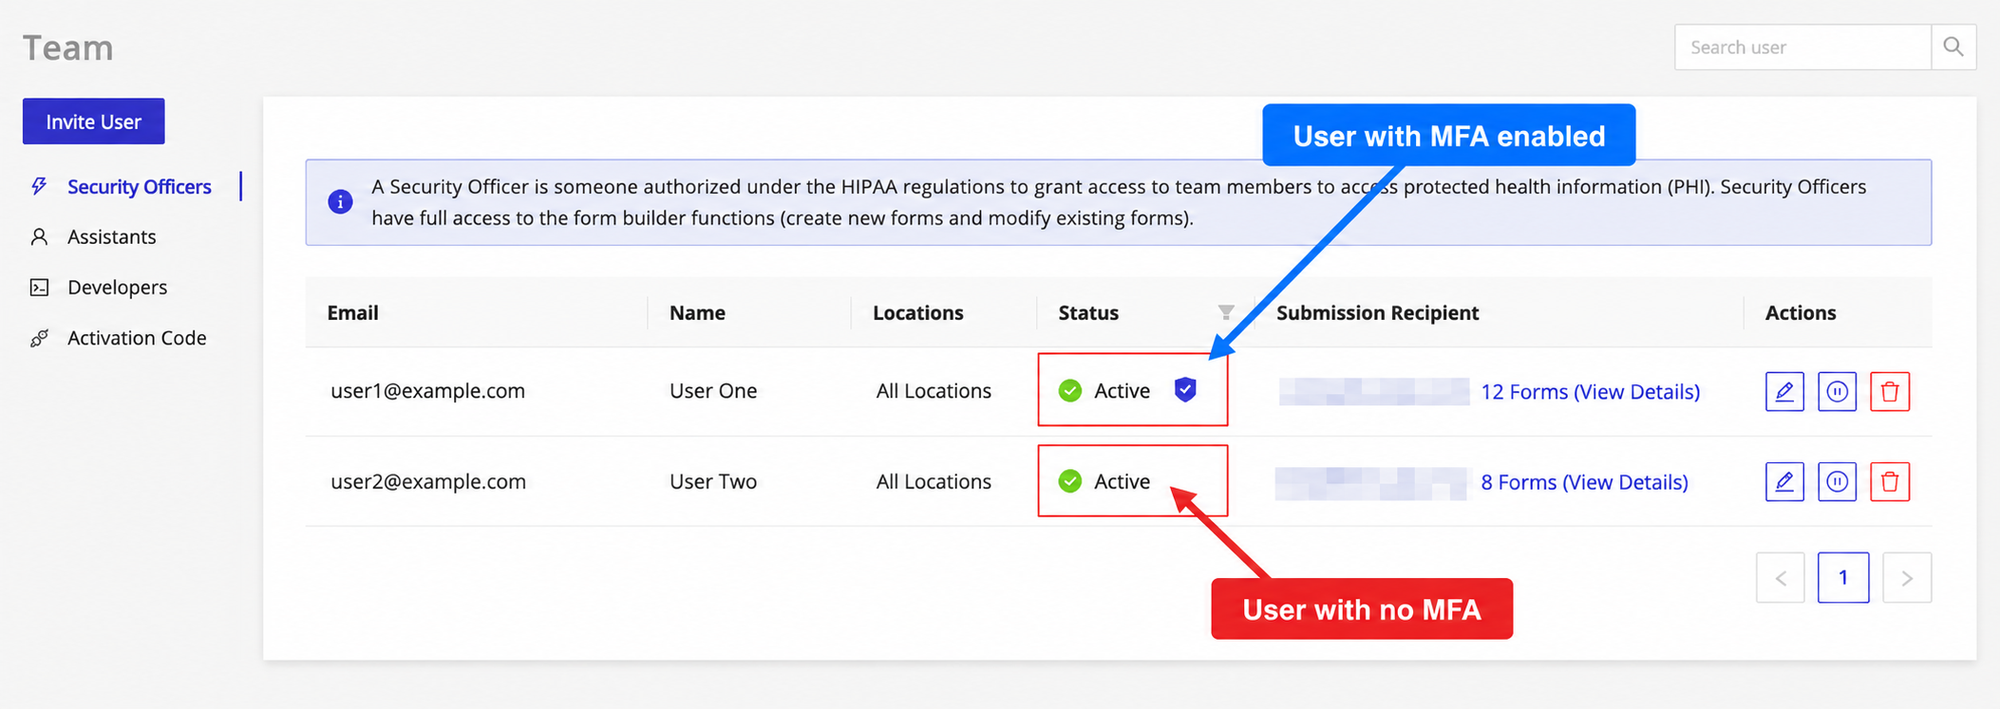
The shield appears on each role tab, so check Security Officers, Assistants and Developers to review your whole team. For more detail, see Checking Who Has MFA Enabled.
Turn off the requirement
Clear the Require MFA for all account users checkbox and click Save. MFA is no longer mandatory for the account. Users who have already set up a device keep using it when they sign in.
Auto-logout after inactivity
Auto-logout protects your account by ending your session after a period of inactivity.
The Auto-logout after inactivity setting is available only to account administrators and applies to all users in the account.
This is especially useful when:
- Accessing HIPAAtizer from shared or clinical workstations
- Working in environments where sessions may be left unattended
Enable auto-logout
- Go to: My Profile → Profile Settings → Security
- Enable Auto-logout after inactivity.
- Select an inactivity timeout from the list:
- Minimum: 15 minutes
- Maximum: 8 hours
If no activity is detected during the selected interval, you will be automatically logged out and required to sign in again.
Recommendations
For improved account security, we recommend:
- Setting up MFA on your own account
- Turning on Require MFA for all account users so that every team member is protected
- Using a shorter inactivity timeout on shared or clinical devices
- Logging out manually when finished, even if auto-logout is enabled
Related
- Team: invite users and assign roles
- How to Add Users to Your Covered Entity Account: invite users, assign roles and Locations, refine permissions
- Account Owner Update: change the account owner's email and password