Understanding UTM Tags and Their Use in Tracking Performance
UTM tags are text snippets added to the end of a URL to help marketers track the performance of online campaigns across traffic sources and publishing media. They provide valuable insights into which marketing strategies and channels drive the most traffic and conversions. Common UTM parameters include:
- utm_source: Identifies which site sent the traffic (e.g., Google, newsletter).
- utm_campaign: Names the specific campaign or promotion (e.g., spring_sale).
- utm_medium: Describes the marketing medium used (e.g., email, CPC).
- utm_content: Used to differentiate similar content within the same ad or campaign.
- utm_term: Identifies search terms used.
- utm_keyword: Tracks the specific keywords used in a paid search campaign.
- gclid: A unique tracking parameter used by Google to pass information back and forth between Google Ads and Google Analytics.
When a user clicks on an ad, Google automatically appends these tags to the URL, allowing you to track the effectiveness of various aspects of your marketing efforts.
Collecting UTM Tags with HIPAAtizer Forms
To capture UTM tags in your HIPAAtizer forms and gain insights into which Google Ads lead to form submissions, follow these steps:
Add Fields to Your Form
Create fields in your form with Unique Names that match the UTM tags you want to collect (e.g., utm_source, utm_campaign, utm_medium, utm_content, utm_term, utm_keyword, gclid).

Additionally, you can utilize the UTM tags preset available in the Form Builder to easily add these UTM tags to your form. This feature streamlines the process of setting up your form to capture the necessary marketing data.
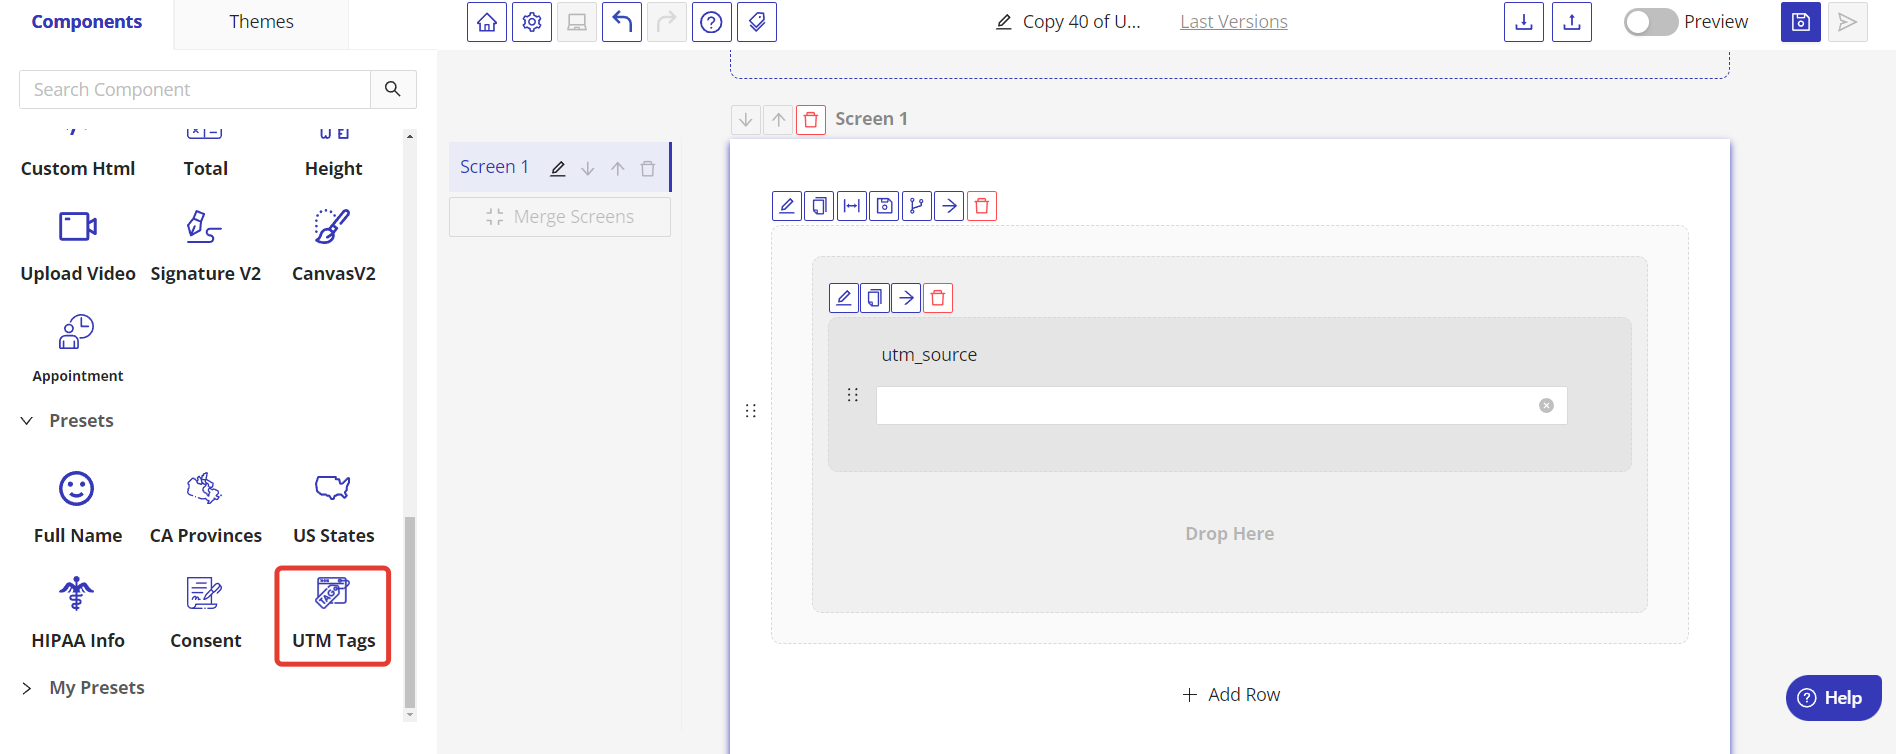
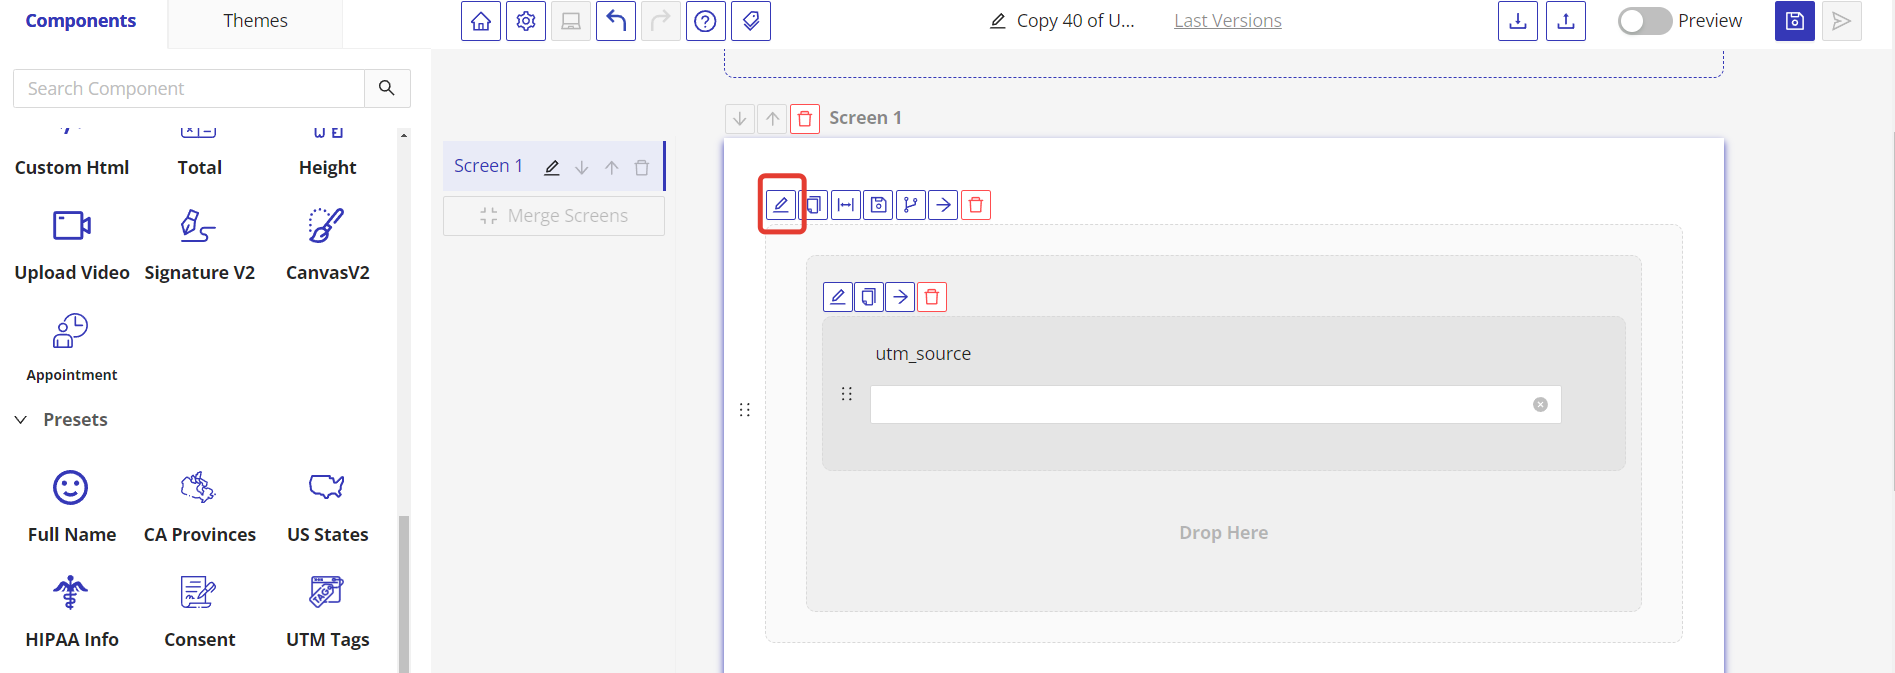
Organize and Hide Fields
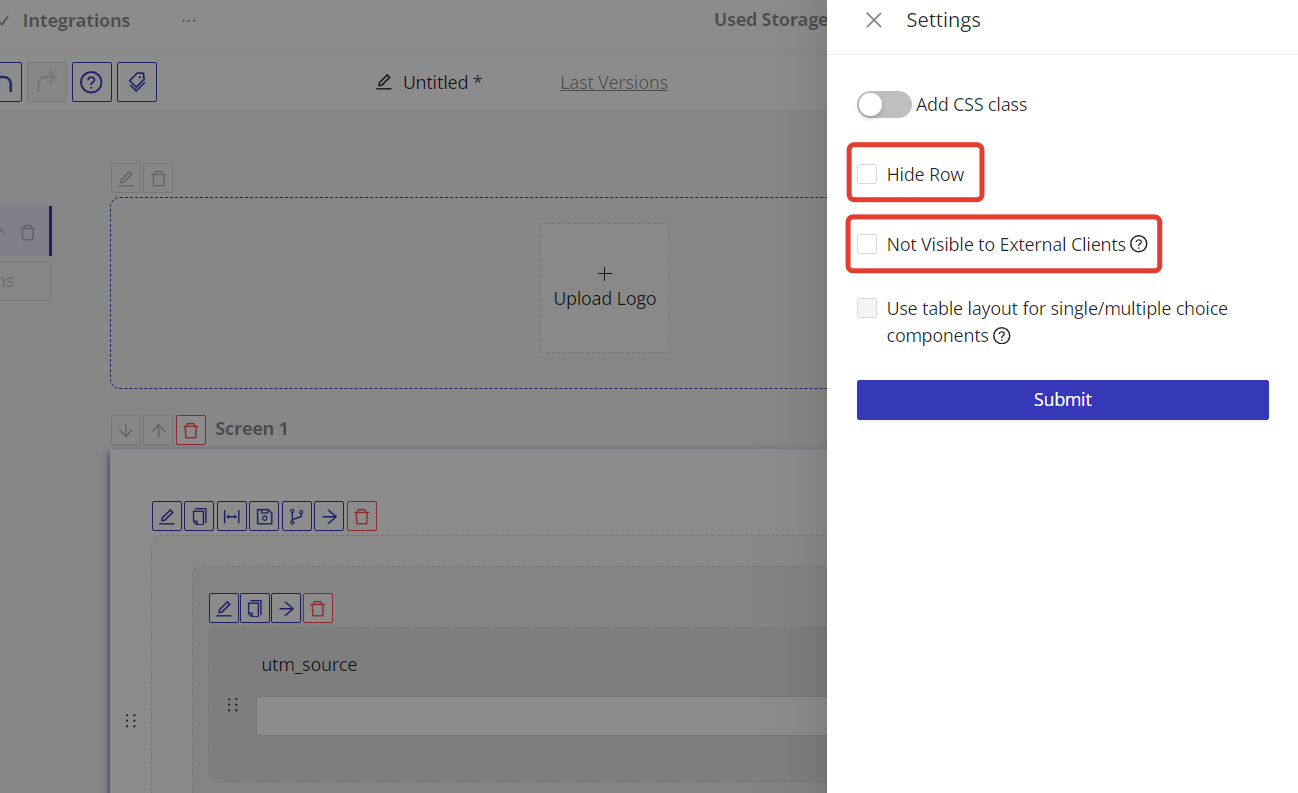
Consider grouping these fields into a separate row for better organization. To ensure these fields are not visible to the form submitter but still collect data, you can hide the entire row. Click the pencil icon on the row, then check the “Hide Row” and/or “Not Visible to External Client” checkboxes.
Publish and Embed Your Form
Once your form is set up to capture UTM tags, publish it.

On the “Share Form” pop-up window click on the “Integrate or Embed Form” tab to explore embed or integrate form options.
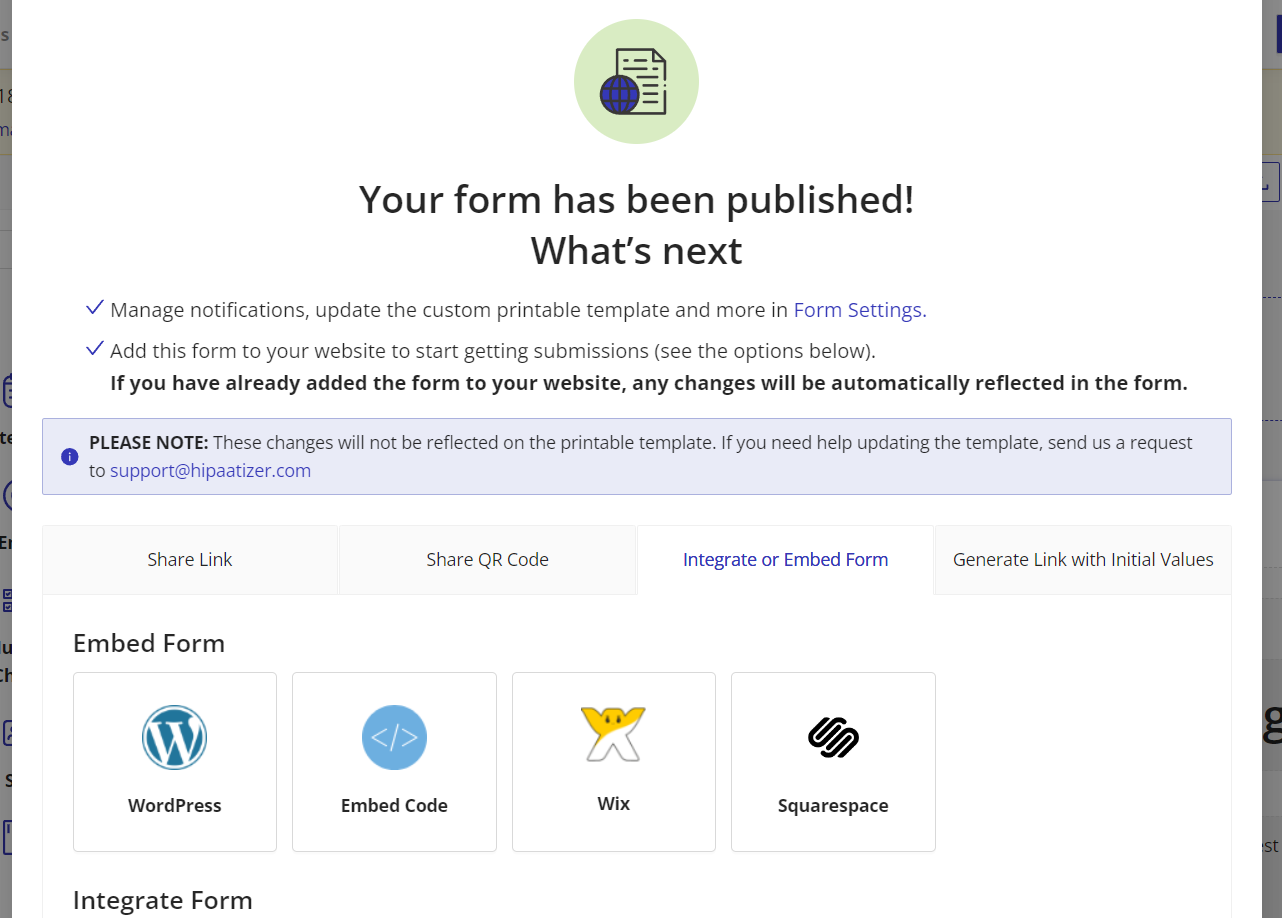
Embed the form on your landing page where visitors arriving through Google Ads will land. This setup ensures that when a user submits the form, the UTM tags from the URL they clicked on are captured along with their submission.
By following these instructions, your form will now be equipped to collect UTM tags automatically. This information allows you to identify which Google Ads are most effective in converting users, helping you to optimize your ad spend and marketing strategies for better ROI.
Still have questions? Contact us