How to Add Users to Your Covered Entity Account
HIPAAtizer allows Covered Entities to invite team members--such as Security Officers, Assistants, or Developers--into their account. This guide walks you through how to invite users, assign roles, manage permissions, and refine access.
This article applies to Developer accounts.
If you are using a free Developer account, please refer to:
Inviting New Users
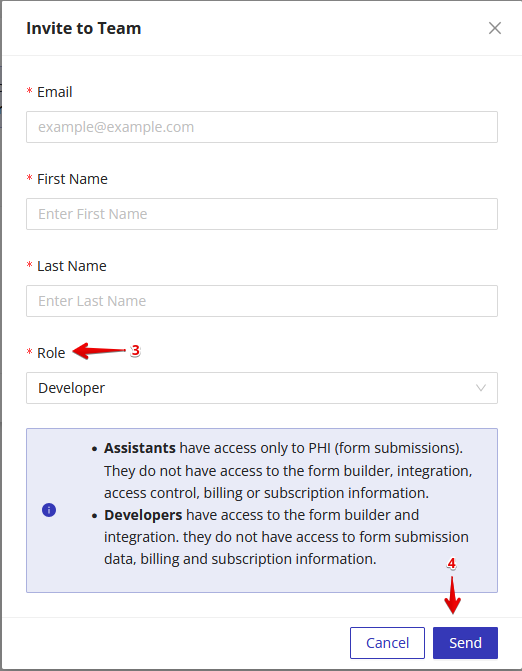
- Go to the Team menu in your HIPAAtizer dashboard.
- Click Invite User.
- Enter the user's email address and select a role and location(s).

Choosing a Role
When inviting a user, select from one of the following roles:
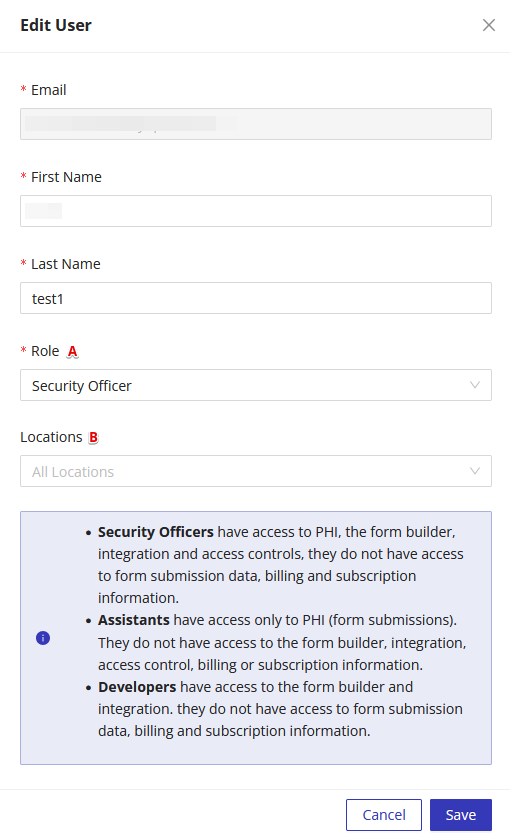
Security Officer
- Full access to forms and PHI
- Can create/edit forms
- Can manage access for other team members
Assistant
- Can view and receive basic PHI
- Cannot edit forms or manage team access
Developer
- Can create and install forms
- Cannot access PHI
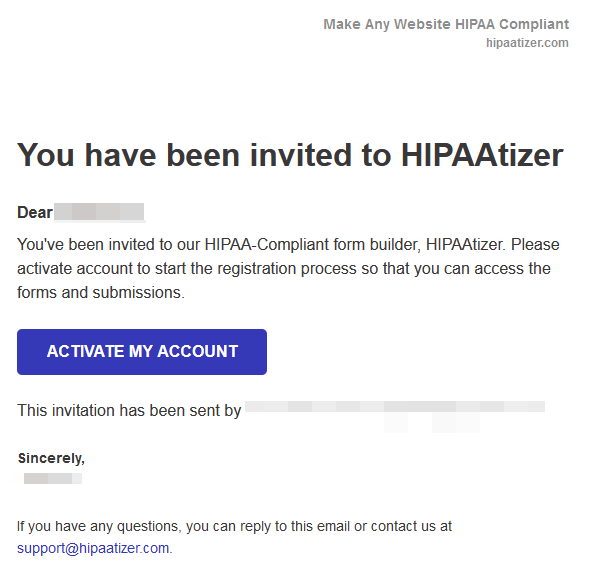
Sending the Invitation
Once the invitation is sent:
- The user will receive an email from HIPAAtizer prompting them to join your team.
- If they don't have a HIPAAtizer account, they'll be asked to create one first.
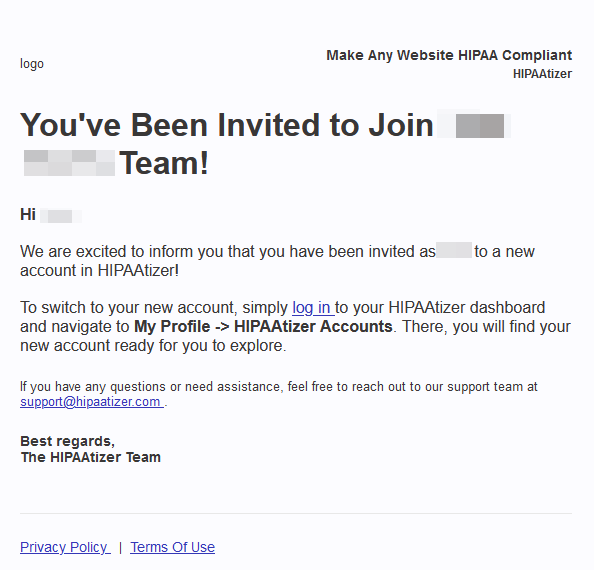
- If they already have an account, they can accept the invite and begin switching between accounts using the same email address.
Re-Inviting a User
If the user missed or lost their invite email, you can resend it via the Team dashboard.
📘 See: How to Re-Invite Users
Managing Existing Users
Once a user joins your team, you can update their:
- Role (e.g., switch from Assistant to Security Officer)
- Locations (restrict access to specific Locations if applicable)
By default, new users have access to all Locations in your account. To restrict this:
- Go to the Team dashboard
- Click Edit under the user's entry
- Assign one or more specific Locations
Once restricted, the user will only see forms and submissions tied to those Locations.
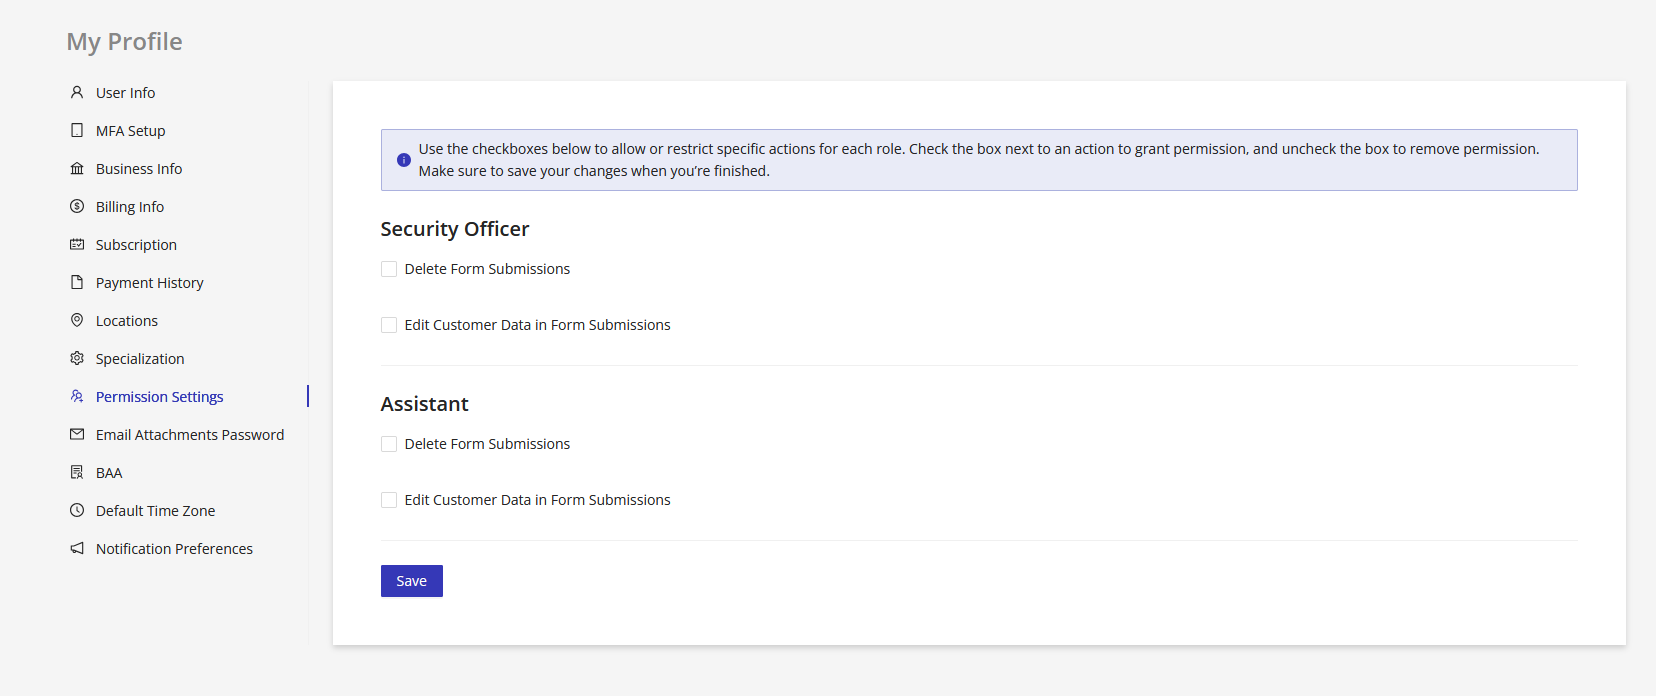
Refining Role Permissions
You can allow or restrict the ability to edit or delete form submission data based on a user's role.
⚠️ Only the account owner can access and change these permission settings.
To adjust permissions:
- Go to My Profile → Go to Profile Settings
- Open the Permission Settings tab
- Use the checkboxes to control which roles can edit or delete customer data in form submissions
Changes made here apply to all users assigned to that role across your account.
Switching Between Accounts
If the user already has a HIPAAtizer account, they'll be able to switch between accounts using the same email.