How to link multiple forms
Step 1. In order to link multiple forms go to the “Form Packets” tab:

Step 2. Click on “Create Form Packet” button:

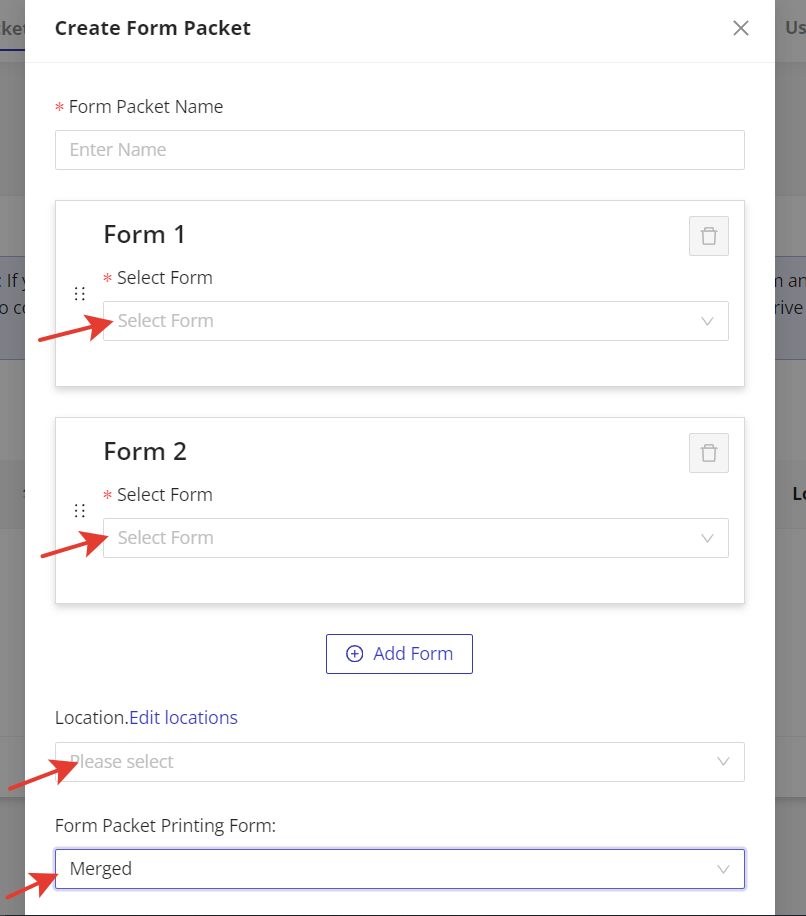
Step 3. In the “Create Form Packet” window, you can select the forms that you want to link in a form packet. Additionally, you can choose the specific location for your form packet and the format of the printable PDF. For the printable PDF of the filled-out form packet, you have a choice between a “merged” PDF containing all the forms in a form packet or a specific form if only one form needs to be printed.
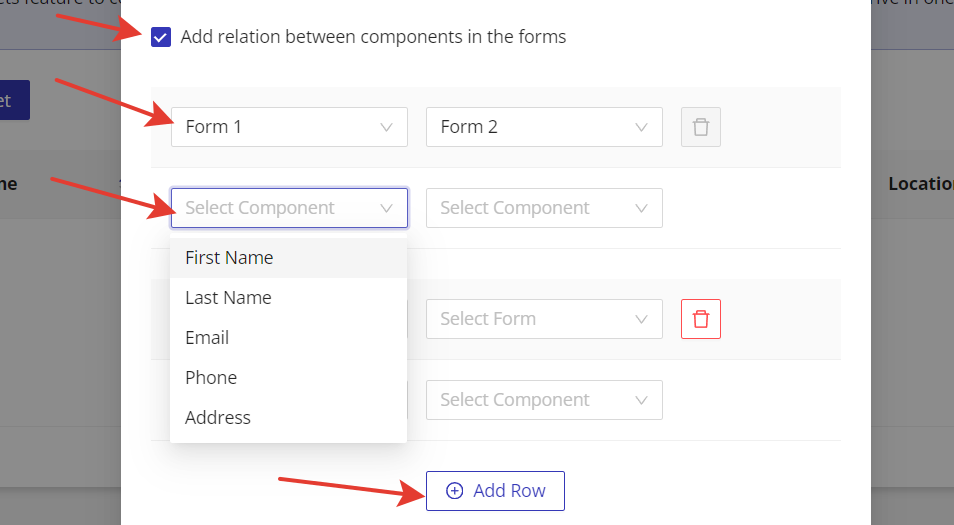
Step 4. In addition to linking multiple forms, you can also connect any field in the selected forms using HIPAAtizer Form Packet. To do that select the “Add relation between components in the forms” checkbox. For example, if you have any repeatable fields such as first name, you can connect them in the settings. When your clients fill out the form, they will only have to input their first name once. In the next forms, their first name will be prefilled, making the form-filling process more streamlined and efficient. Click on the “Add Row” button to connect more fields.
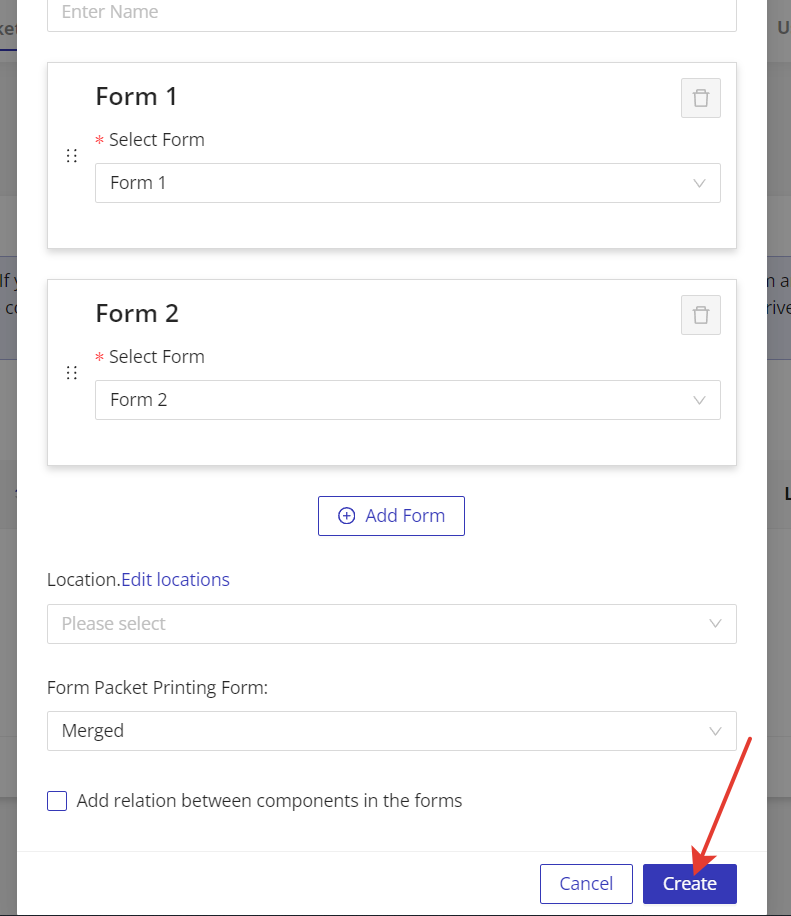
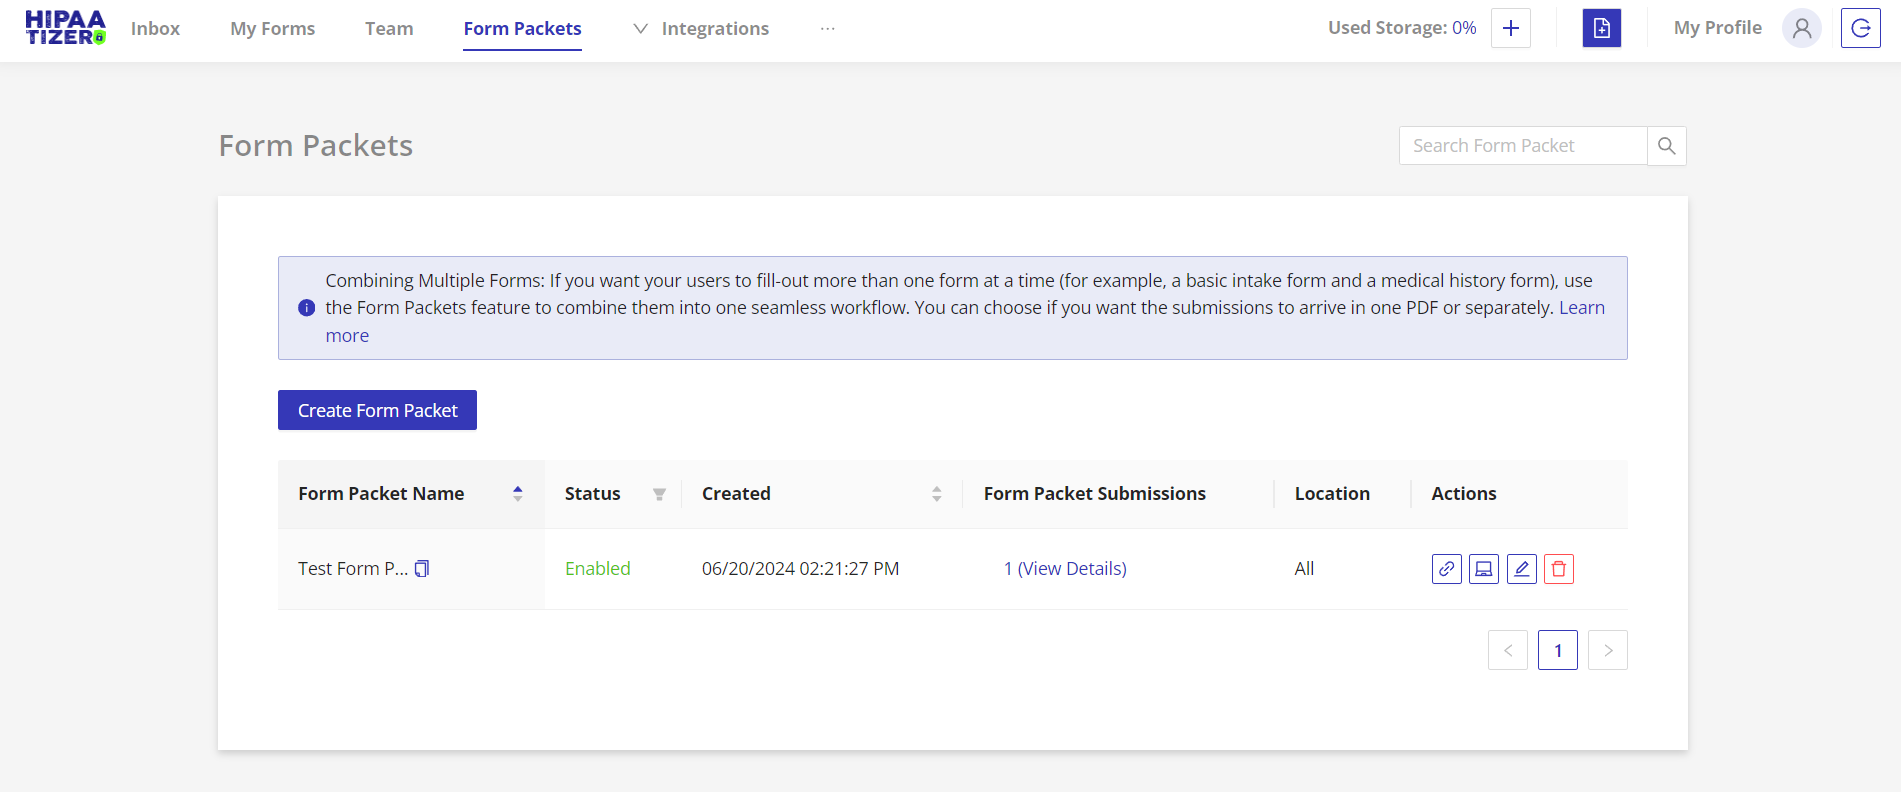
Step 5. Upon clicking the “Create” button, the modal window closes and a newly created form packet appears in the dashboard:
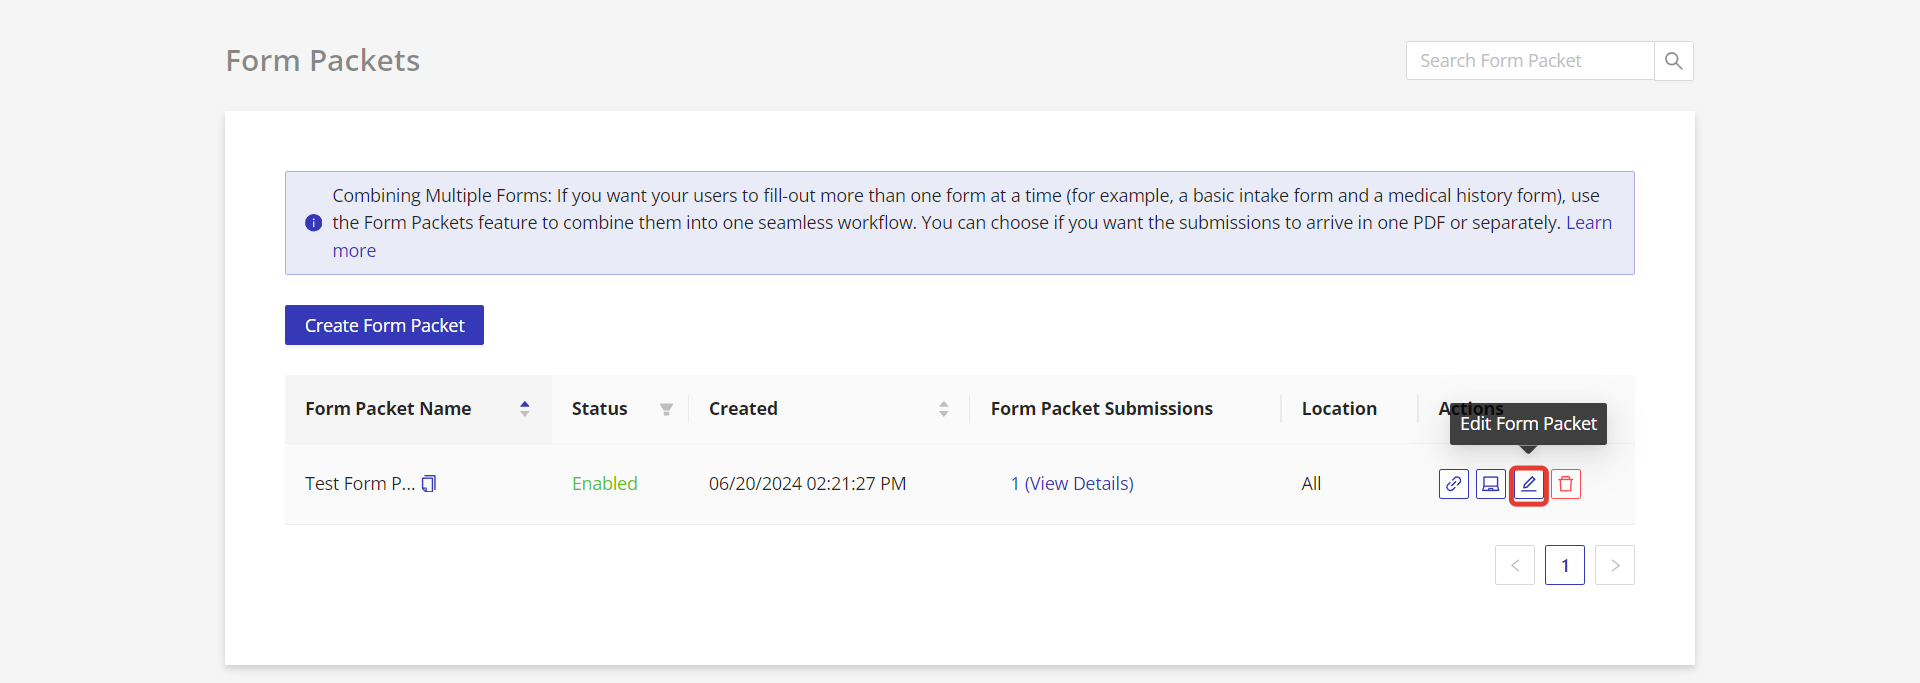
Edit Form Packet
To edit existing form packets simply click on the “Edit Form Packet” icon to make changes to the linked forms, location, or printable PDF format.
How to share and fill-out Form Packets
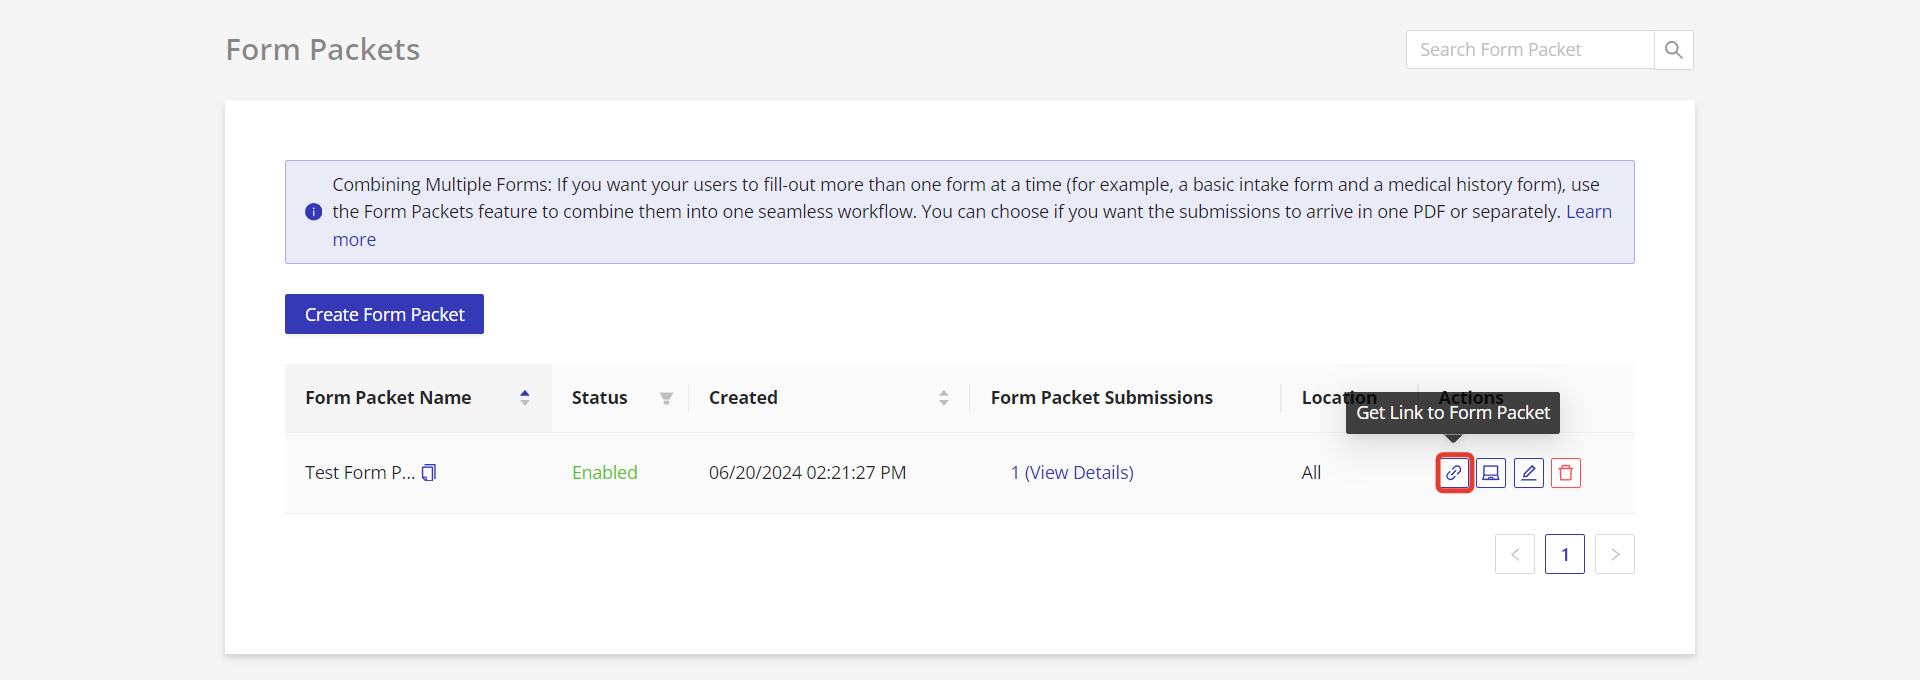
Step 1. To share the form packet with your clients or patients, click on the “Get Link to Form Packet” to copy the form packet link:
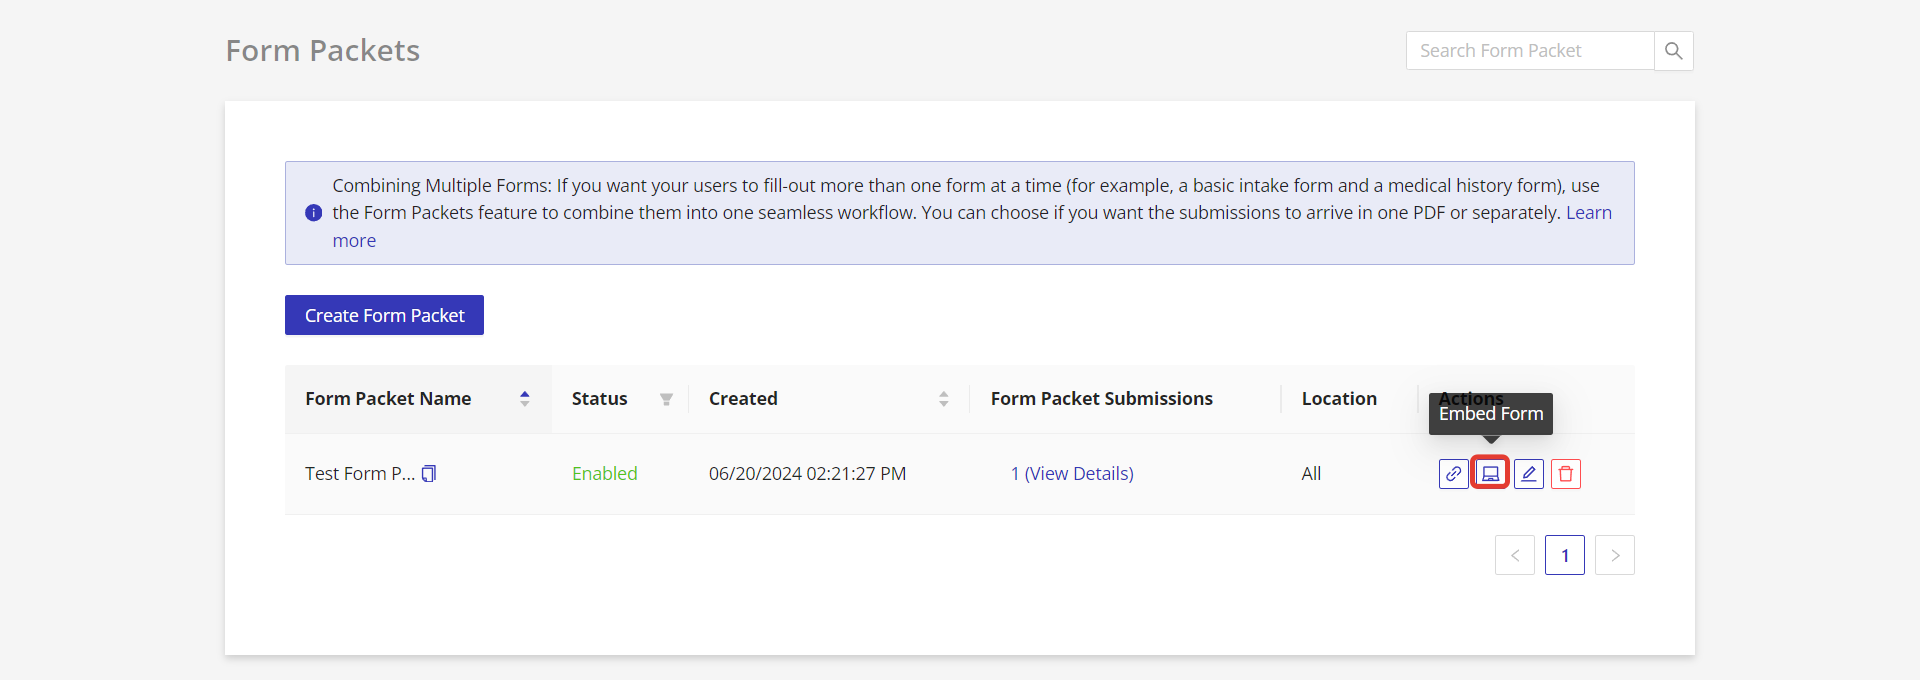
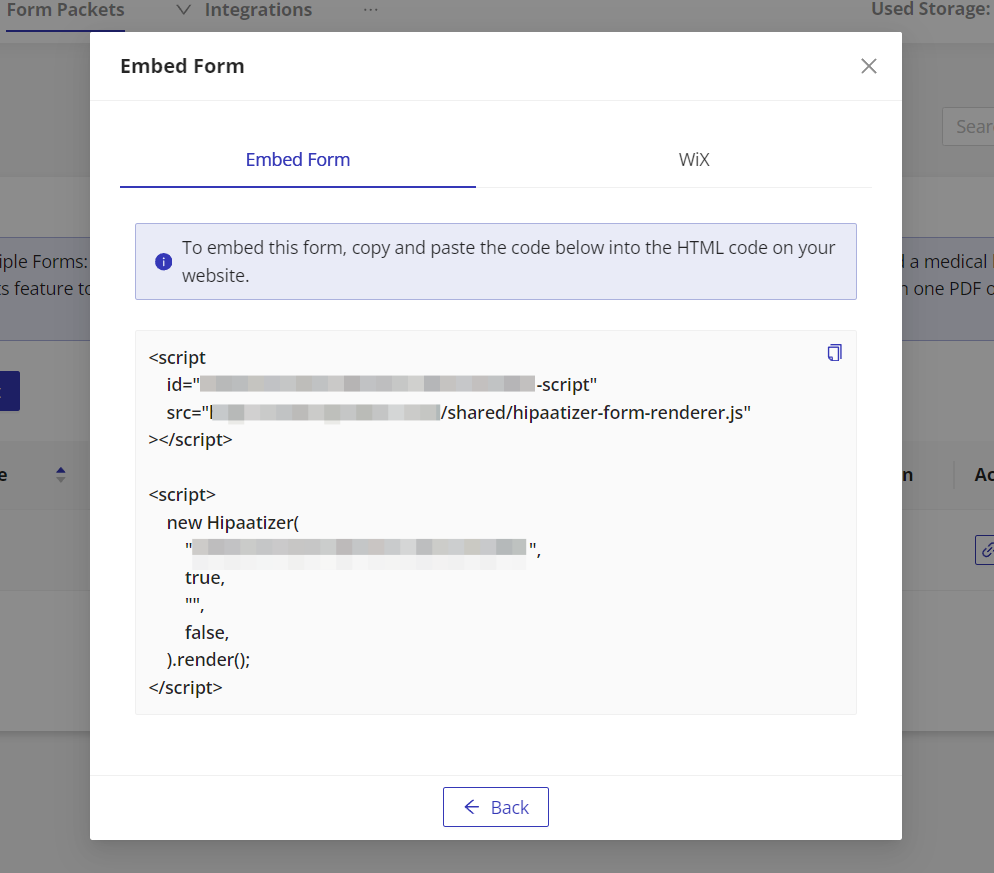
Or, you can copy the short code and embed the form packet in a website, by clicking on “Embed Form“:
Step 2. When your clients or patients access the form packet, they will be able to fill-out and submit the first form of the form packet:

After submitting the first form, the second one appears and the user will fill it out and submit it, as well:

Upon submitting the last form in the form packet, the screen confirming full submission is displayed:

How to manage Form Packets submissions
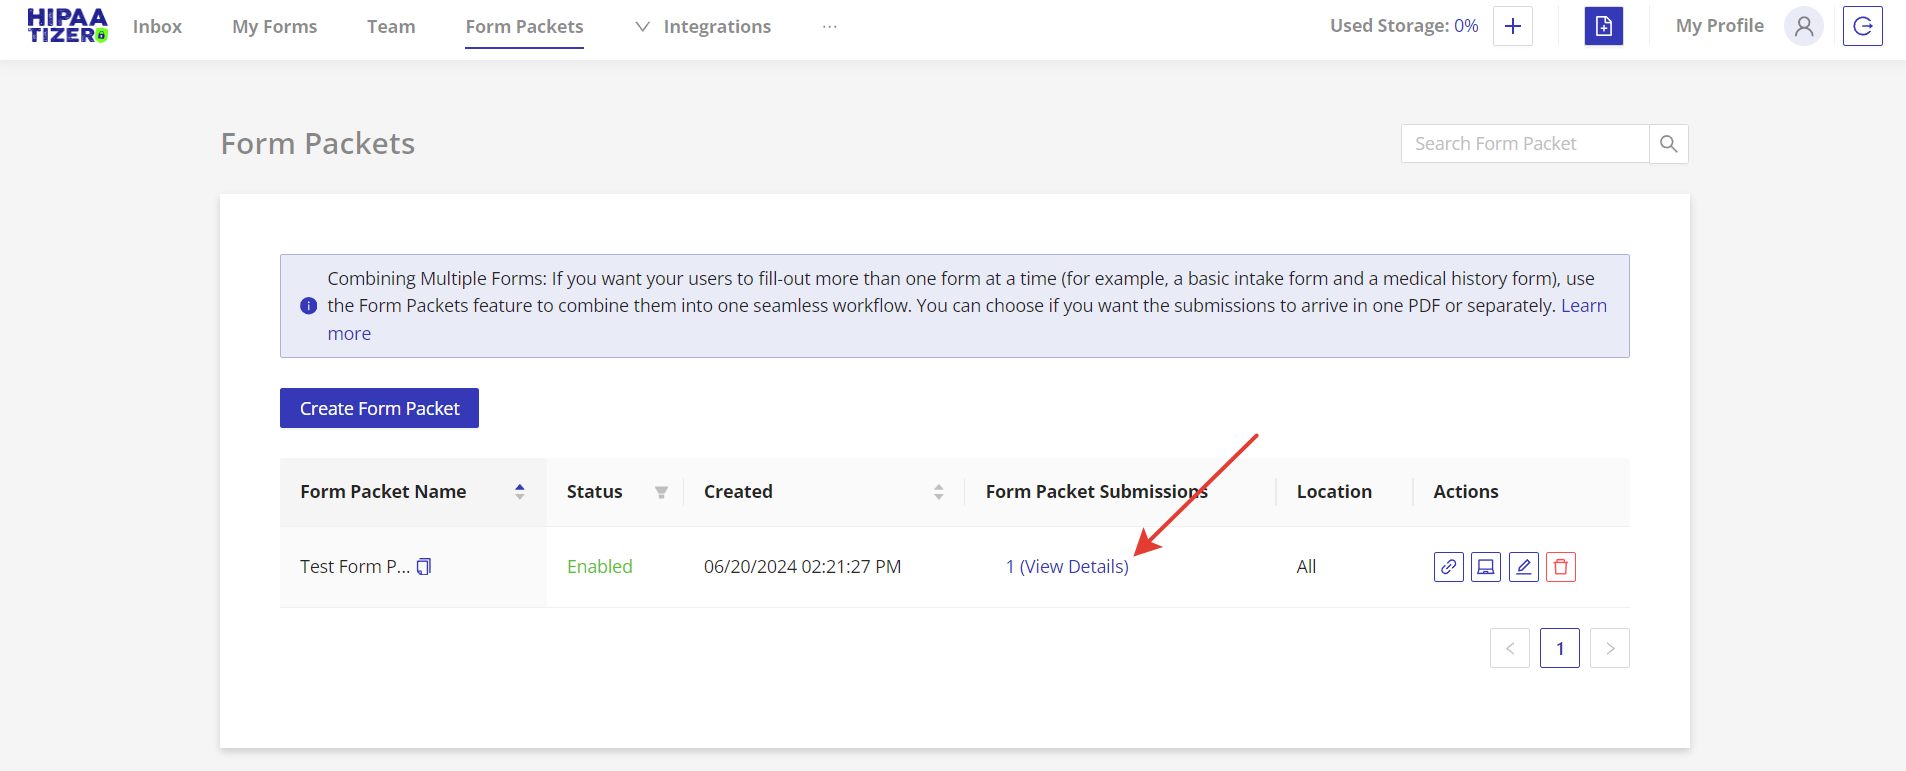
Step 1. After a client or patient submits a form packet, the submission will be displayed in the Form Packets dashboard. To see a submission, the user should click on #(View Details) of the relevant Form Packet:
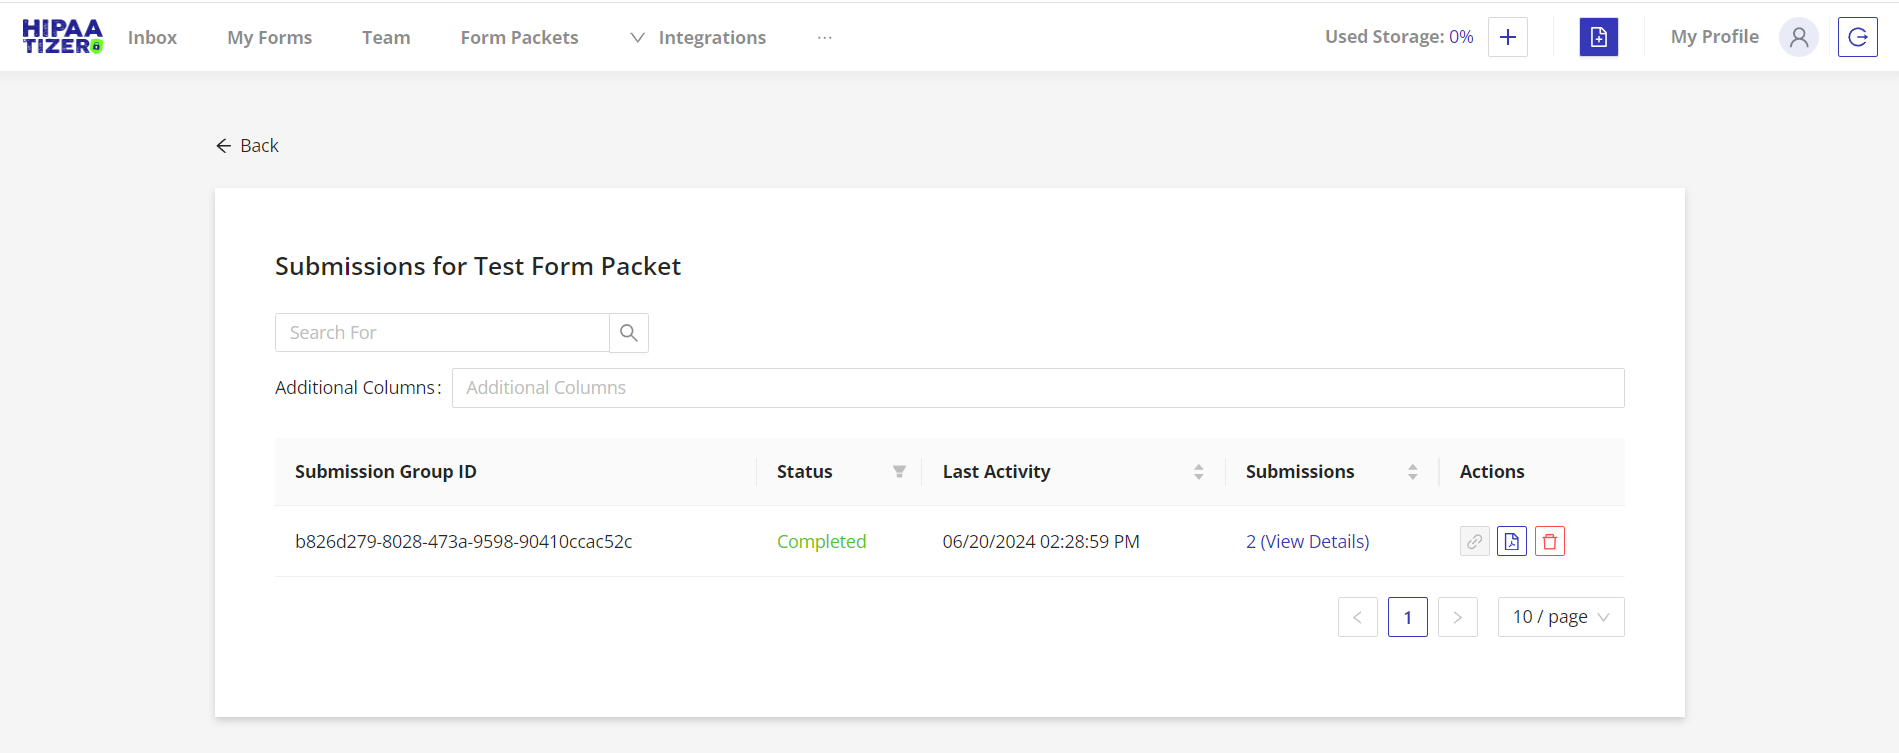
Step 2. And they can view the relevant submissions (in this example, there is only one submission):
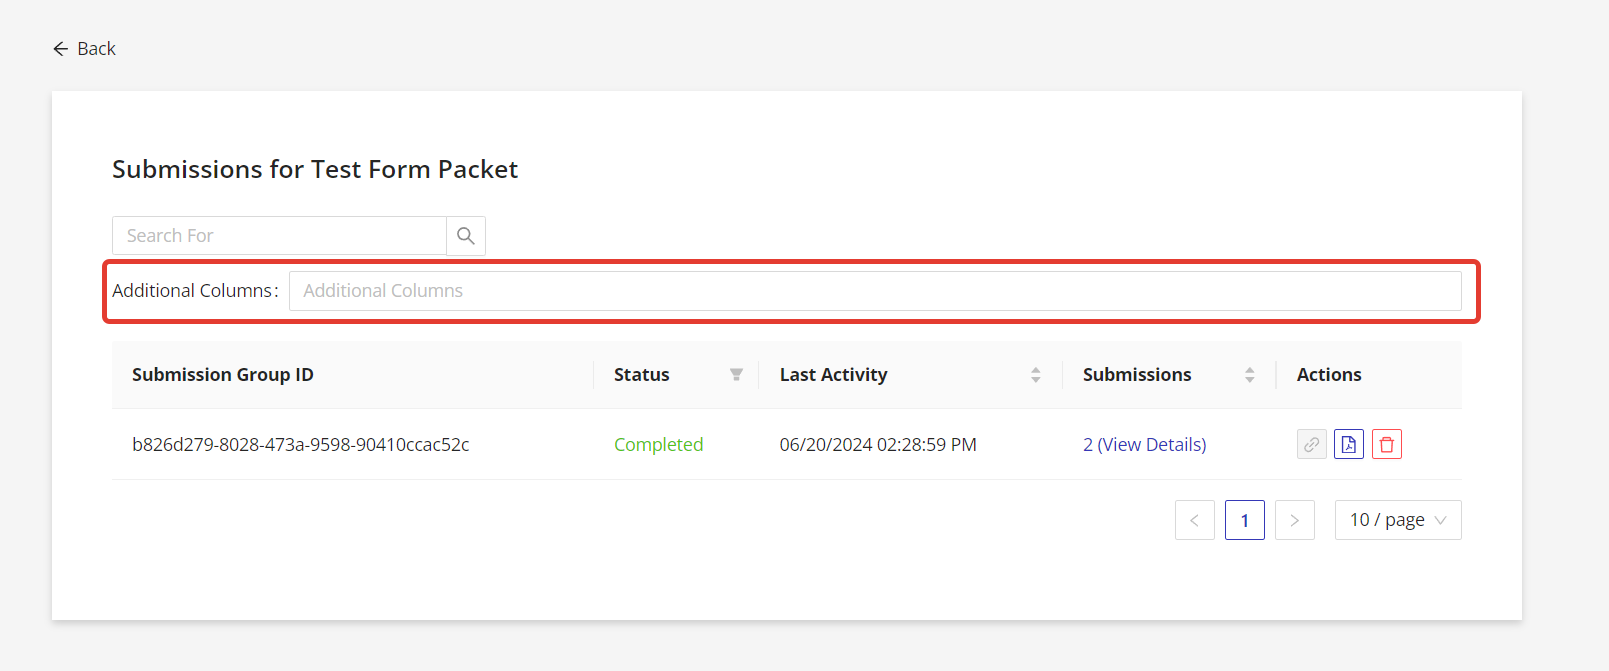
Hint! To make it easier to find submissions, users should add one or more additional columns to add specific fields, such as a last name. For this, click on the “Additional Columns” section:
Please Note: To display the data in the Additional Columns dropdown, you have to configure additional columns for each form first.
See below how to configure additional columns for the first form:
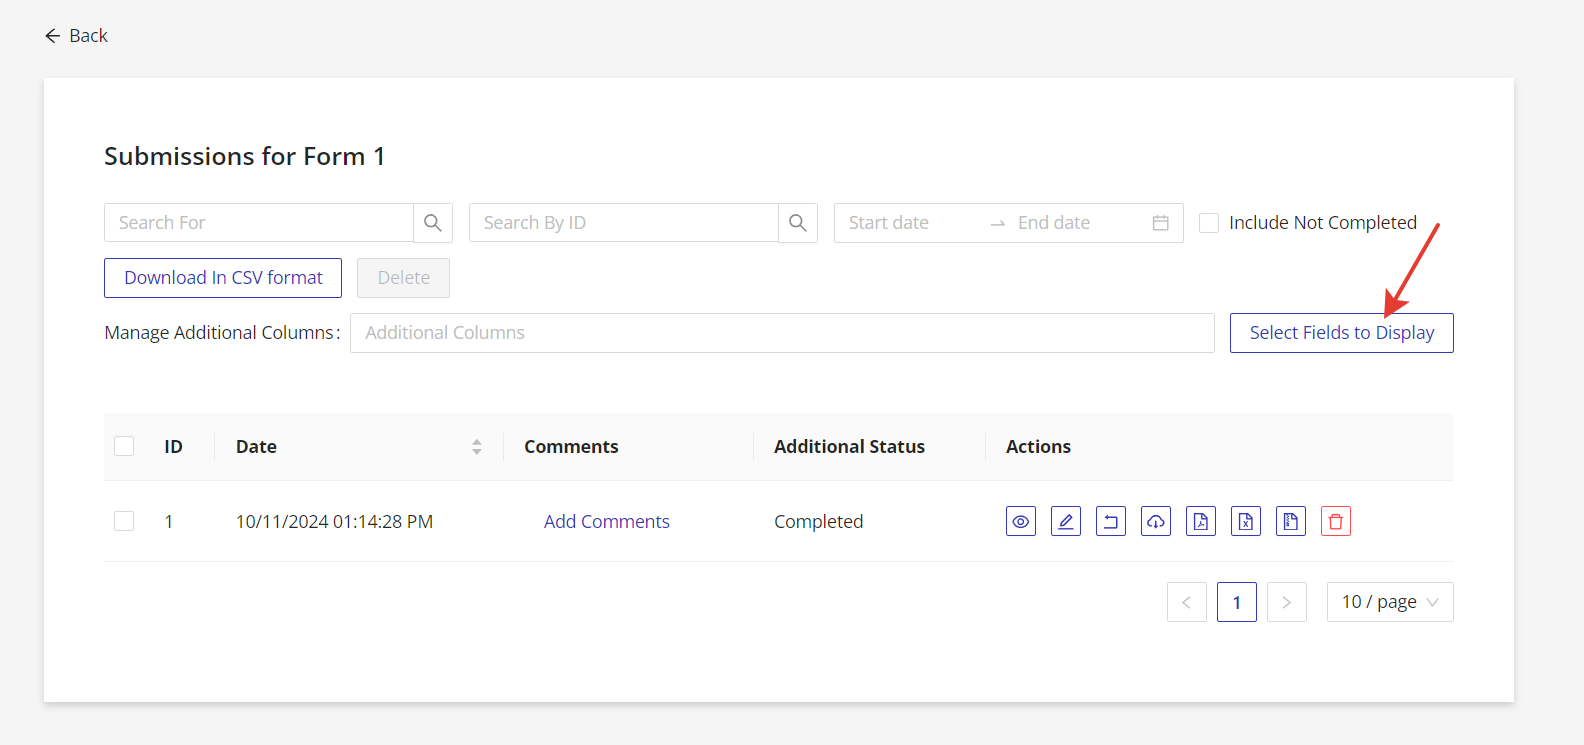
Choose the Form (1) you would like to add additional information to in the respective form’s “Submissions” dashboard by clicking on (2) #(View Details).
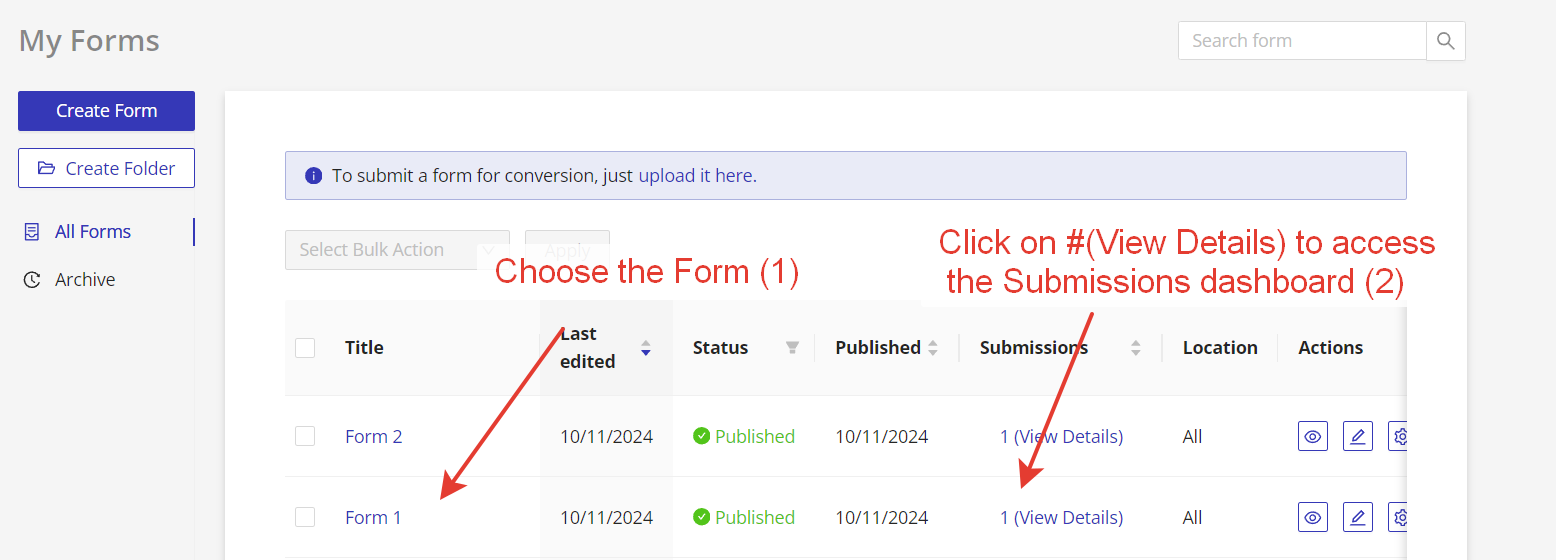
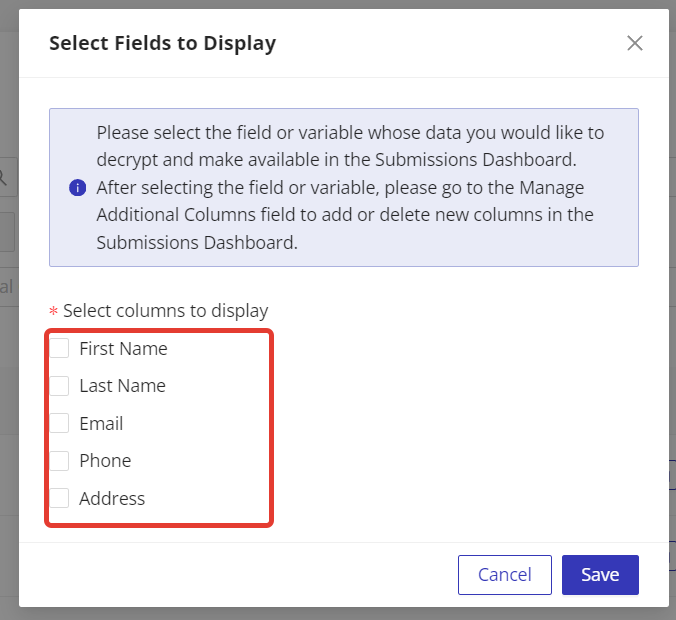
Click on the “Select Fields to Display” button and choose the fields whose data you would like to decrypt and make available in the Submissions Dashboard.
Please note, in a longer form, all the fields from the form will be displayed. Therefore, you may need to scroll to find the desired field(s).
Don’t forget to save your choices!
Back to your Form Packet submissions.
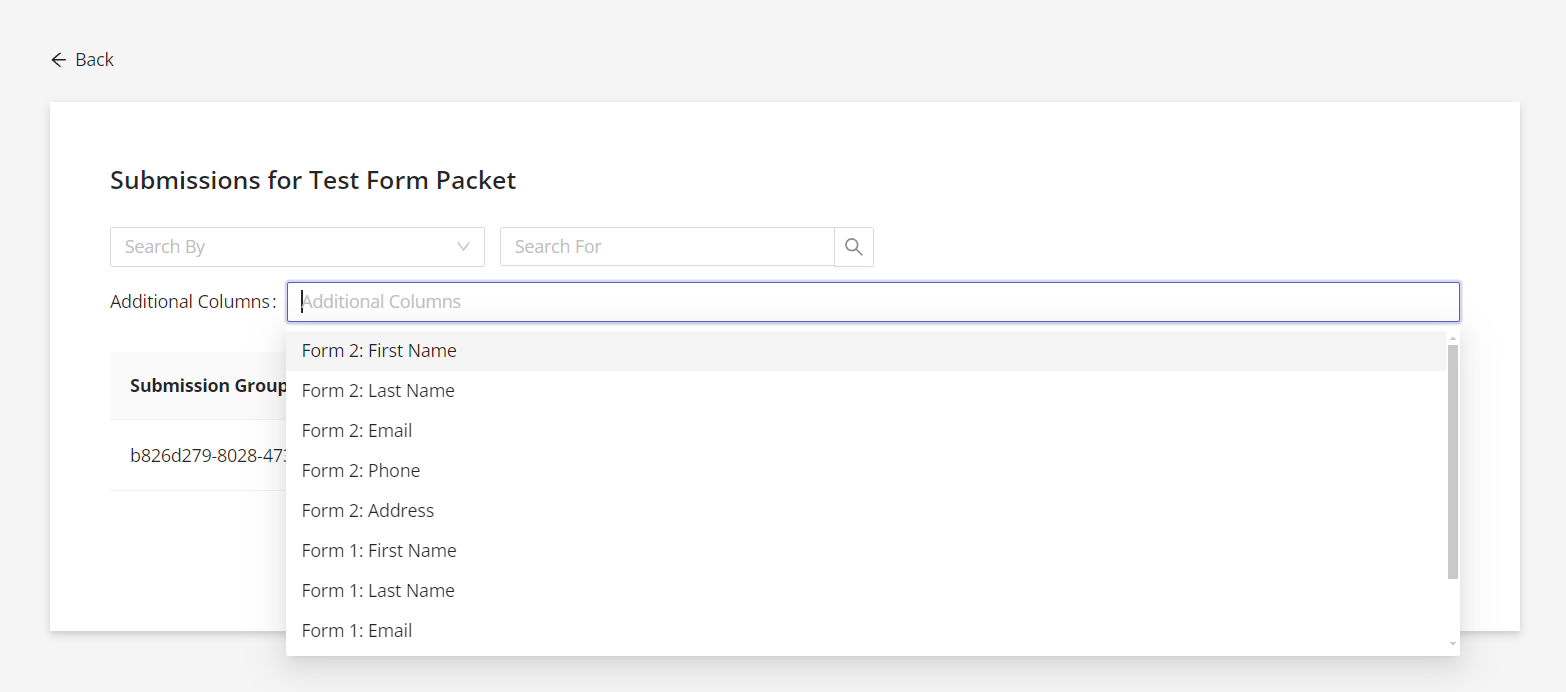
In the dropdown, “Additional Columns” currently displays the fields you set up previously. This allows users to quickly access a submission for further processing.
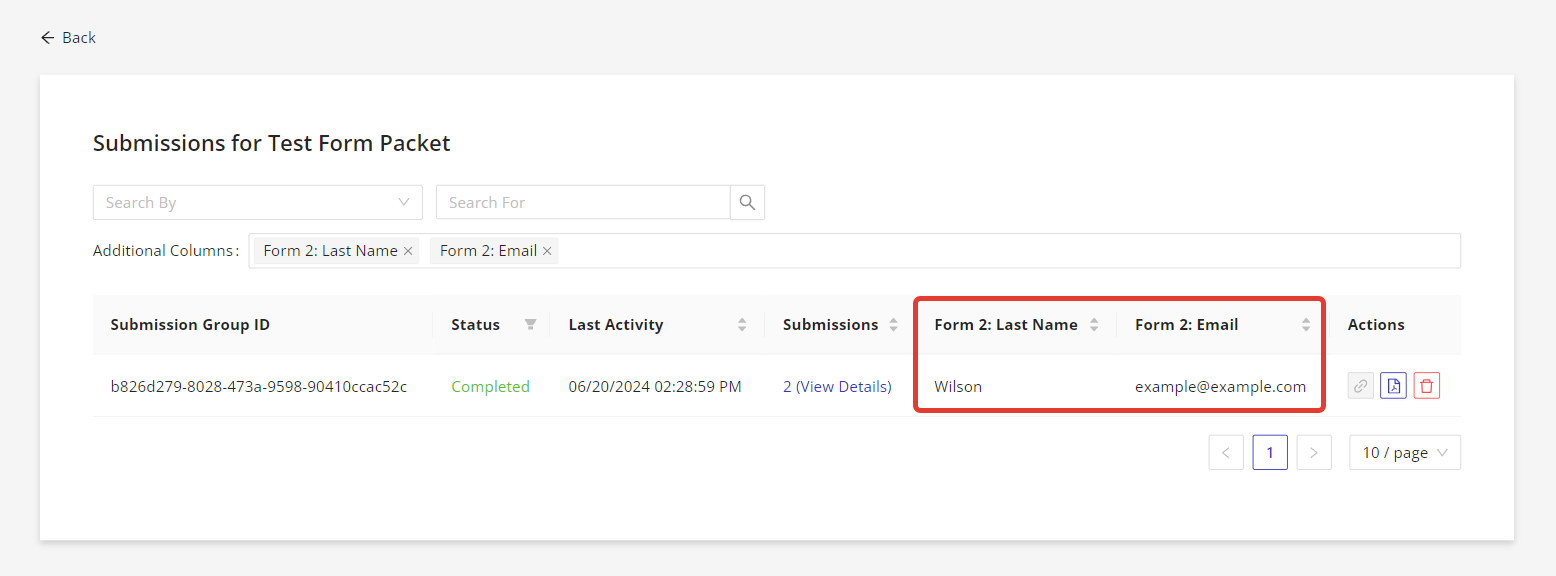
In the red box, you will see the additional columns that have been added:
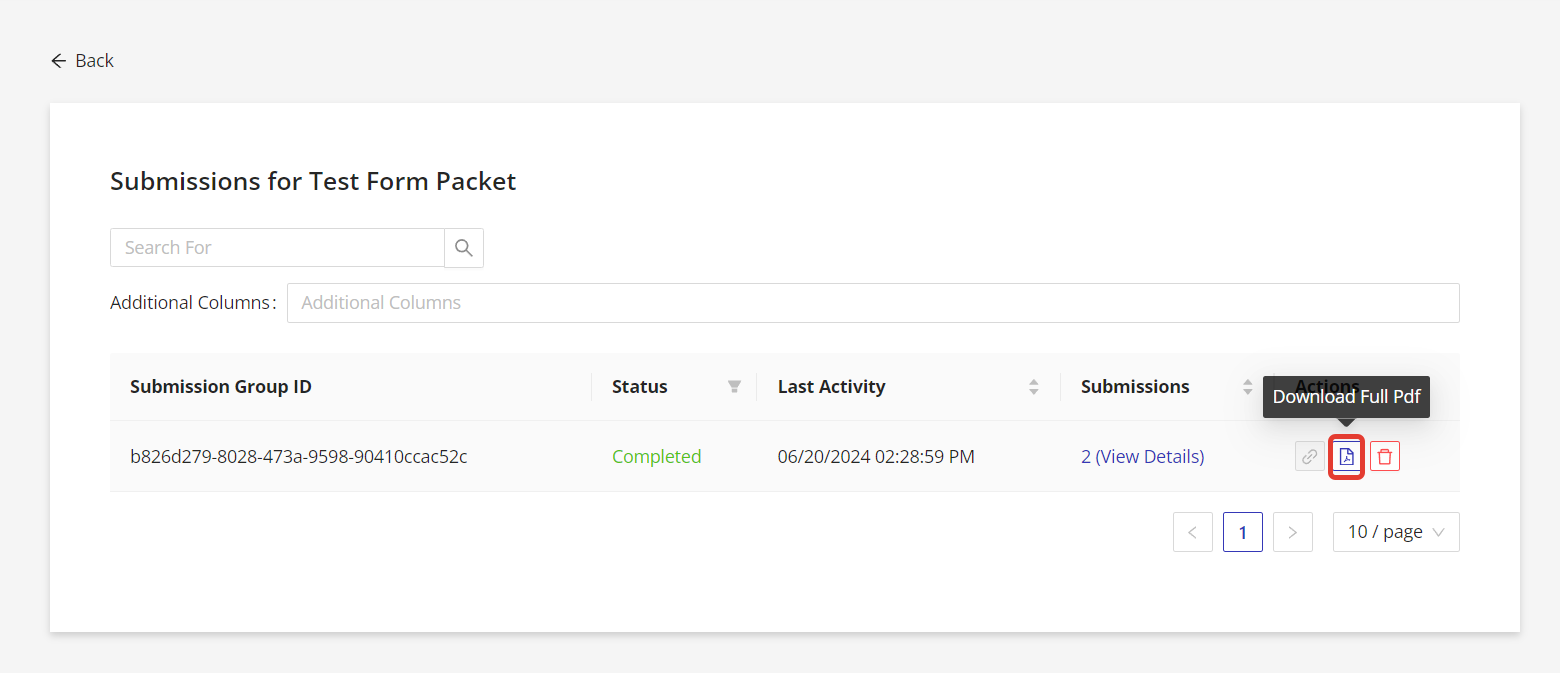
Step 3. If all the forms in the form packet have been merged into one PDF for printing, then click on the “Download Full PDF” button to download the full submission. If not, or if there are attachments in one or more of the forms, go to the next step.
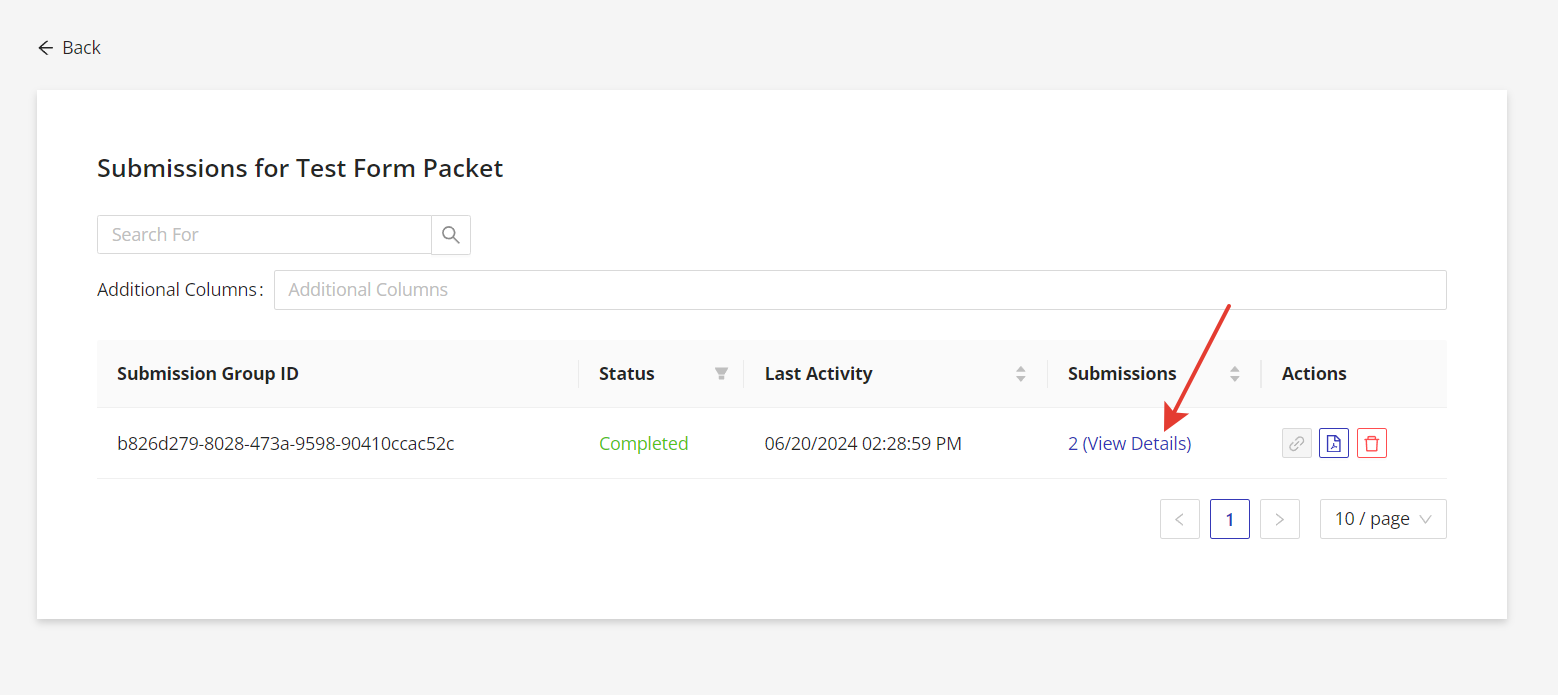
Step 4. To access the individual forms in the form packet, click on #(View Details):
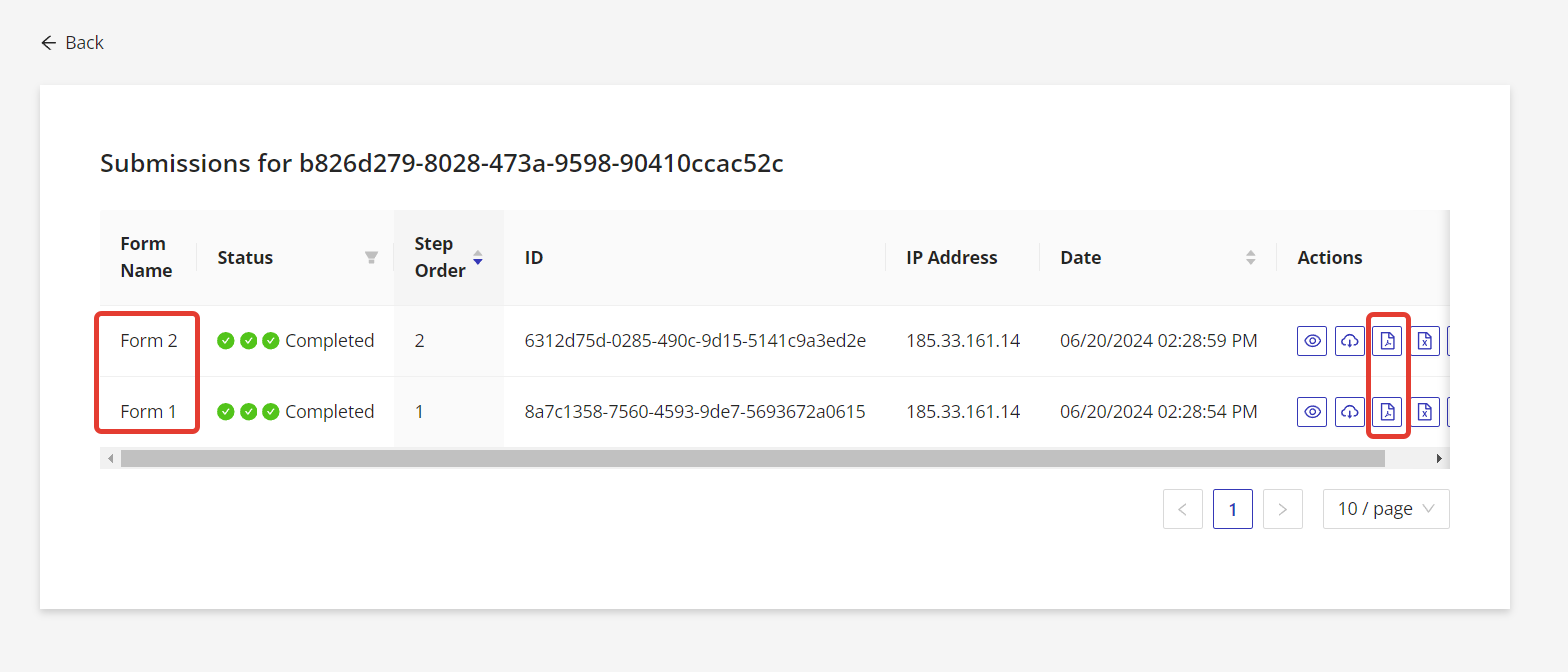
Step 5. The user can now see the submission data related to each form in the form packet. To download a PDF of each submission (see red boxes on the right), they click on the appropriate symbol. Besides downloading a PDF, they can view the submission, generate an audit log, download a CSV version of the submission and download any relevant attachments:
Still have questions? Contact us