How to Create a Contact from a Form Submission
HIPAAtizer account owners can enable the automatic creation of a Contact from a form submission. To do this, you must enable automatic Contact creation in an existing (or newly created) form.
Enabling Automatic Contact Creation
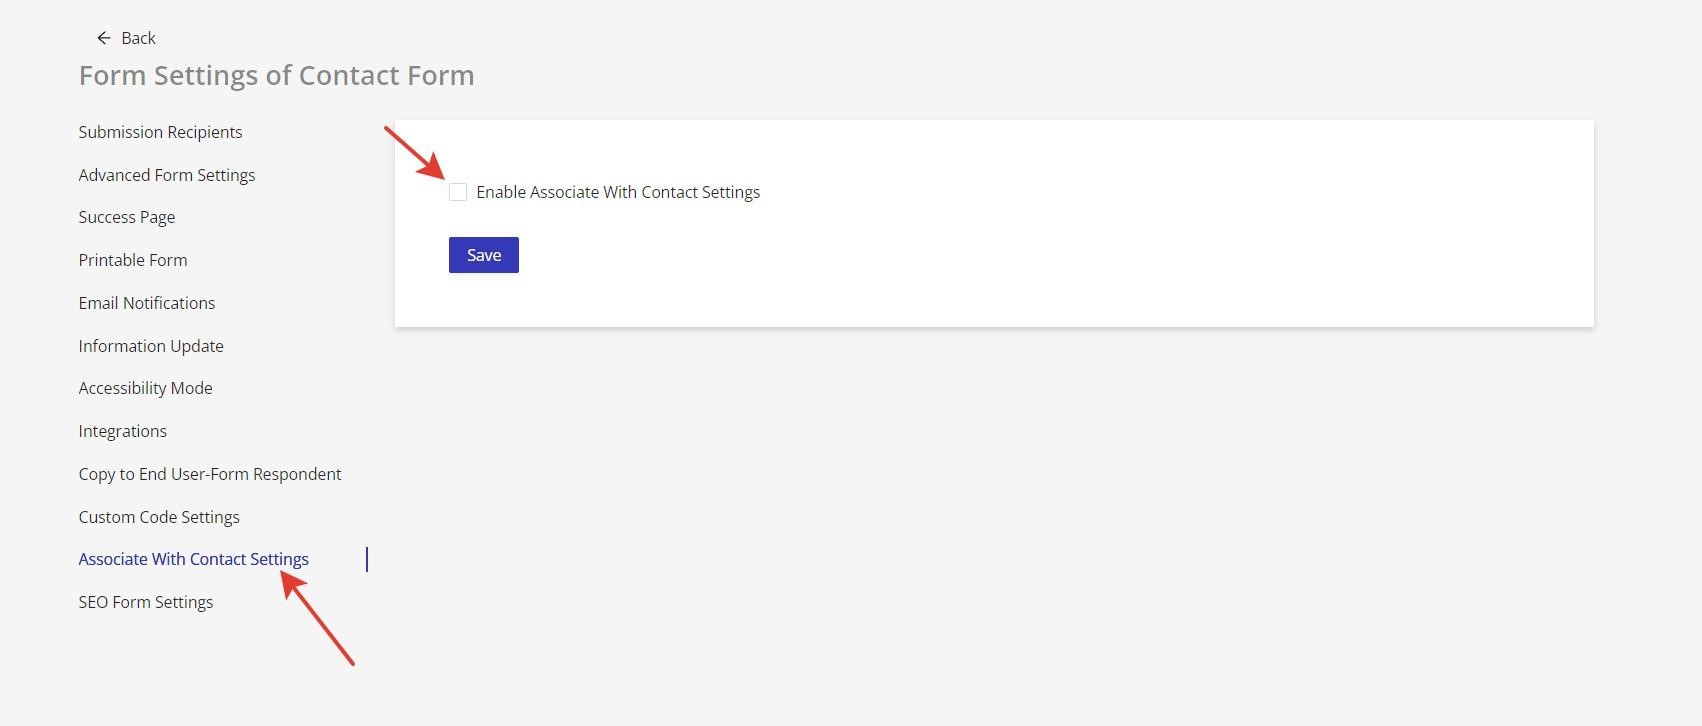
In the "My Forms" dashboard, identify the form that you would like to enable automatic contact creation and click the gear icon to access the form's "Form Settings". From here, click "Associate With Contact Settings" from the list on the left side of the screen, then check the box 'Enable Associate with Contact Settings".

Defining Collected Information
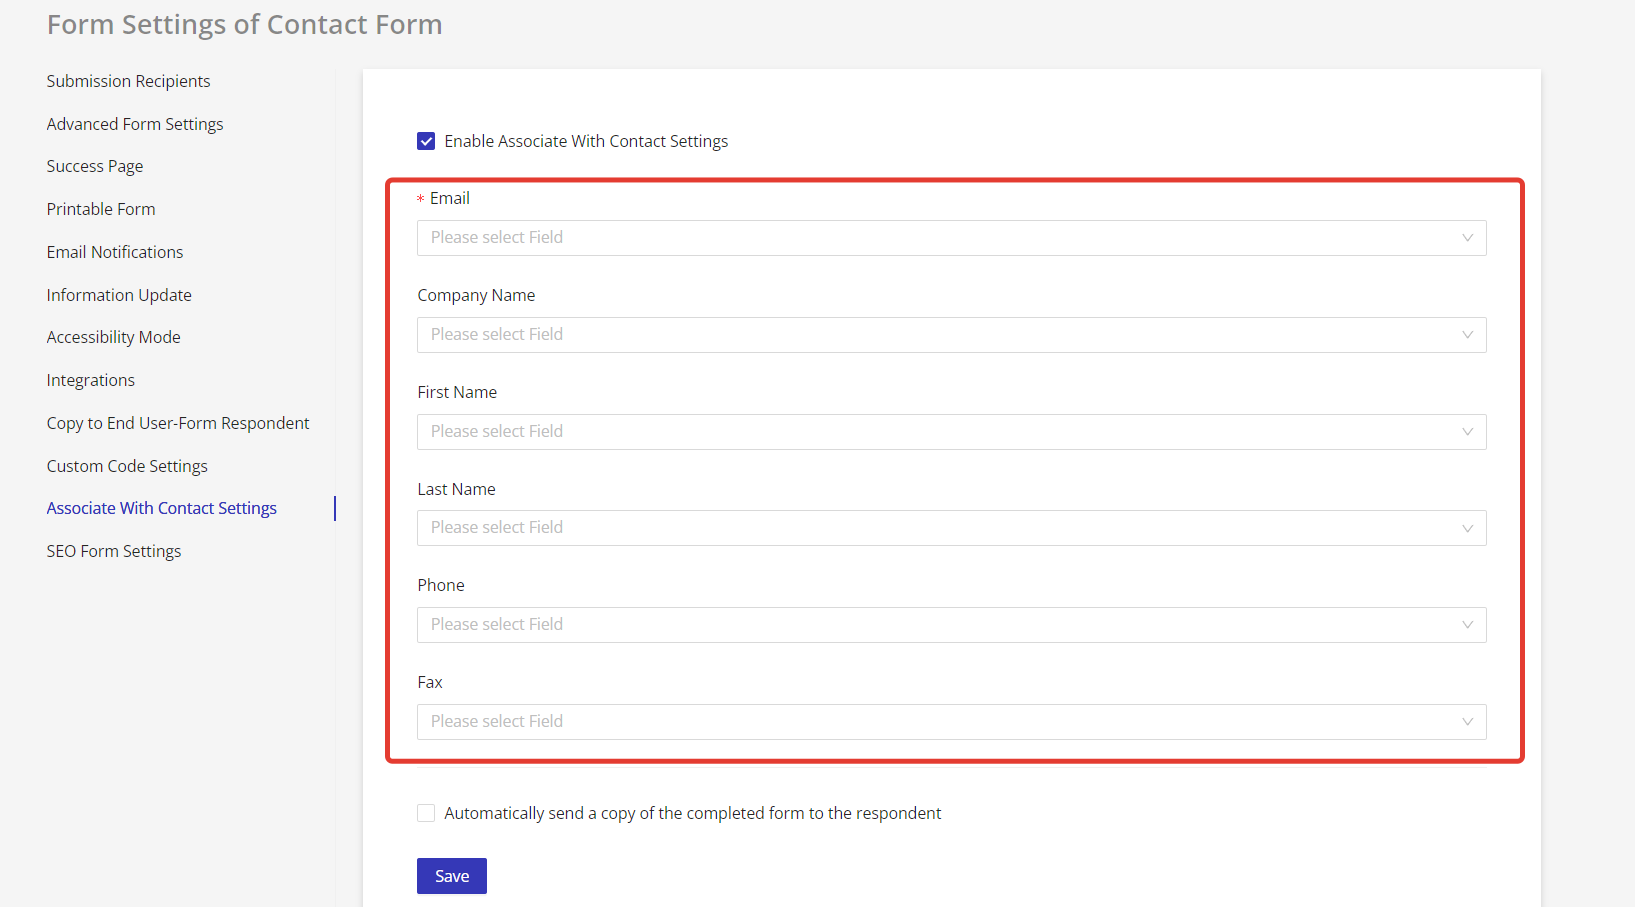
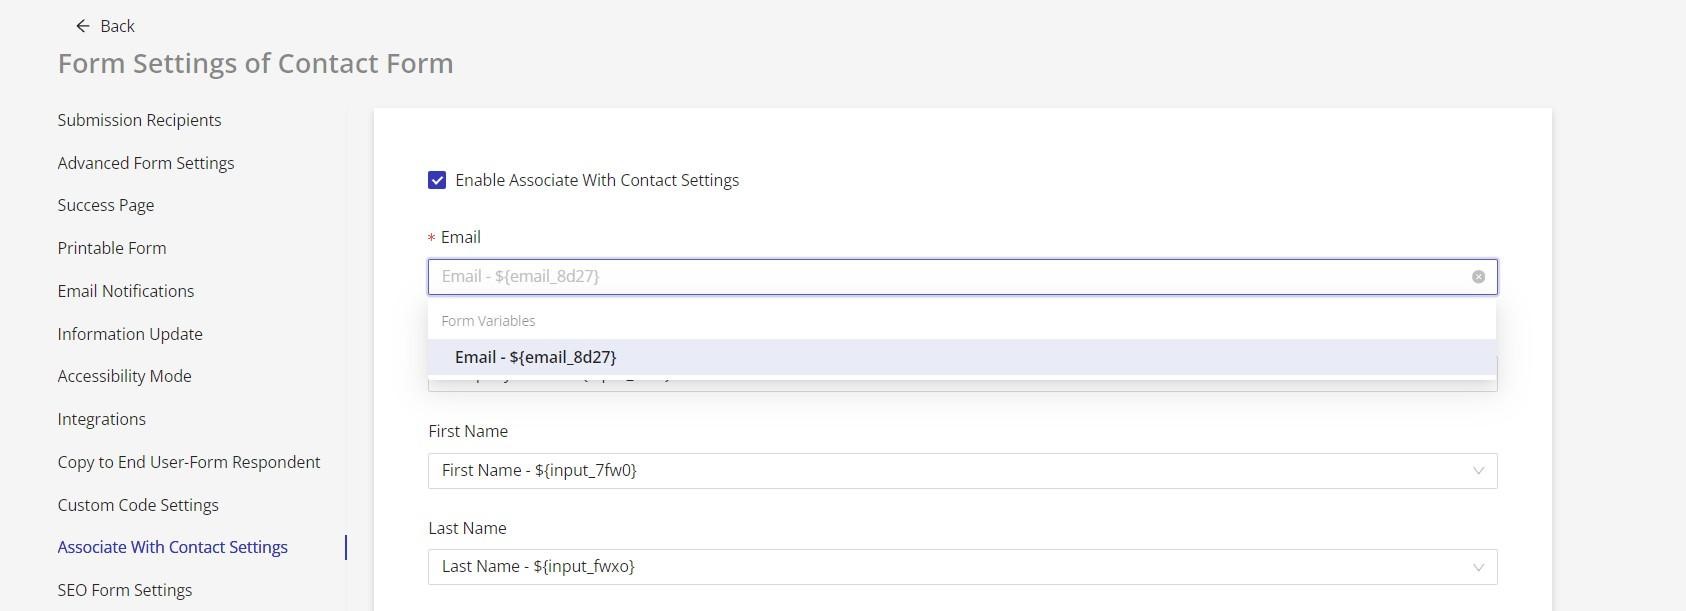
Once "Associate With Contact Settings" has been enabled, the contact fields that can be associated with a form field will be displayed. Choose which field from the chosen form you would like to associate with a particular Contact field. After you have chosen the form fields to associate with your Contact, click "Save".
Email is a required field. If a form does not have an email component, you cannot associate it with a Contact automatically.
Contact fields are limited to Email, Company Name, First Name, Last Name, Phone and Fax.
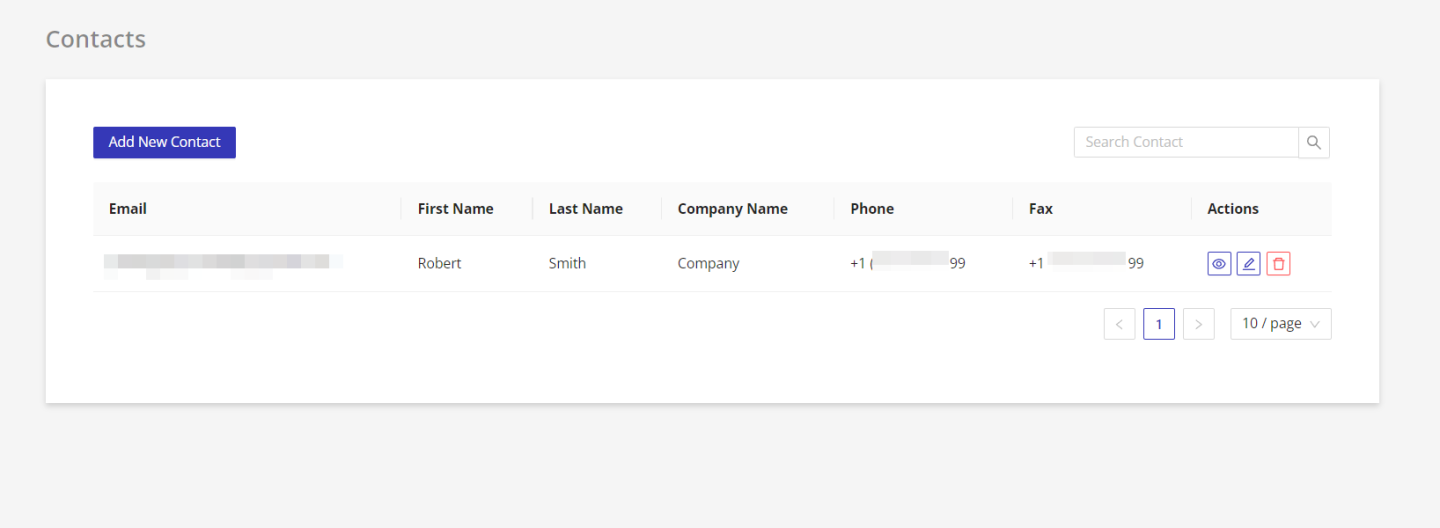
Accessing or Viewing New Contacts
Once your patient or client submits a form with 'Associate with Contact' automatic Contact creation enabled, in addition to a regular form submission you will also see that a new contact appears in your 'Contacts' dashboard.