How to Create a Form from Scratch
Below are instructions on how to create, publish and unpublish a form.
In this example, we will show you the steps necessary to create a simple "Contact us" form:
Accessing the Form Builder
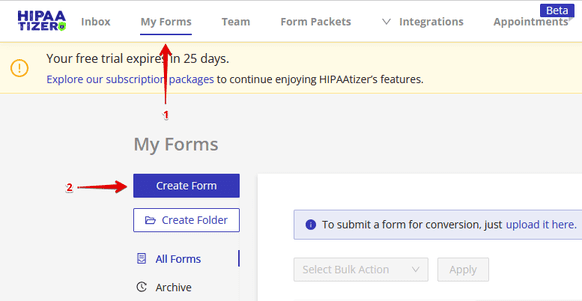
To create a "Contact Us" form in HIPAAtizer, select 'My Forms' from the banner at the top of the screen, then select the 'Create Form' button on the left.
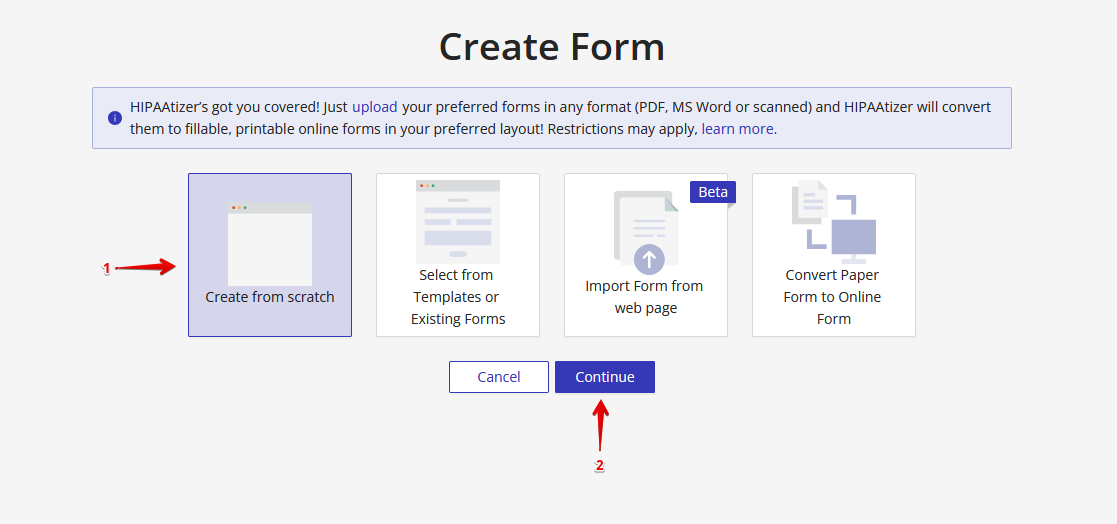
There are four options to select from: 'Create from scratch', 'Select a template', 'Import form from webpage' and 'Convert paper form to online form'.
To create a new form from scratch, please select (1) 'Create from scratch', and then press (2) 'Continue'.
Building the Form
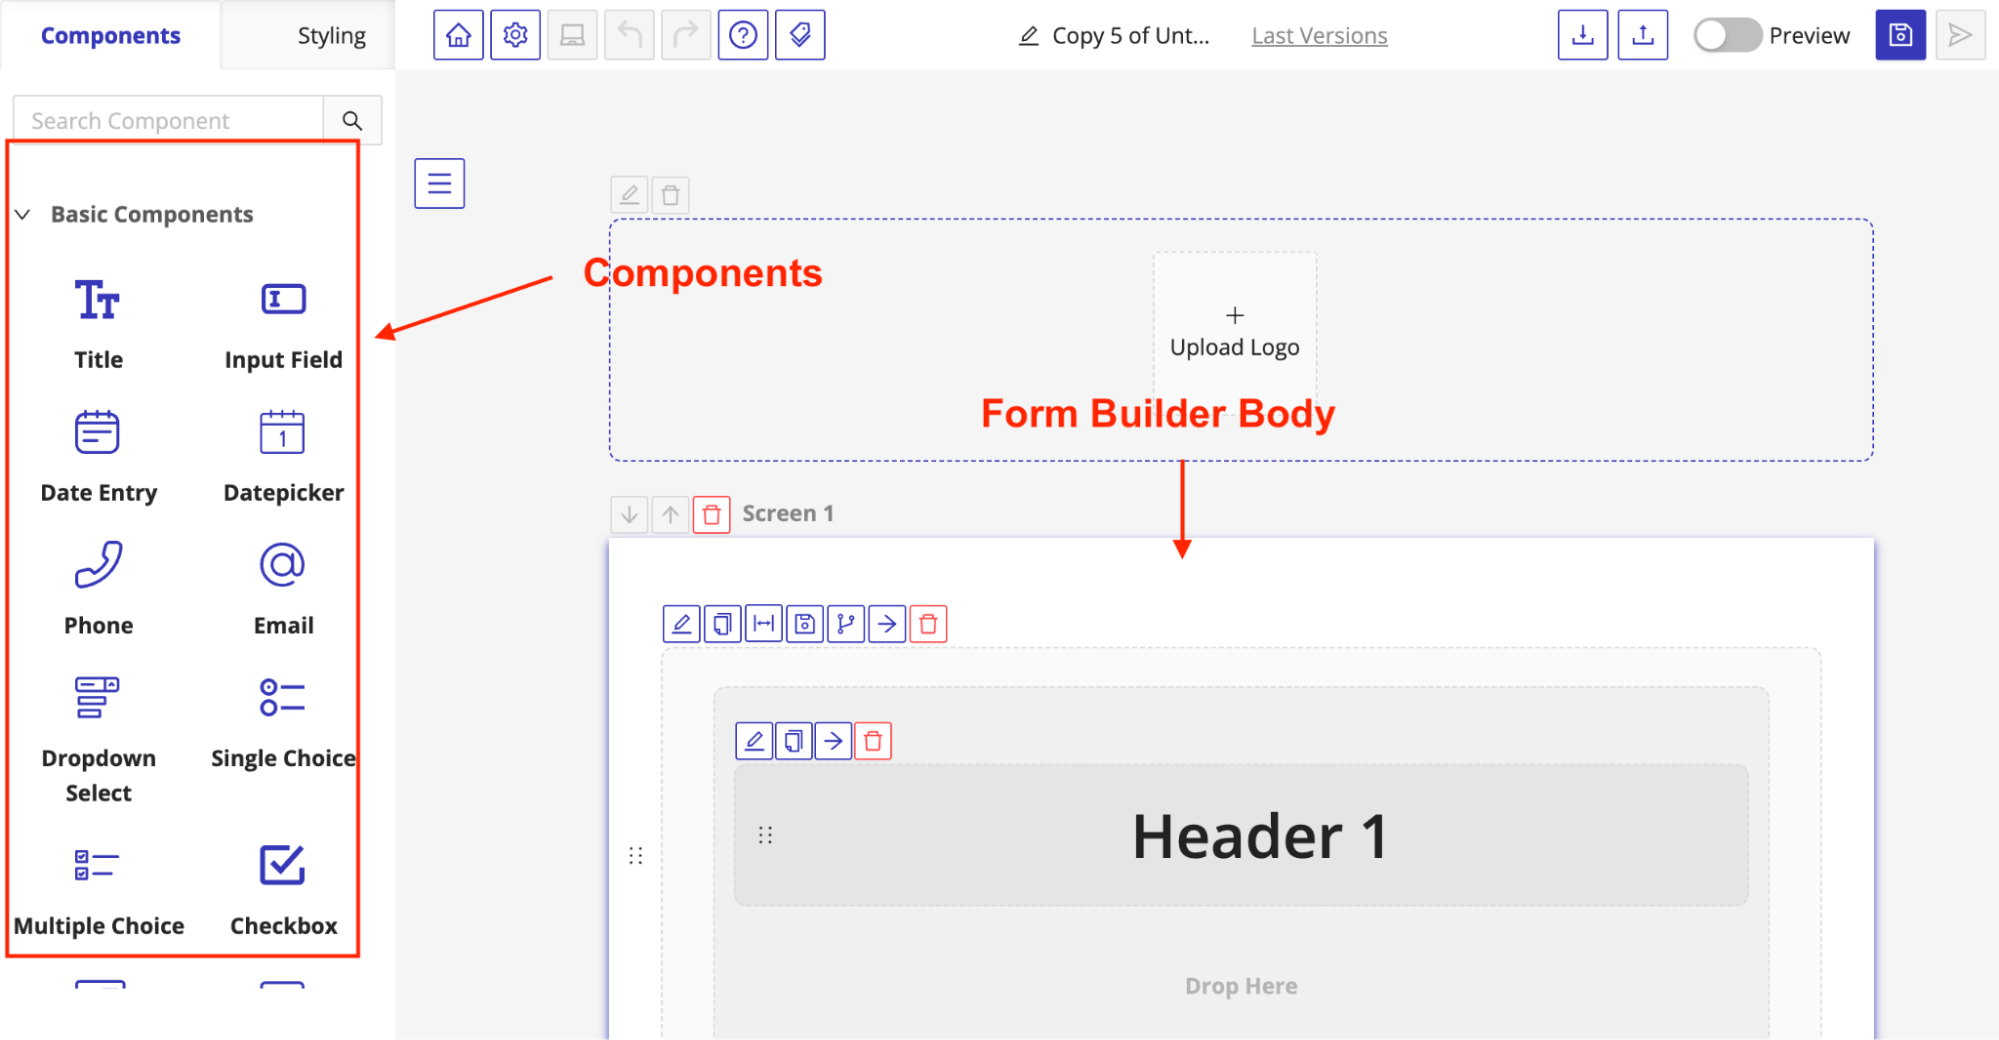
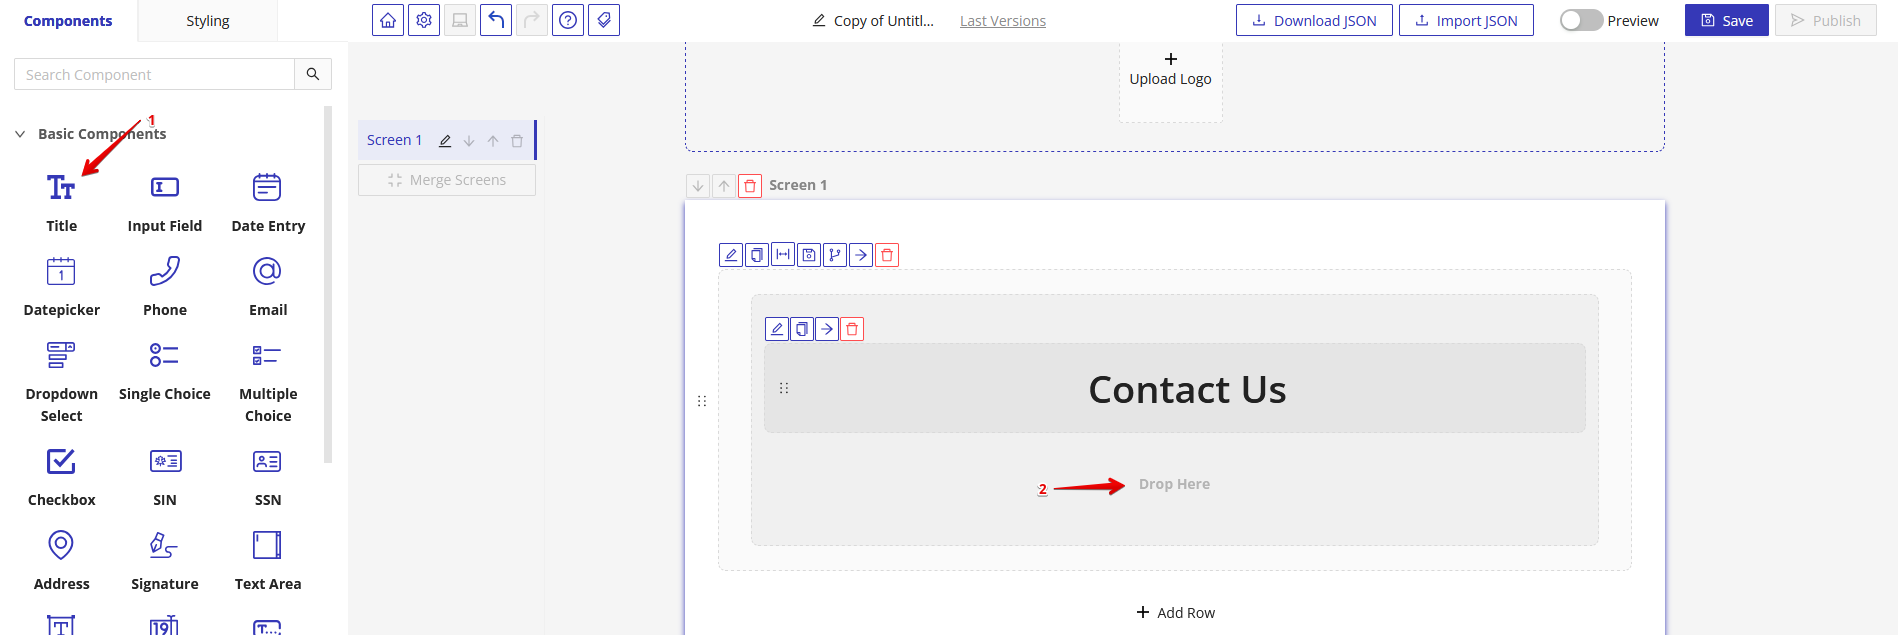
After clicking continue from the previous step, the HIPAAtizer form builder opens. There are two key sections, these are the "Components" and the "Form Builder Body". To create a form, drag the relevant Component and drop in the Form Builder Body.
Header
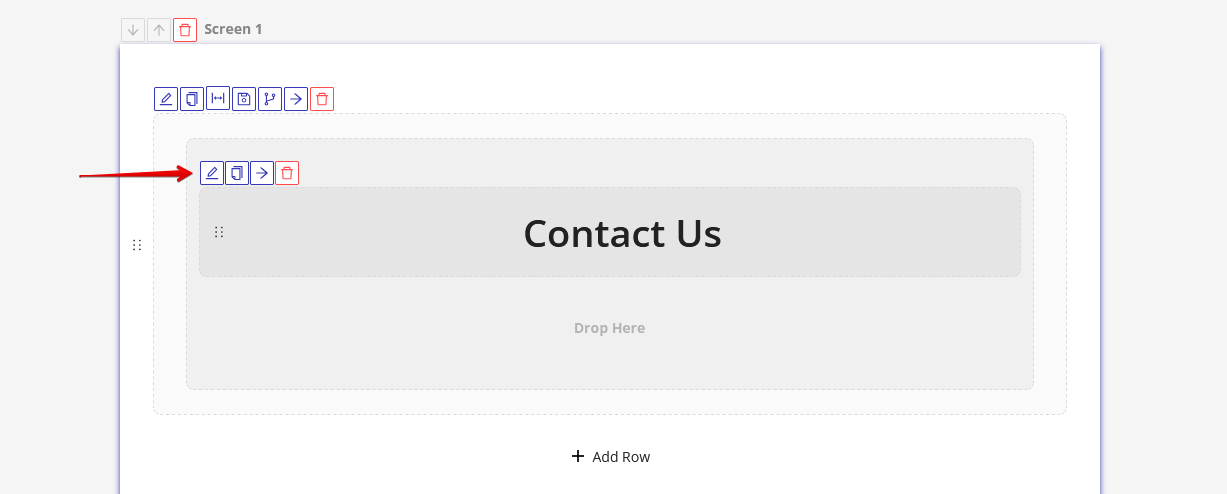
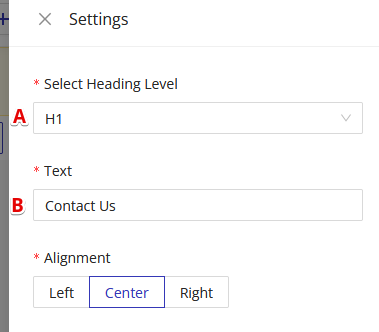
To edit the Header, click the 'edit' icon on the top left of the box. In this area you can edit the sizing of the heading (A) as well as the text (B) (in this case, Contact Us).
Sub-Header
To make a subheading, drag the 'Title' option onto the form and add it where it says 'drop here'.
Editing Fields
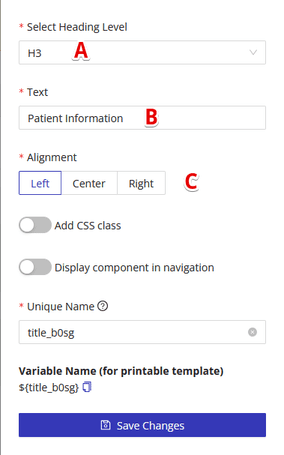
To edit your field, select the top left edit icon and make your desired changes. We will change the heading level to H3 (A), fill out the text - in this case, Patient Information (B), and then align it to the left-hand side (C).
Adding Components
You can drag and drop any components and presets to the field to add them to the form, such as 'Full Name', 'Date', and other options. We will drag the 'Full name' option (under 'Presets) onto our form.
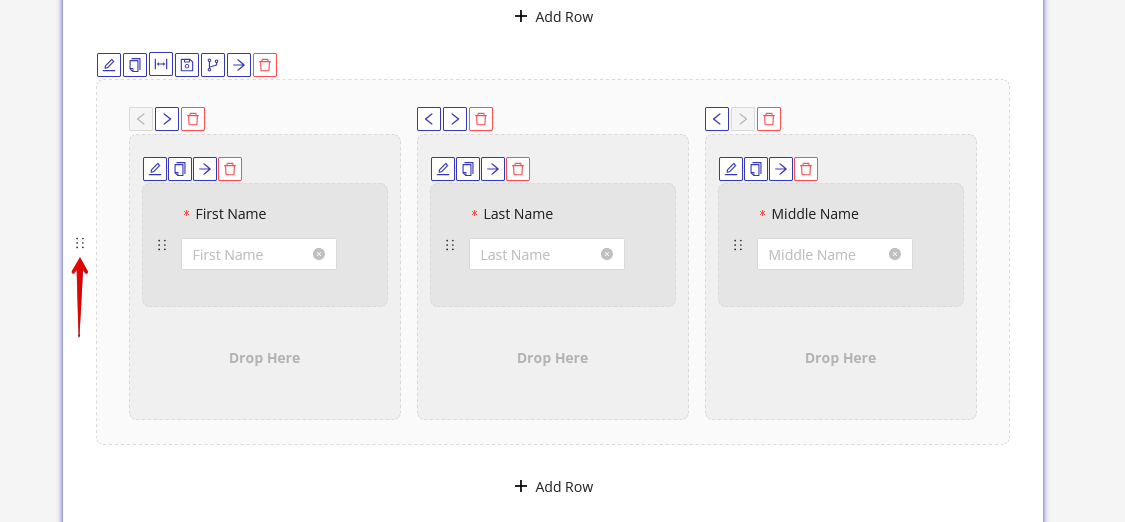
Creating Columns
The "Full Name" preset automatically splits the row into 3 columns. You can change this into 1-3 columns by selecting the "Split Row" icon on the top left of the row.
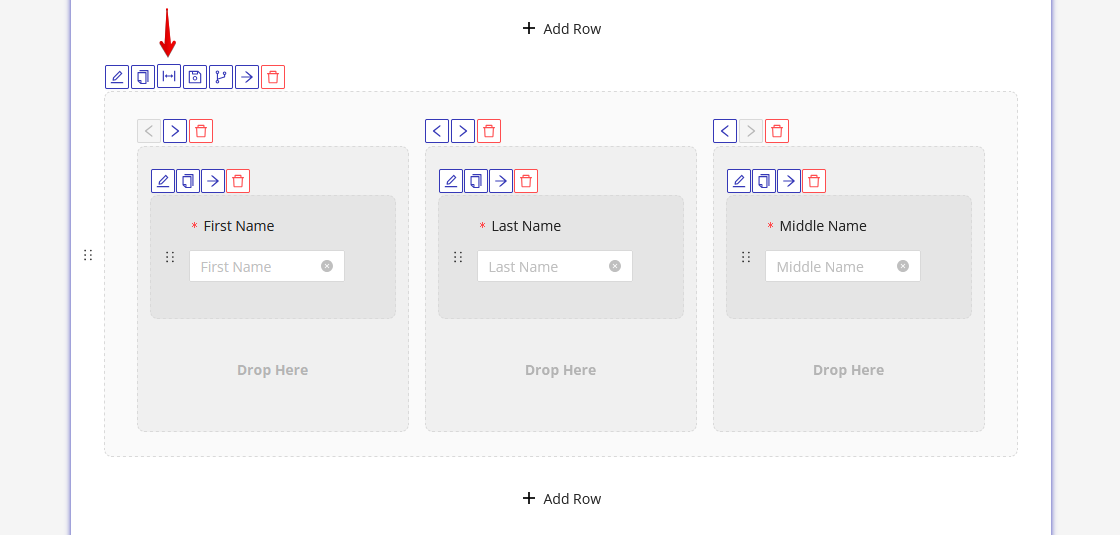
To organize and rearrange the rows, such as moving them up or down, you can click and hold the 6 dots located on the left side of each component and move it as needed.
Required Fields
To make a field required, select the 'edit' button on the top left of the component box to open the settings window, then adjust the 'Make required' toggle on the right side.

Completing our "Contact Us" Form
Continue with customizing your form by dragging over the 'phone' and 'email' components.
Next, create an area where the patient can fill out their question or reason for contacting. Drag over a 'Text Area' component. You can label this as "How can we help?", "Contact us", or any other title that fits your needs.
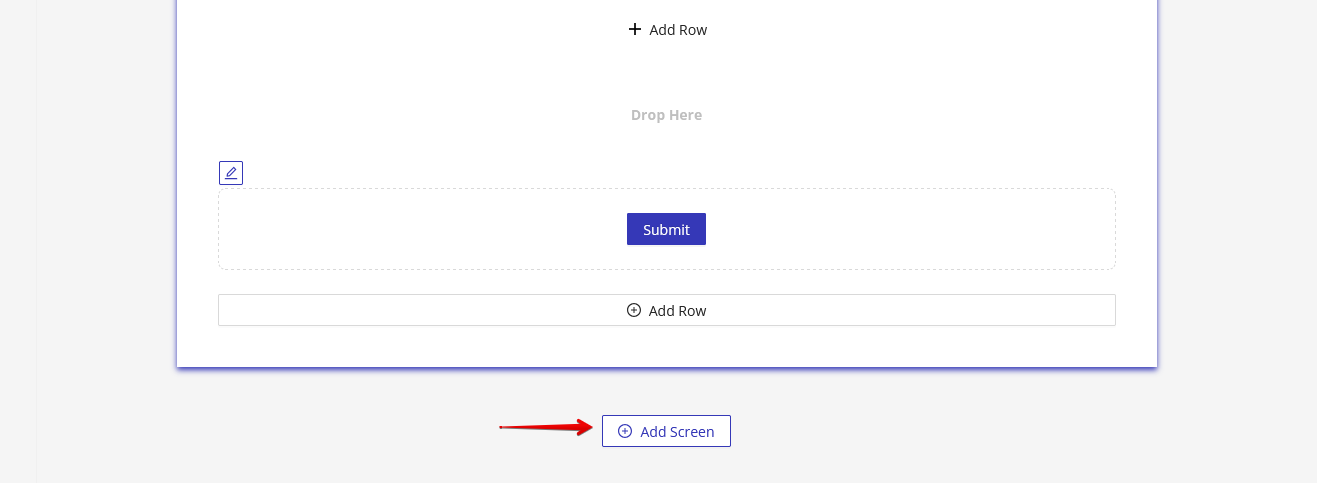
Most contact us forms don't require a second screen. However, as you add more complex forms, you can add additional screens by selecting the add new screen button at the bottom to create multiple page forms.
Previewing and Publishing Your Form
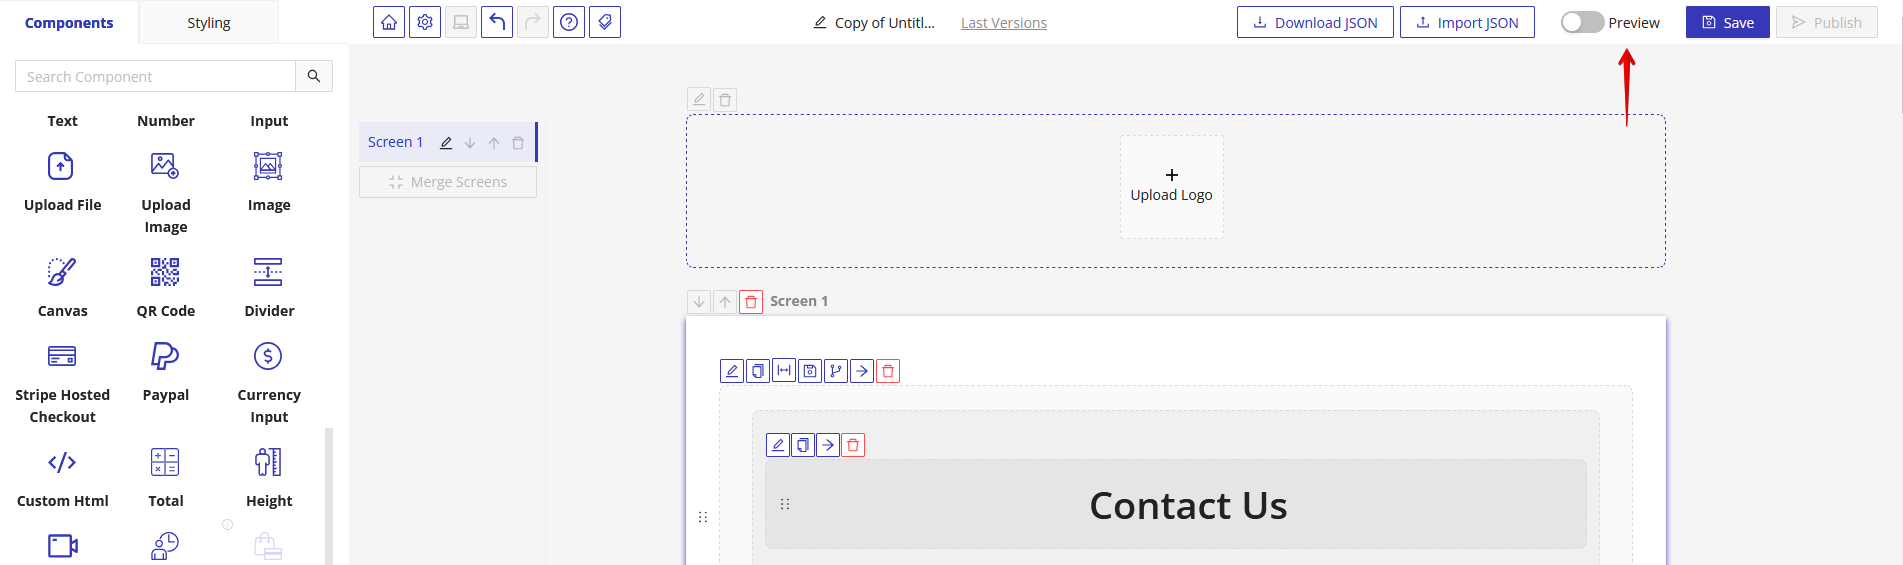
Preview Your Form
To view how your form looks, you can preview it at any time by selecting the 'Preview' toggle on the top right.
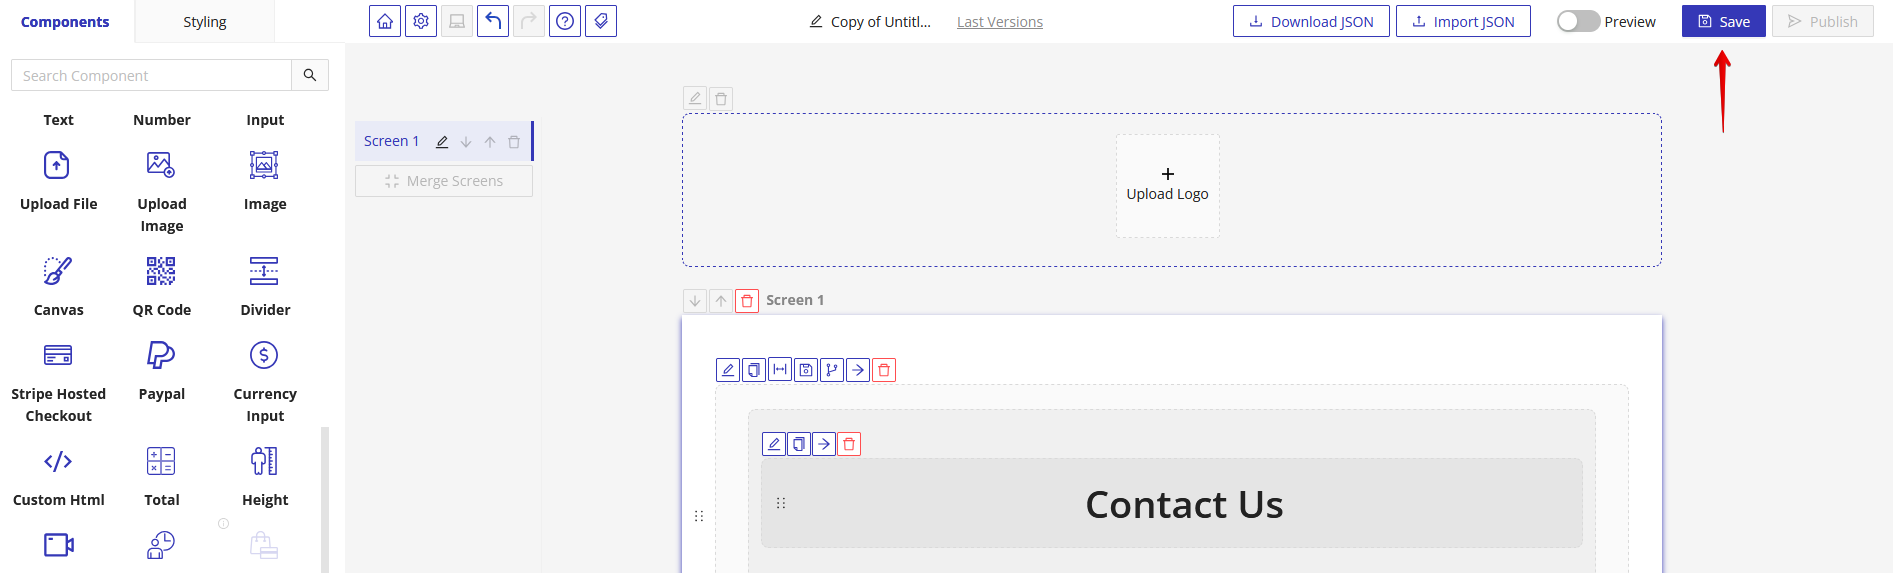
Saving Your Form
To save your form, select the 'Save' button on the top right and you will be prompted to publish. Your form must be published to embed it on your website.
Sharing Your Forms
There are several options for sharing your form after publishing. You can directly send a link or QR code to the patient to fill out the form, or you can move onto the steps of embedding your form into an active website.
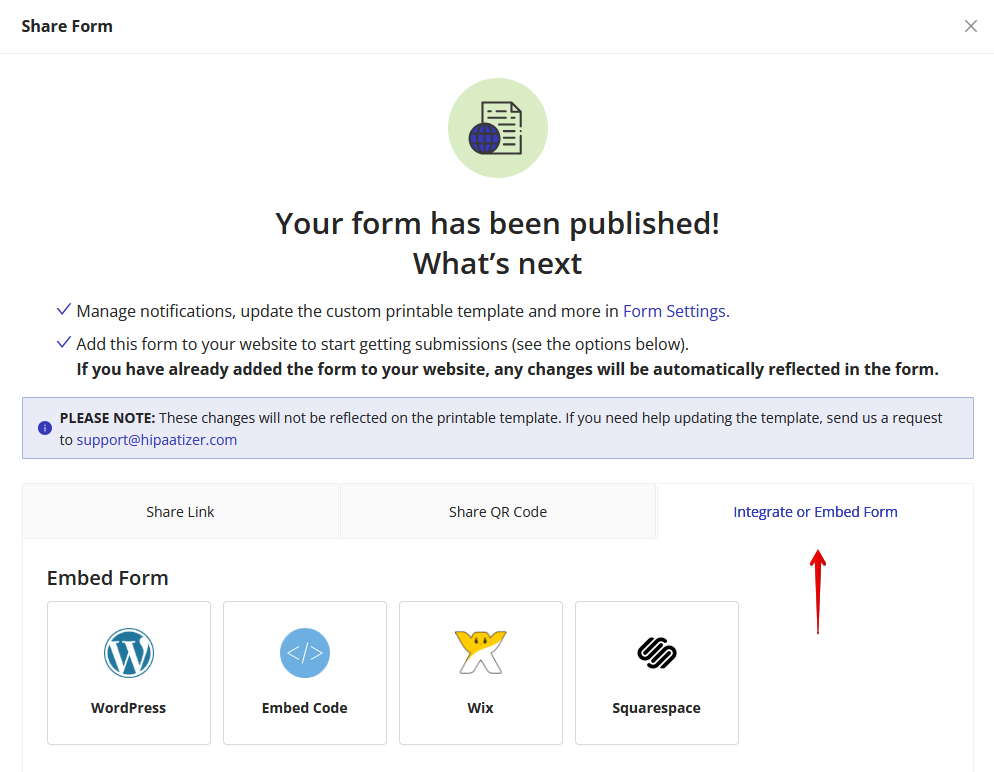
Embedding Your Forms
Select 'Integrate or embed form'. In this area you can proceed with selecting the platform that you have your current website on and follow the steps to integrate your new form.
If you are creating the form in your sandbox-developer account, you can create the form, but the form needs to be published on the web from a Covered Entity's account in order to be HIPAA Compliant.
Unpublishing Your Form
If you want to delete, remove or inactivate a form, you must "Unpublish" it. To do this, please navigate to My Forms page -> Identify the form you would like to Unpublish -> click on the 3 dots icon under Actions columns for your form -> Select 'Unpublish' option.
After unpublishing, your form status will be changed to 'Draft' and will become inaccessible to anyone you have shared the link with. To re-publish the form, follow the steps above, but click 'Publish' instead of 'Unpublish'.
