HIPAAtizer is the best HIPAA-Compliant form builder for creating HIPAA-Compliant forms. They can be easily integrated into any website, or you can share links or QR codes with your patients. Most importantly, all submissions can be managed securely in our HIPAA-Compliant dashboard. Explore the guide below to learn how to access your HIPAA-Compliant form submissions with HIPAAtizer. For a deeper understanding of the platform and its features, visit our dedicated page. Need to convert your form? Simply upload it, and we’ll do the rest.
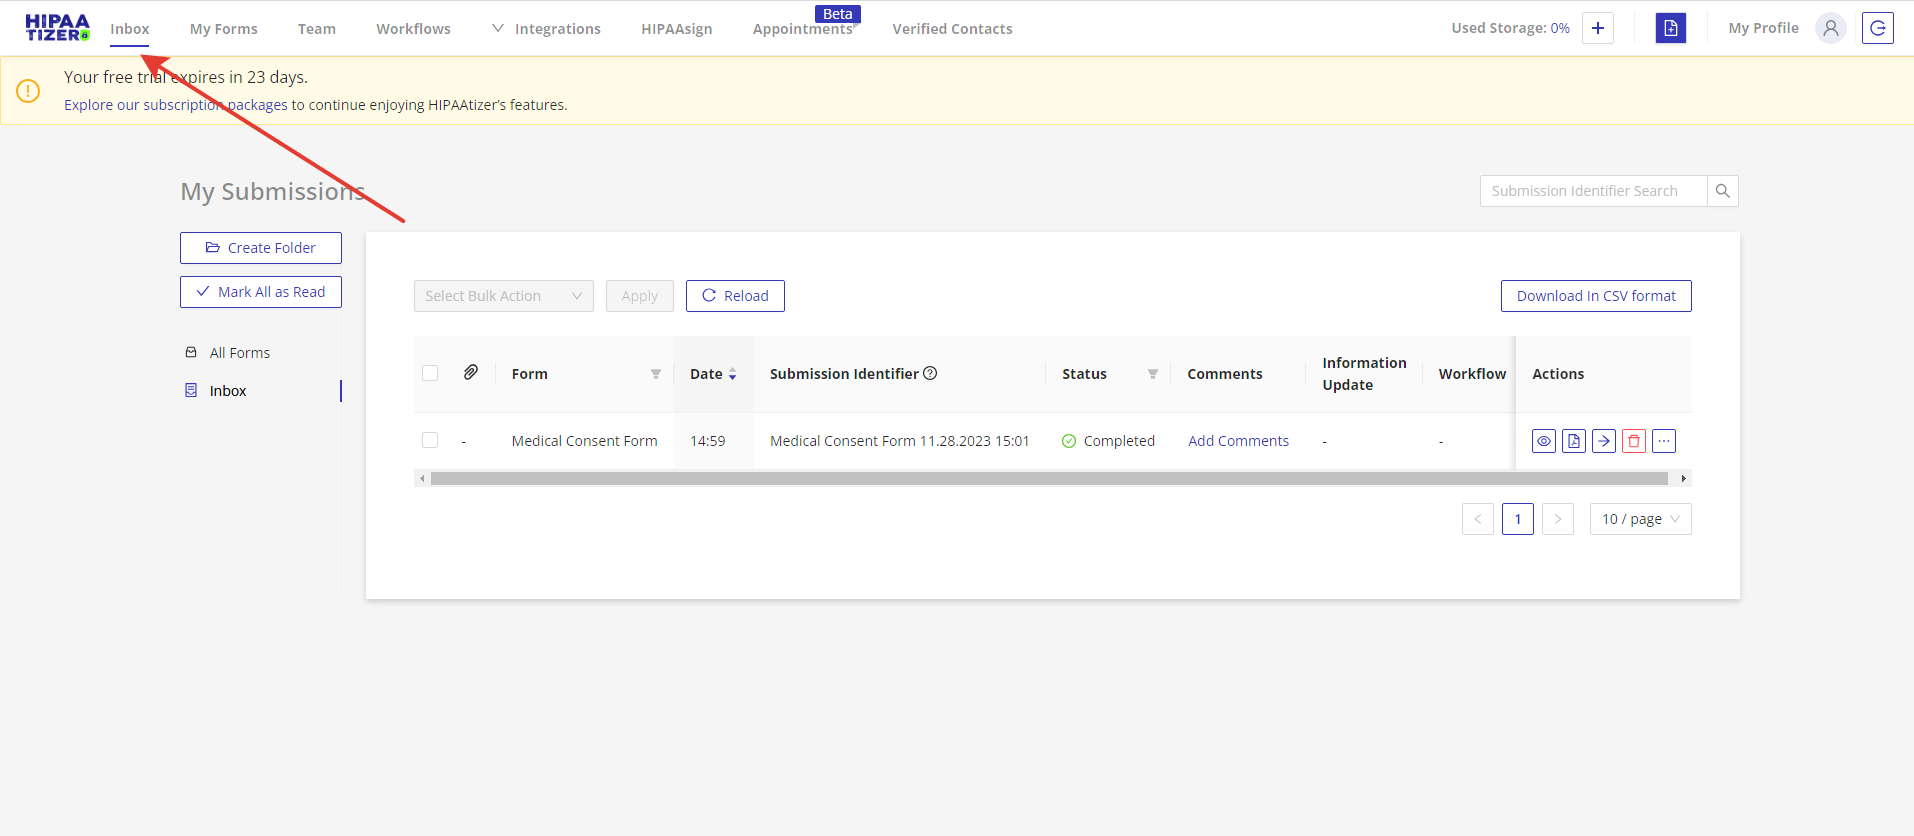
Inbox Page
On the Inbox page you can monitor and manage submissions for all your forms.
Managing Submissions
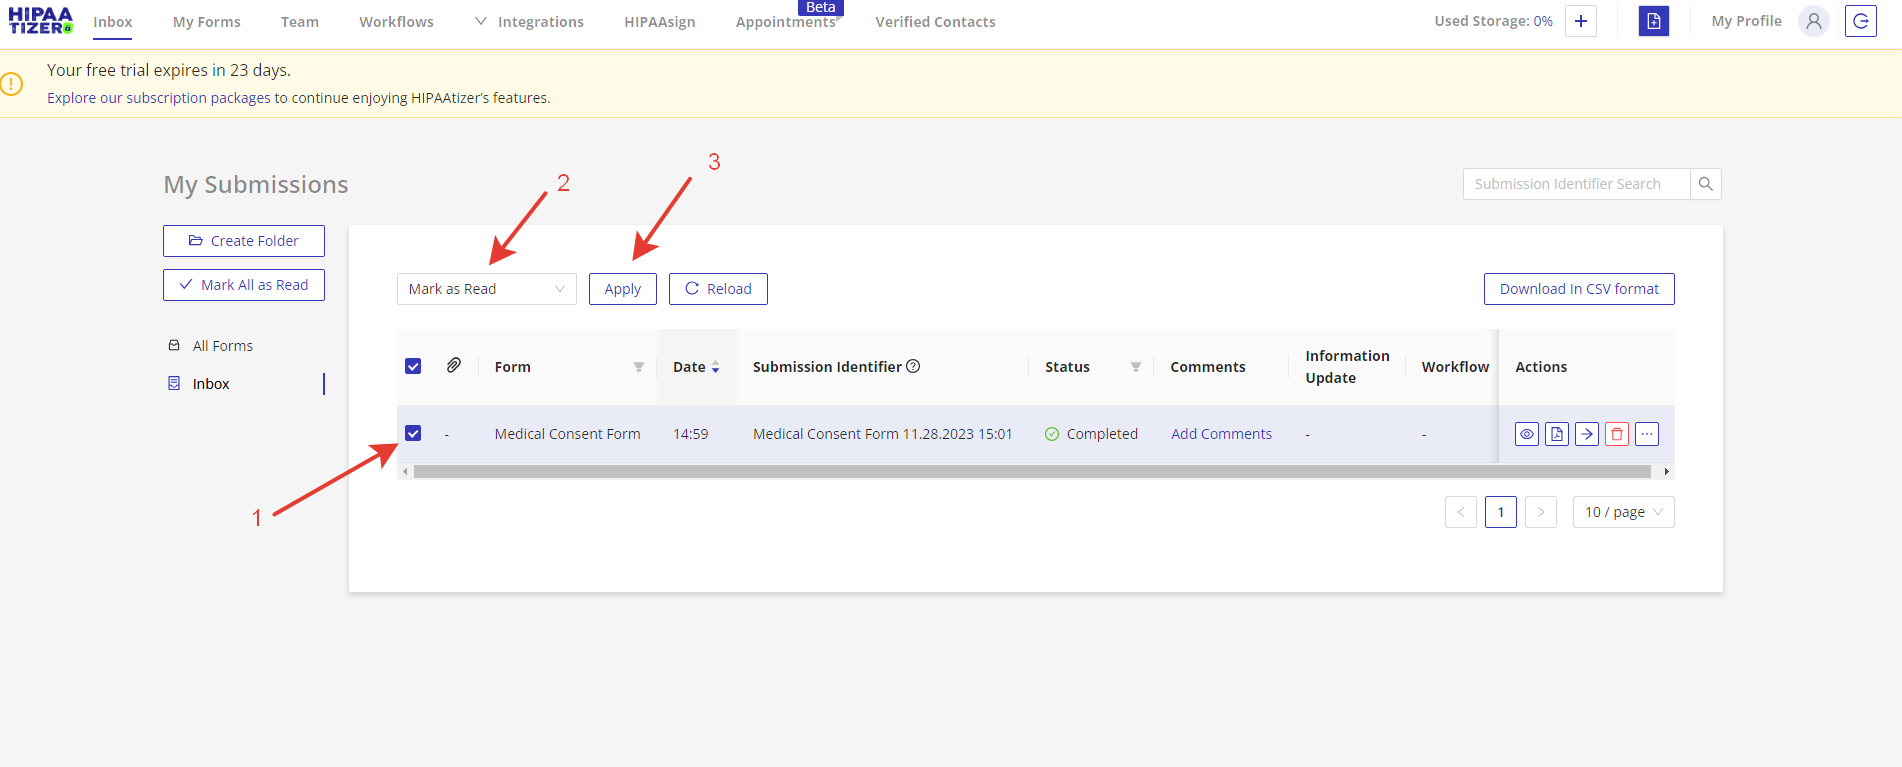
- Mark submission as read: Check the submissions you want to mark as read, then click on the bulk action -> Mark as Read -> Apply. To mark all submissions as read, click on the “Mark all as Read” button on the left navigation.

- Set up the submission identifier for form to easily search for certain submission. See our guide of how to set up the submission identifier.
Attachment Handling
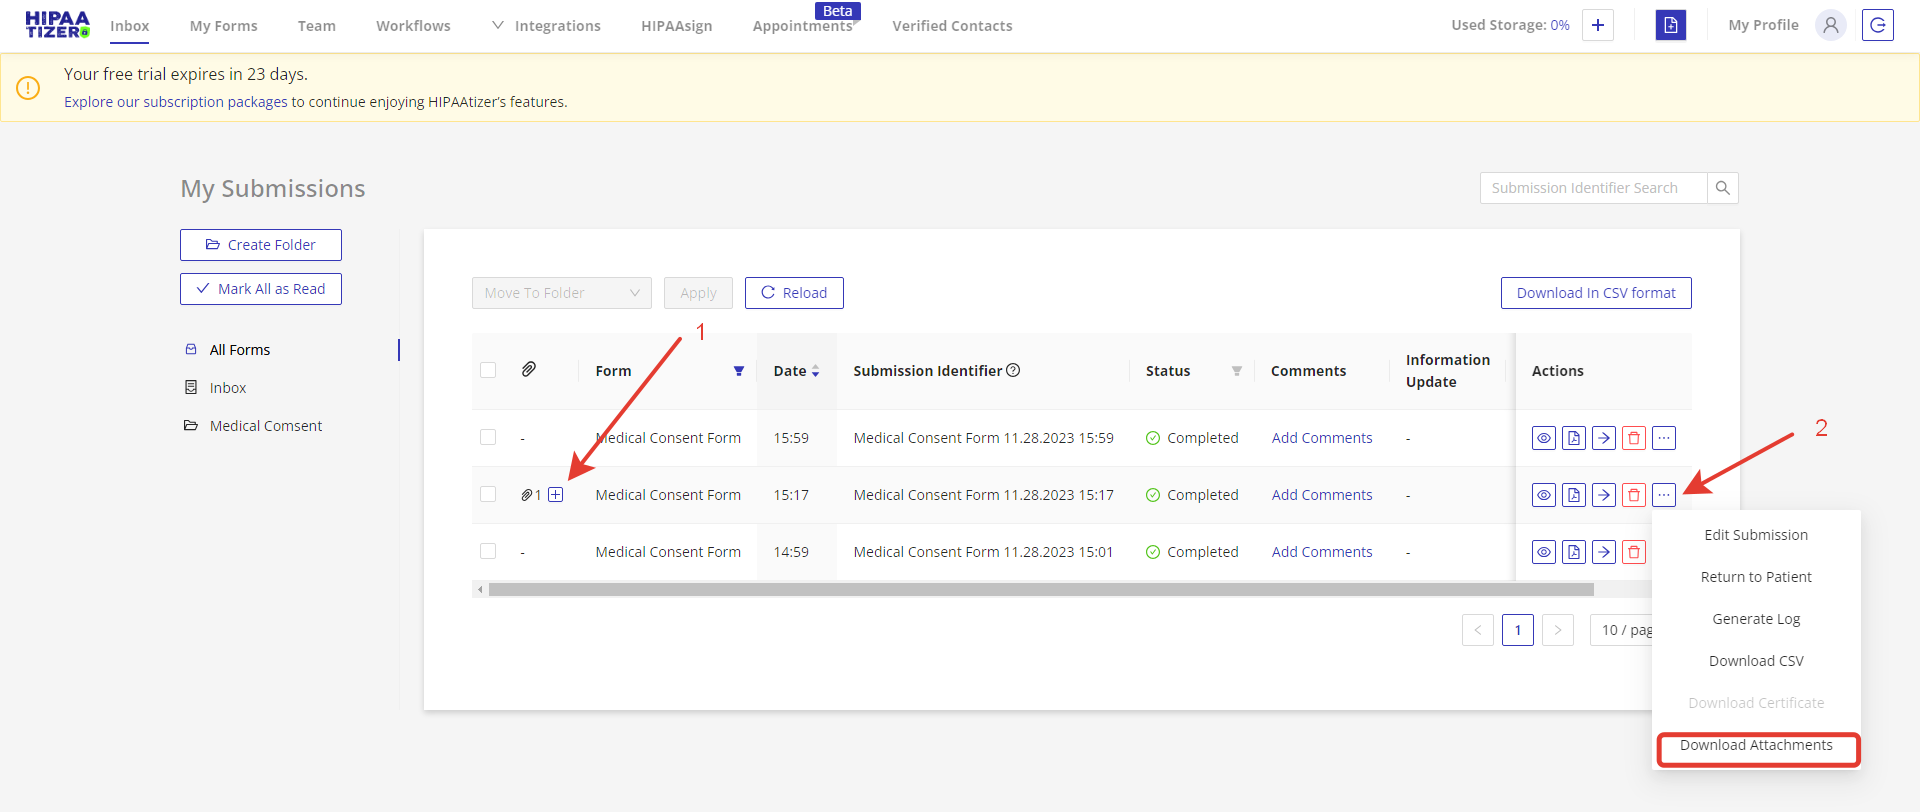
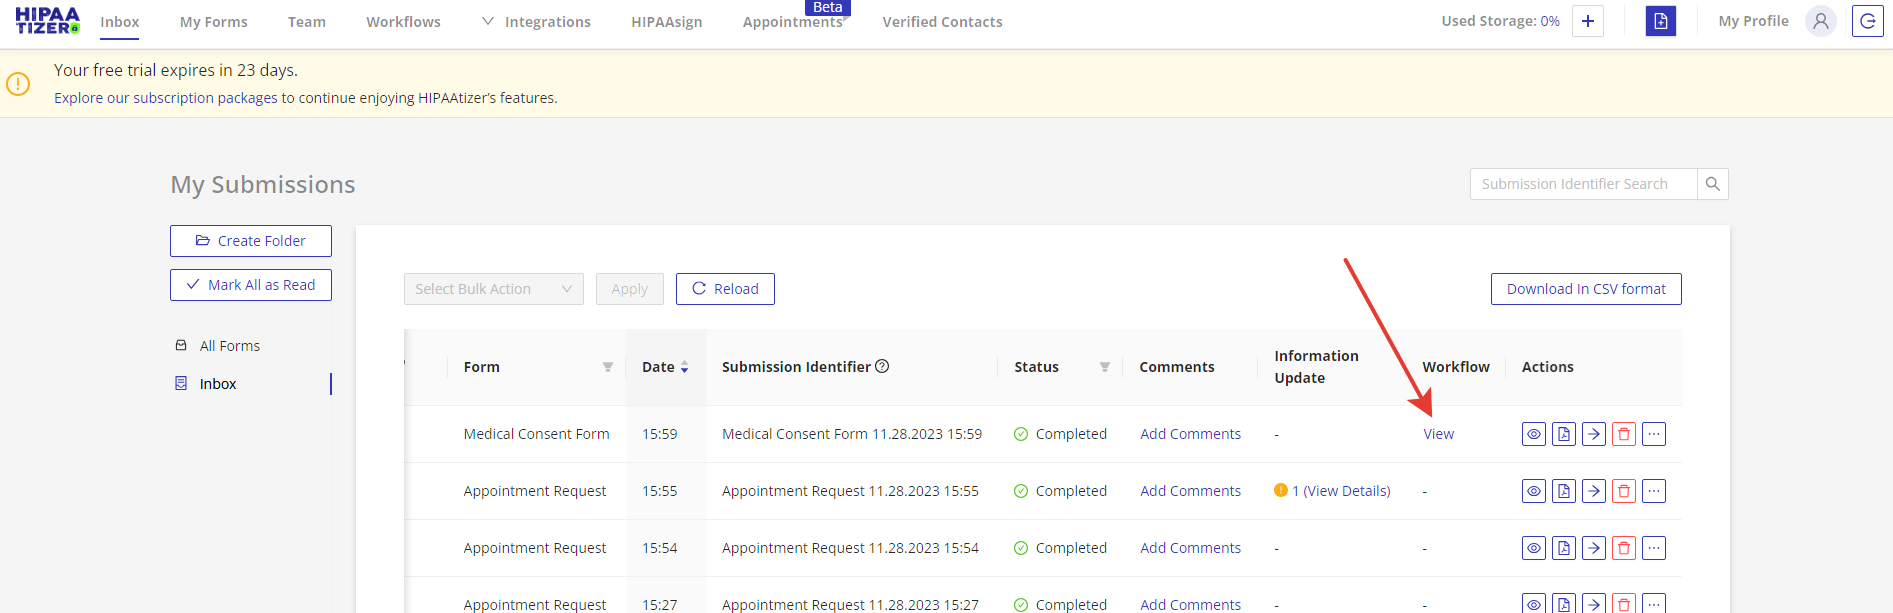
See attachments for submissions: Click on the “Plus” icon on the “Attachments” column to display information about submission attachments (1). To download attachments, click on the “…” icon in the “Actions” column, then select “Download Attachments” option (2).
Filtering Options
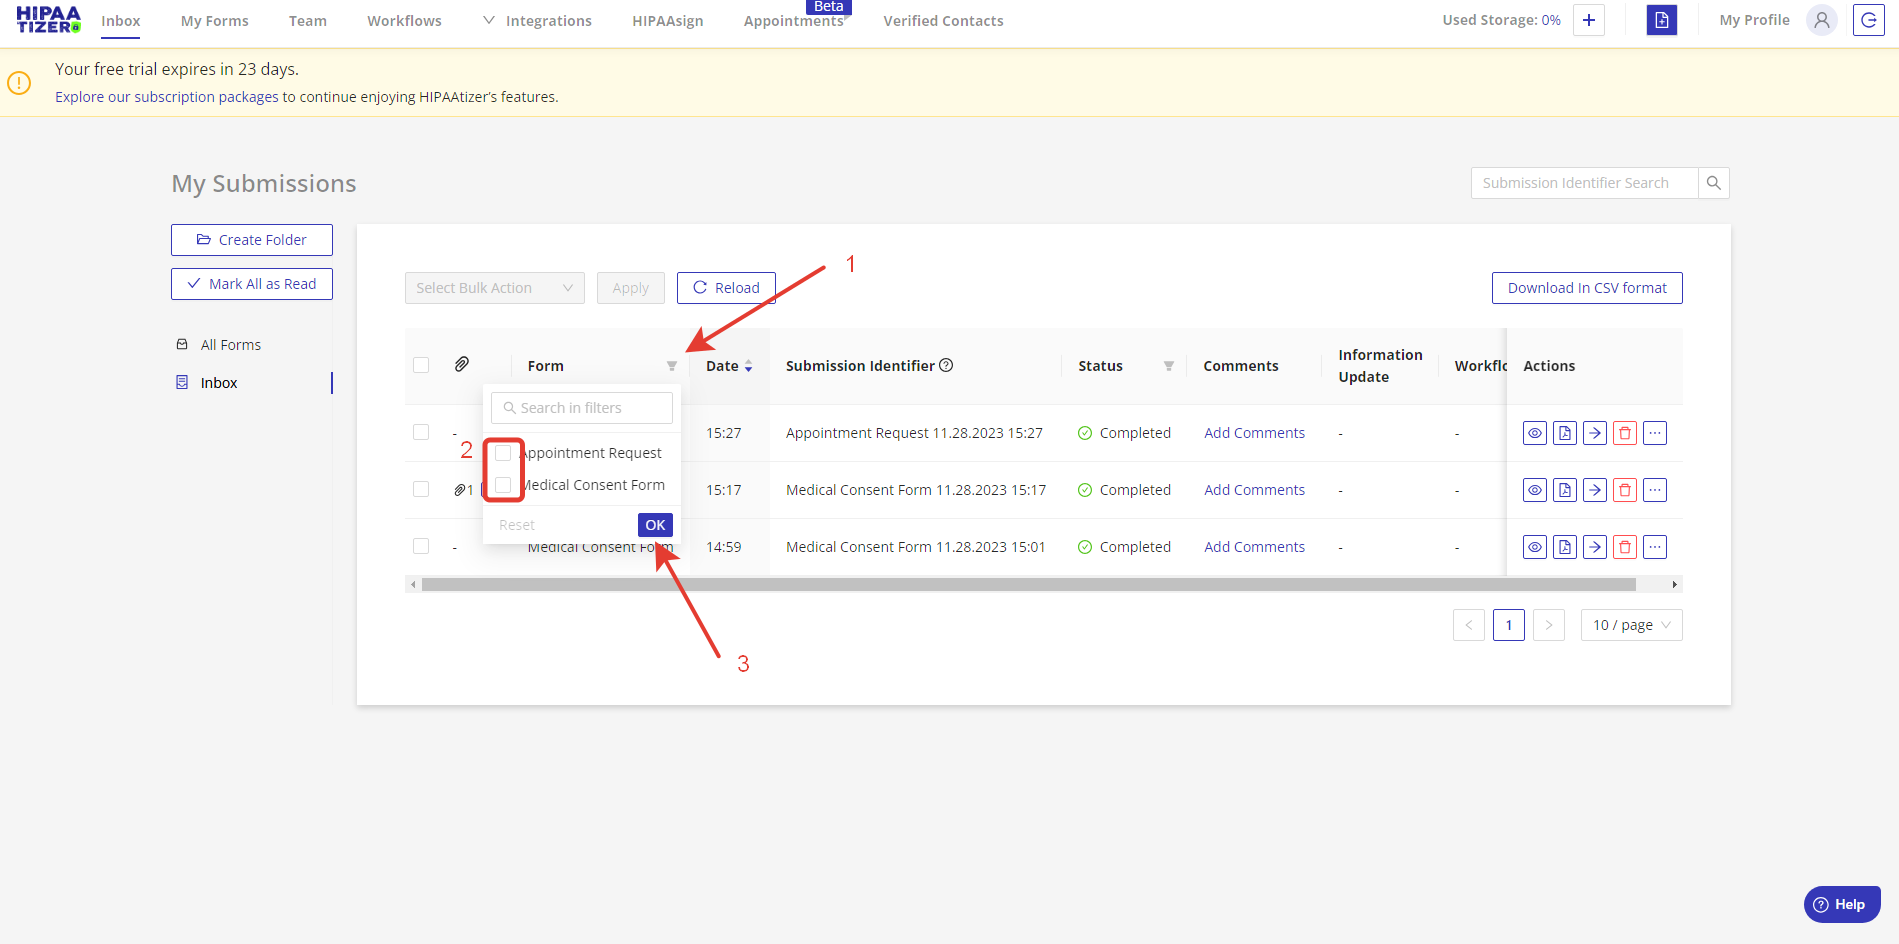
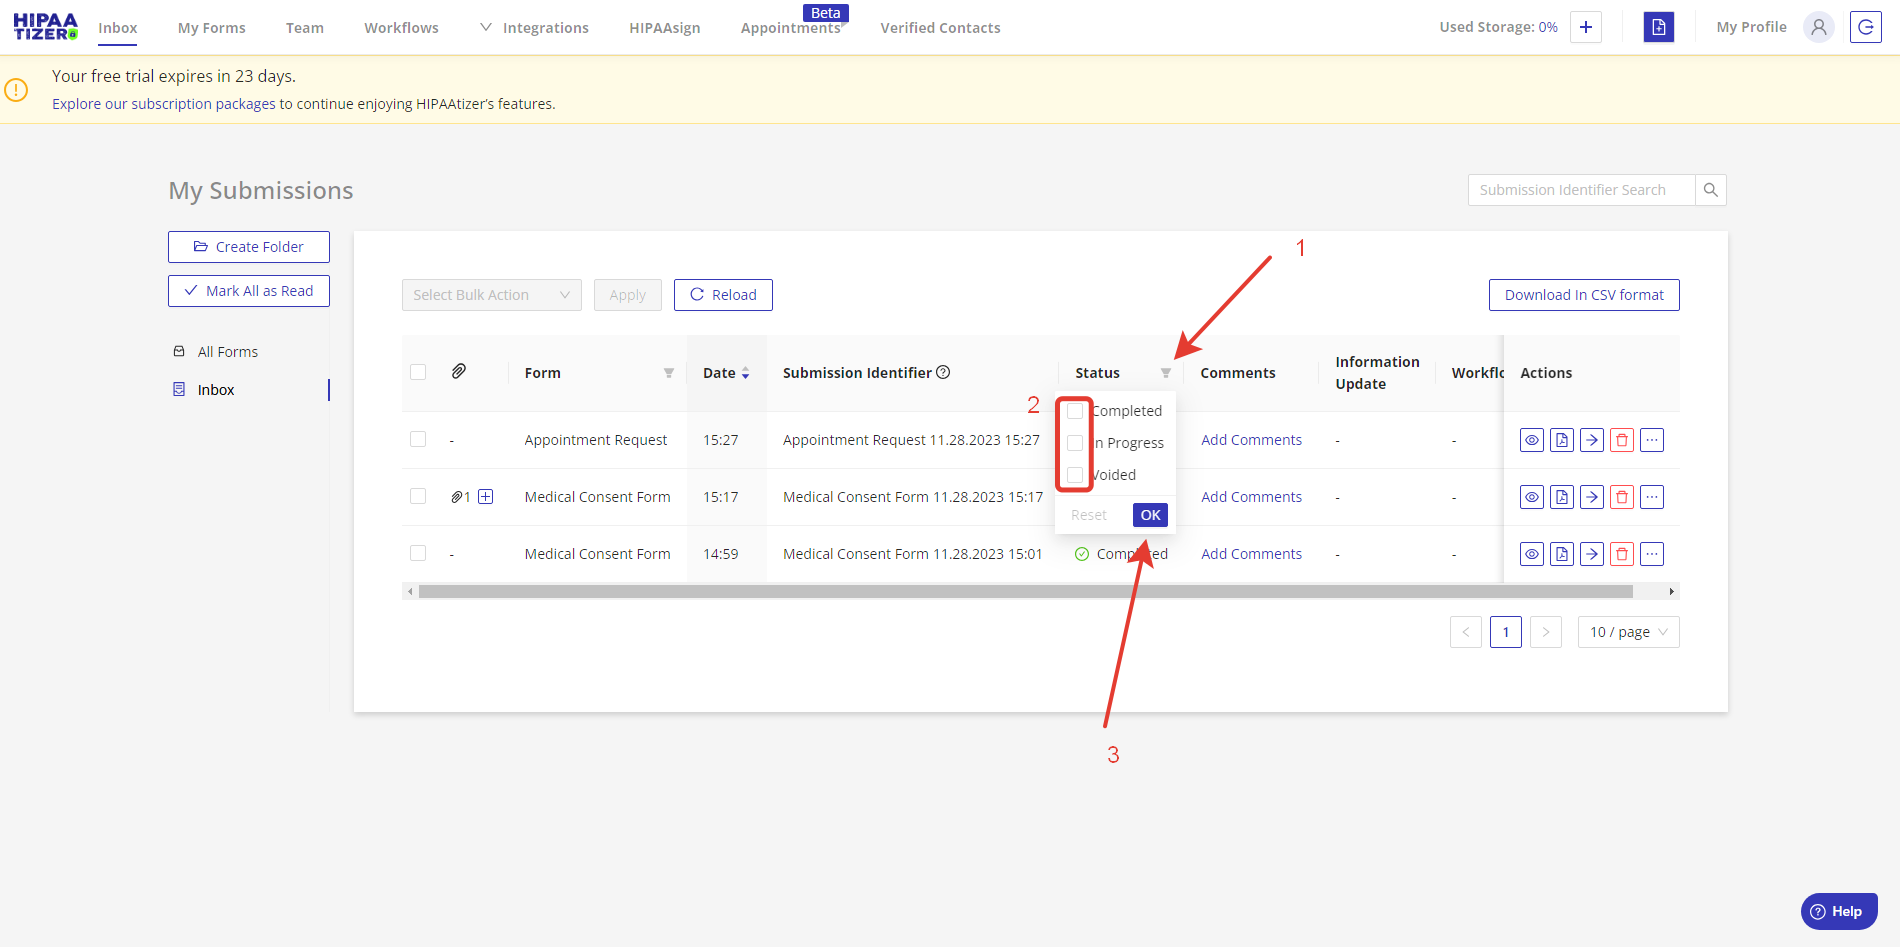
- Filter submissions by form: Click on the “Filter” icon next to the “Form” column and select form(s) whose submissions you want to display. Click on the “OK” button to save the filter settings.
- Filter submissions by status: Click on the “Filter” icon next to the “Status” column and select form status from the following: Completed, In-Progress, or Voided. Click on the “OK” button to save the filter settings.
Information Management
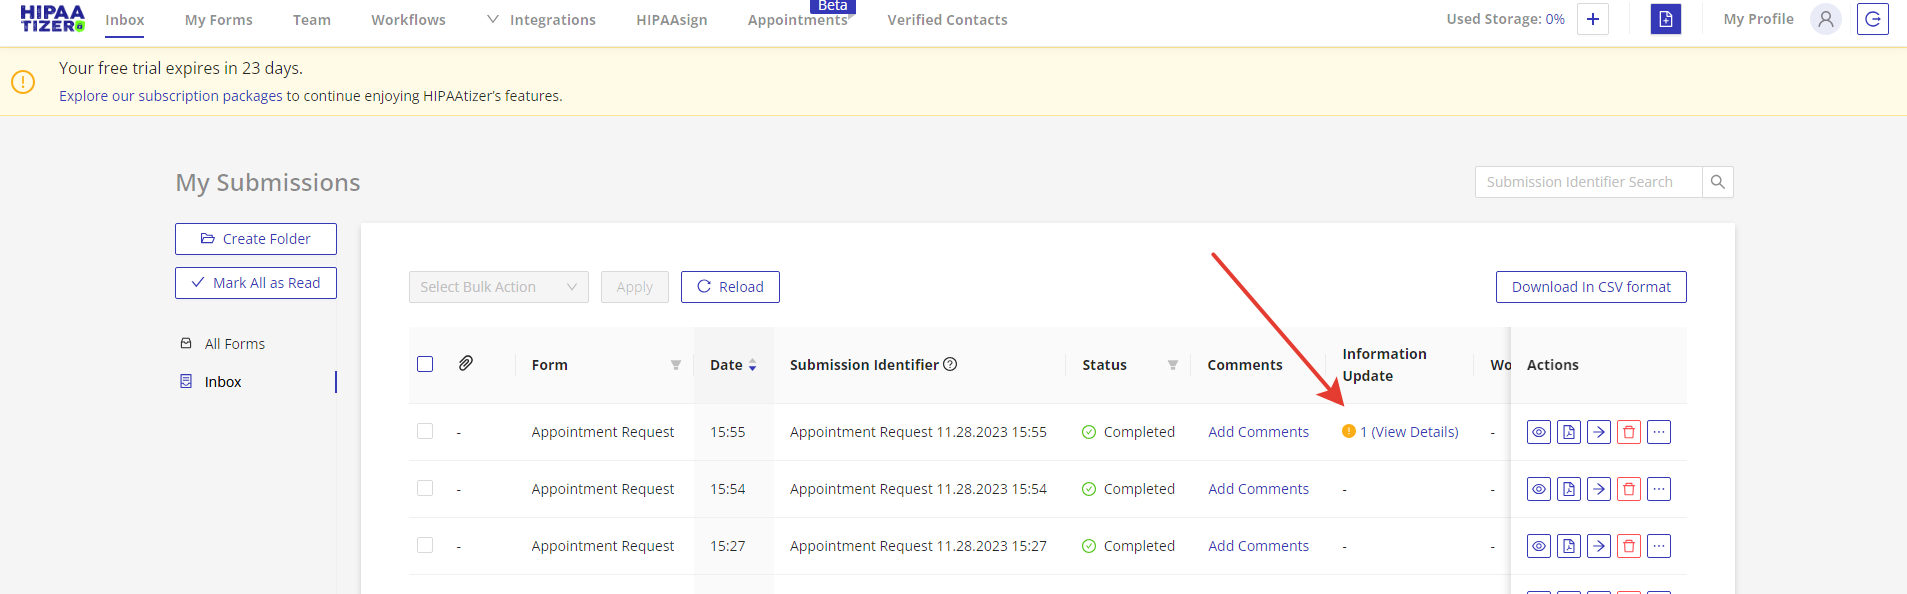
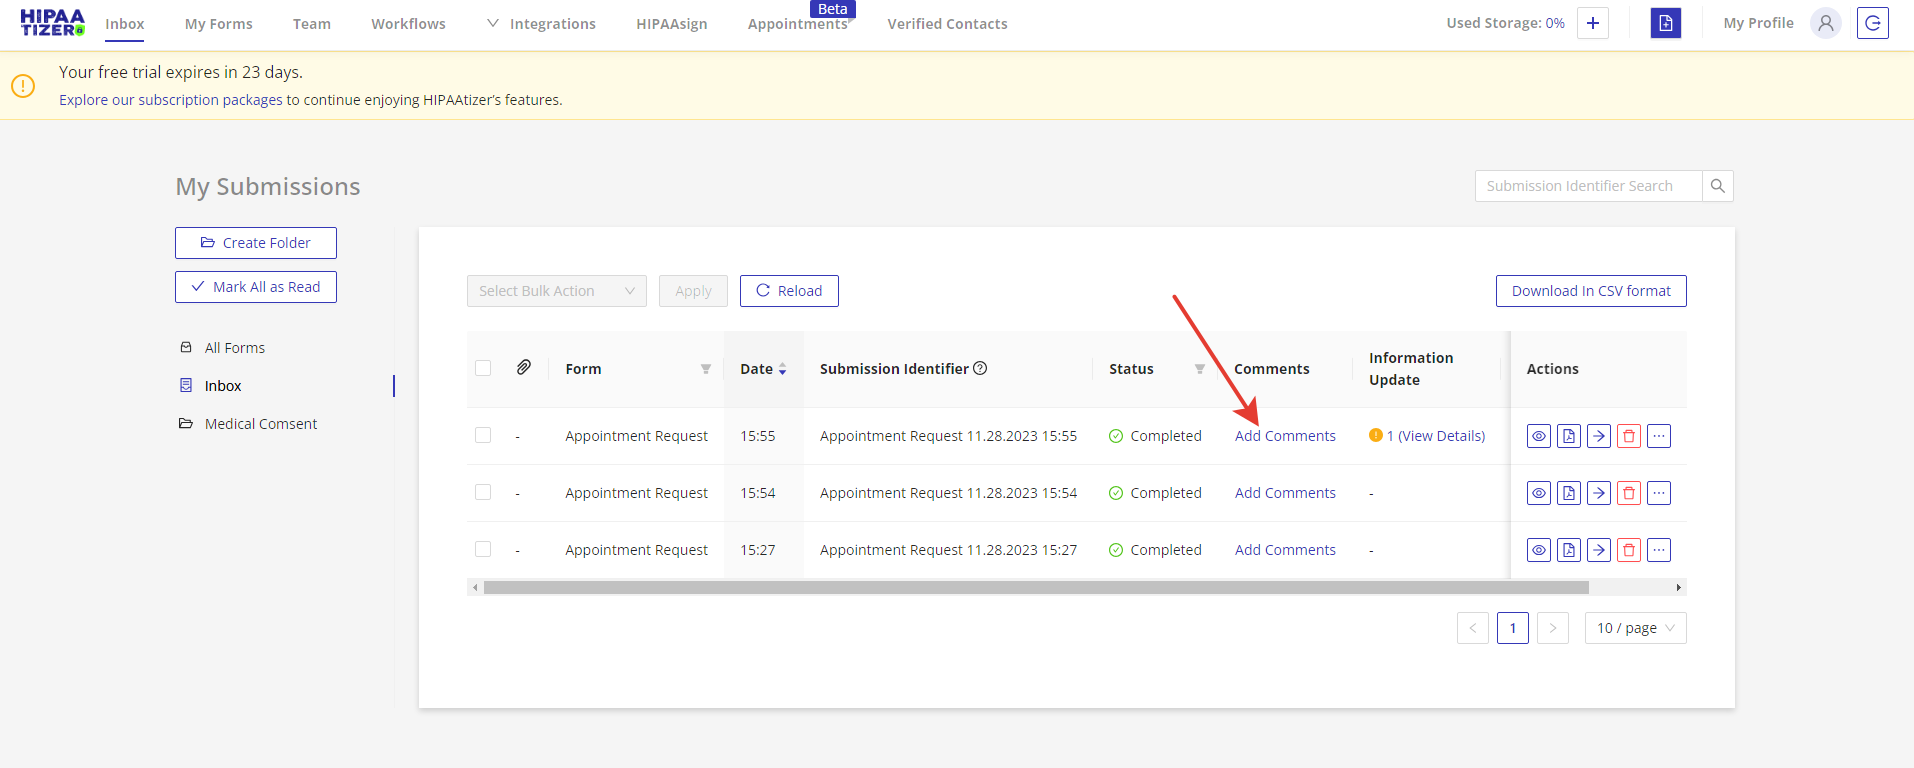
Monitor changes for returned patients: Click on the changes link in the “Information Update” column to see information about changes.
To set up the information update please follow the instruction:
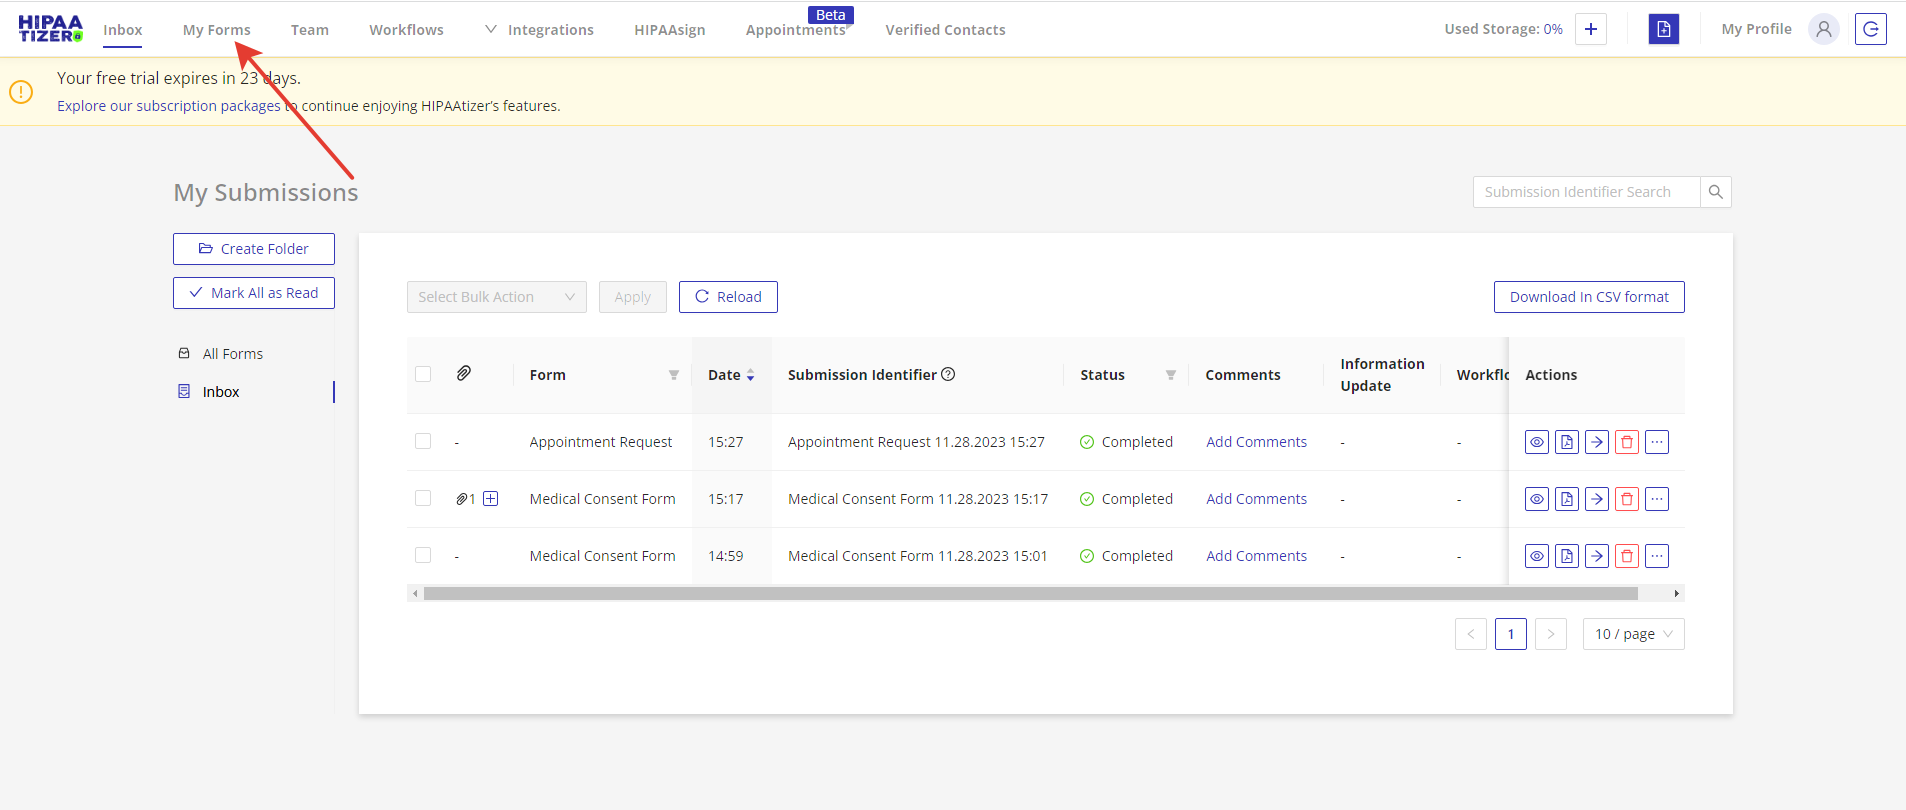
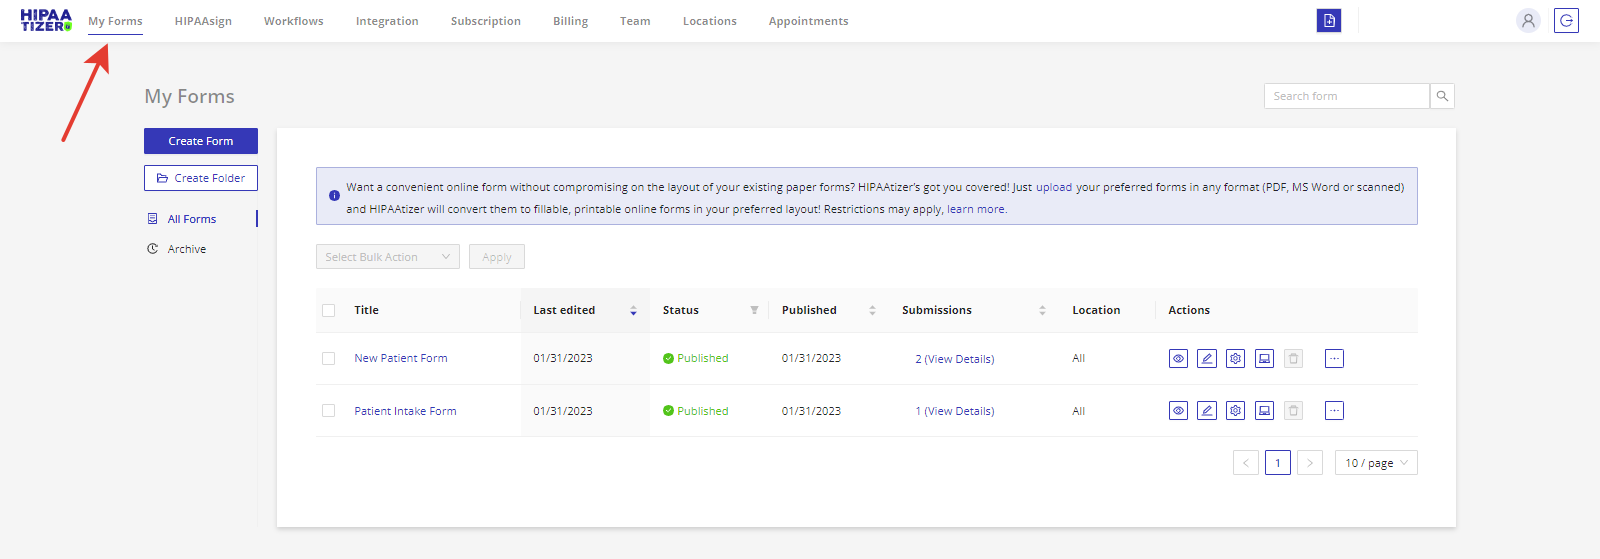
Step 1. Go to My forms page.
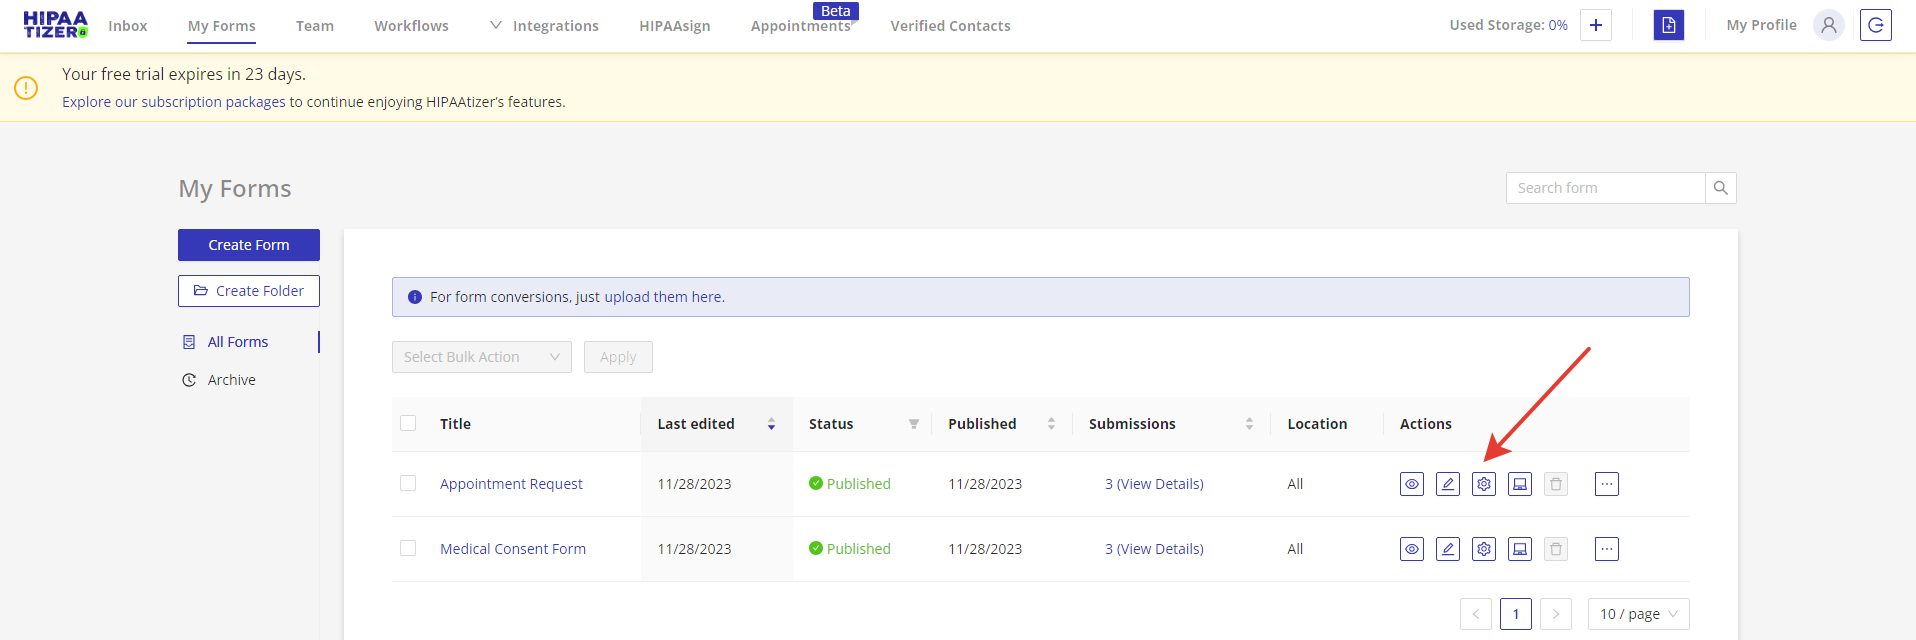
Step 2. Select the form you want to set up the information update and click on the “Form Settings” icon.
Step 3. Go to the “Information Update” tab.
Step 4. Check “Enable Information Update”.
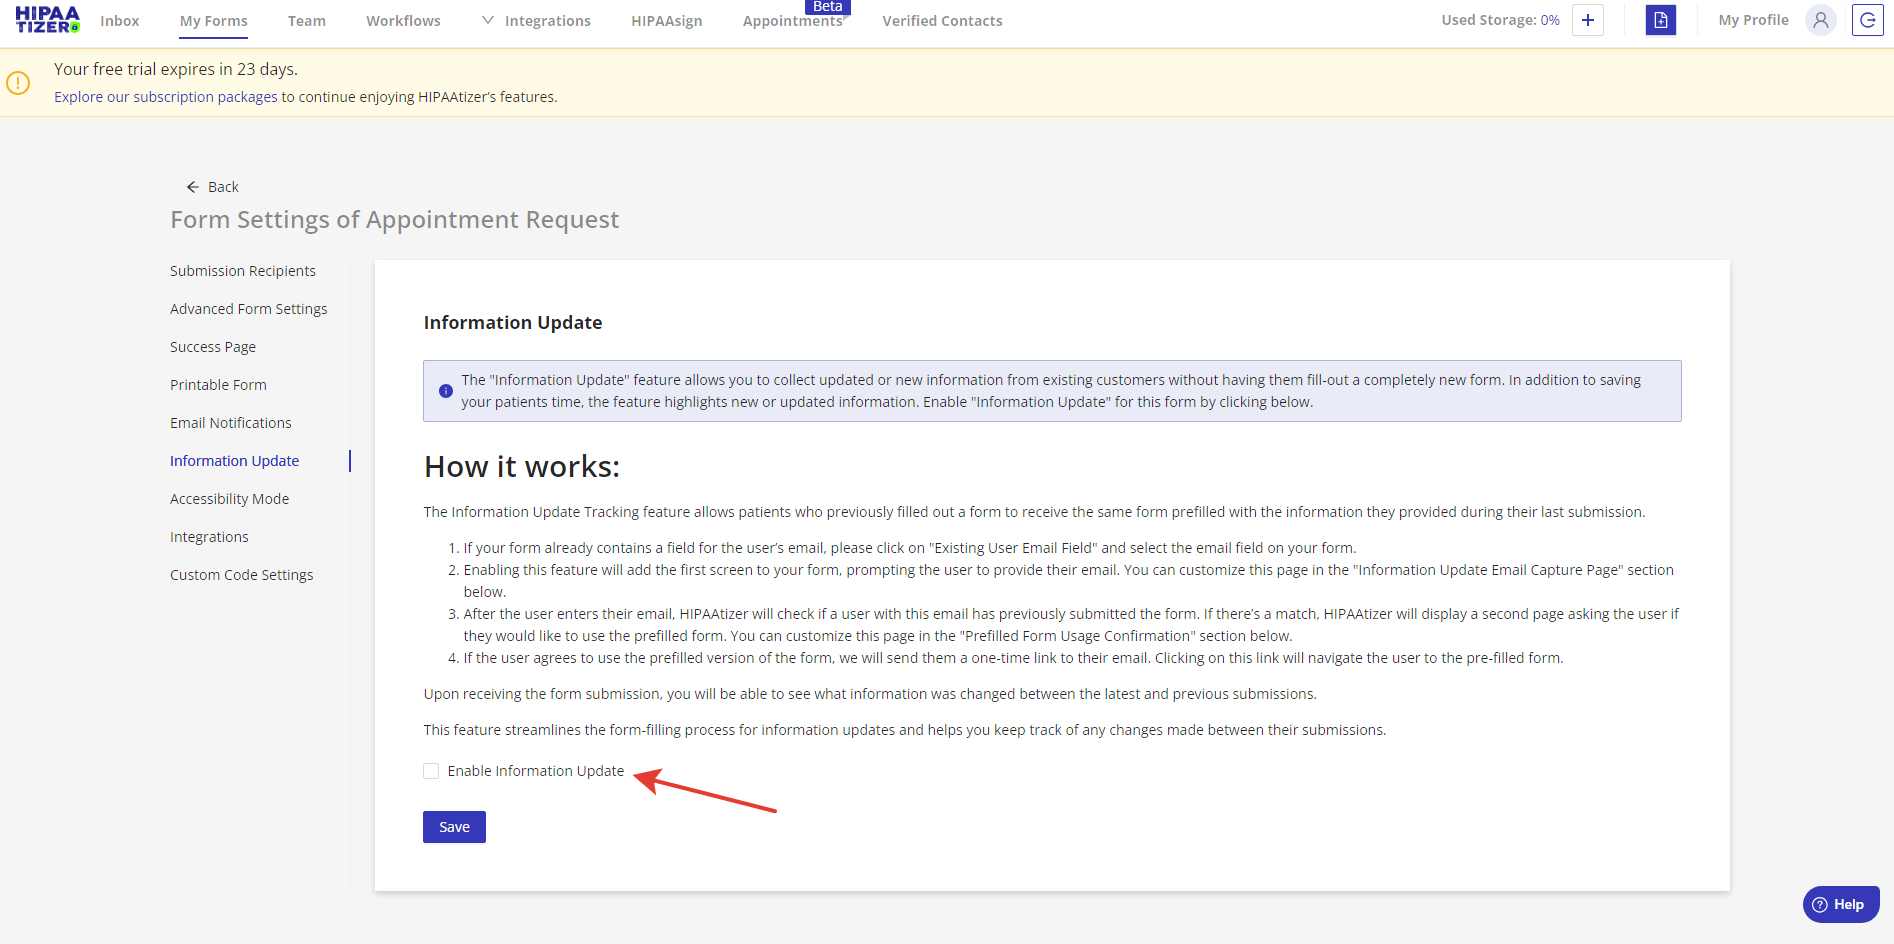
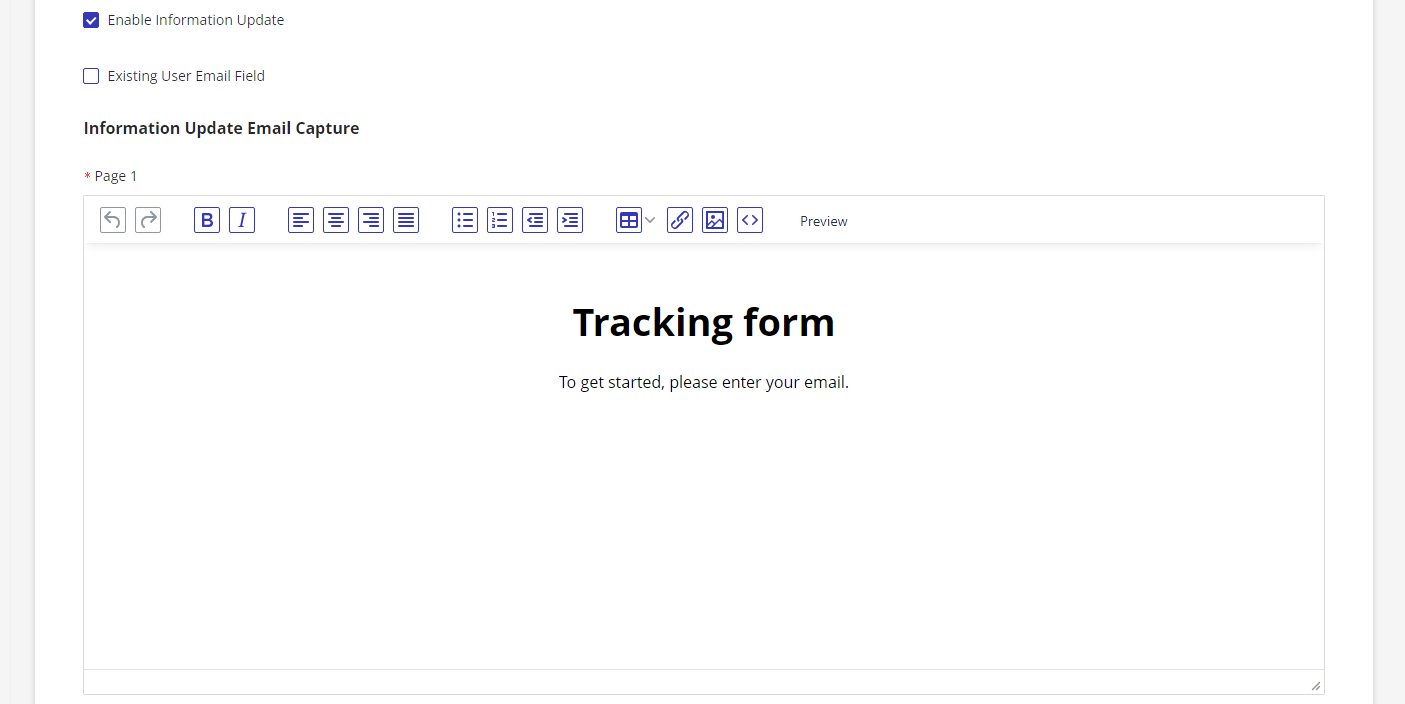
Step 5. Set up the “Information Update Email Capture” page. You can edit the page text, add other text, images, etc. or use our default text. On this page user will be asked to enter their email address to help us identify them. If your form already has the email field you can reuse the email that user enter on this page further in your form. To do this, check “Existing User Email Field” and select the email from form fields.
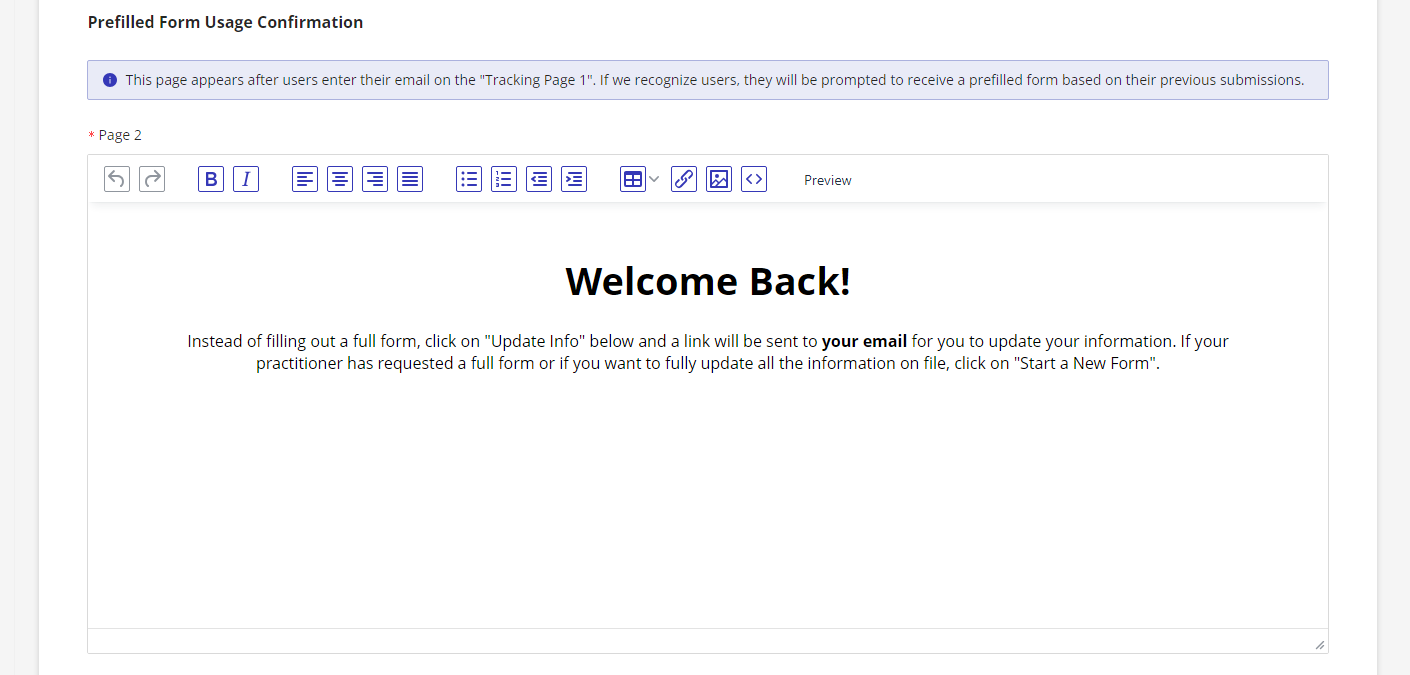
Step 6. Set up the “Prefilled Form Usage Confirmation” page.This page will be shown user if we recognize them as “returned patient” by email. You can edit the page text, add other text, images, etc. or use our default text.
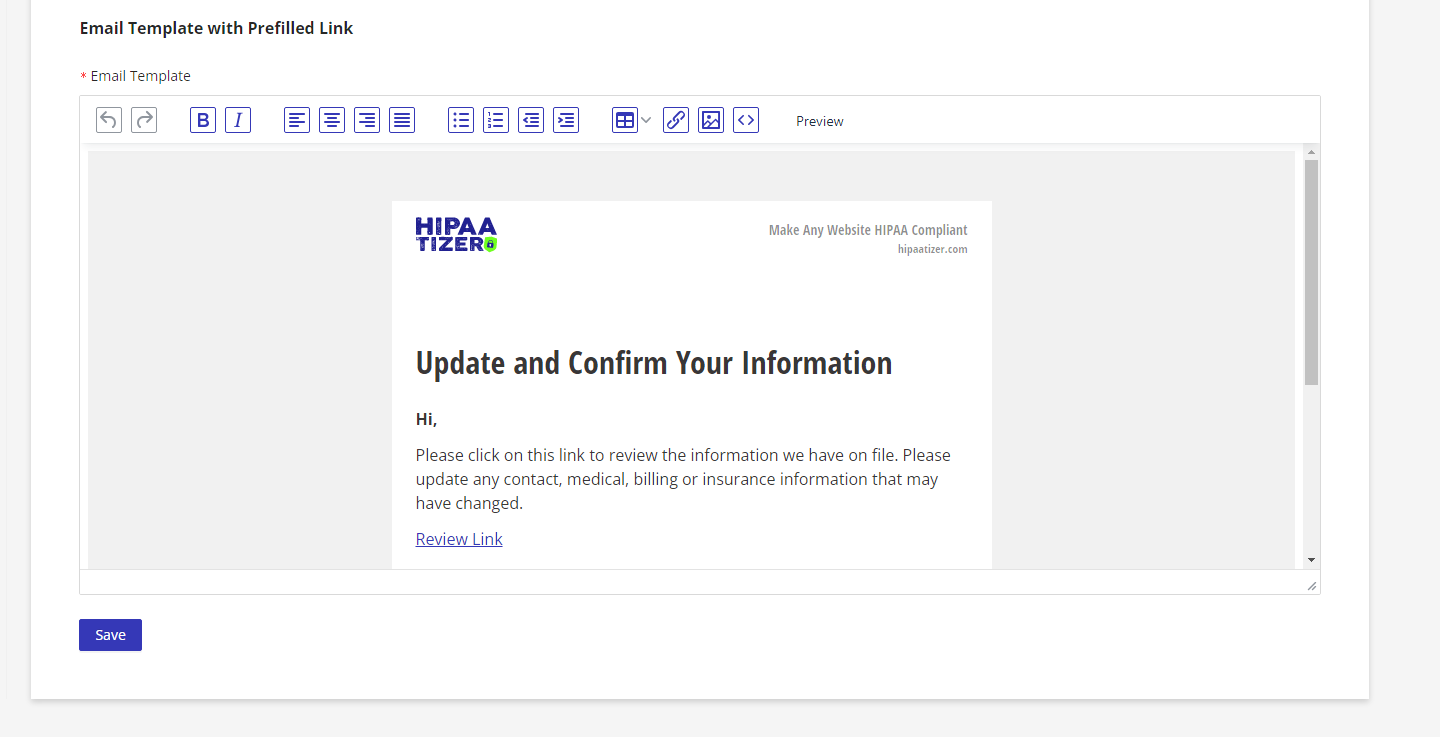
Step 7. Set up the “Email Template with Prefilled Link”. This email includes the link to the prefilled form with “returned patient” data. The email will be sent to the user which we recognize as “returned patient” and if they select “Update Info” option on the “Prefilled Form Usage Confirmation” page.
Step 8. Save your changes.
Workflow Management
See information about forms in a workflow: If your form is a part of the workflow, you can see the workflow progress information by clicking on the “View” link in the “Workflow” column.
Viewing and Downloading Options
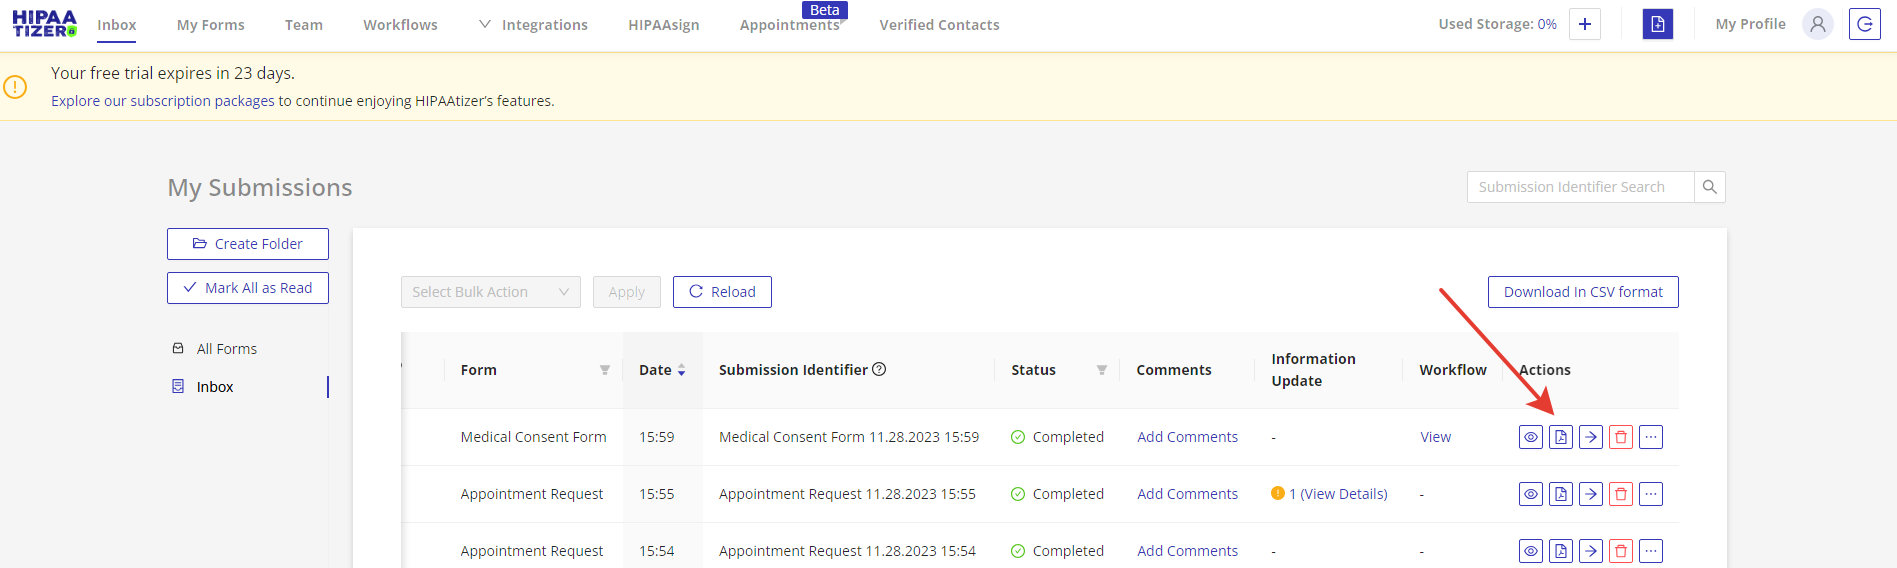
- View submission in the web view: Click on the “View” icon in the “Actions” column to see the web version of the submission.
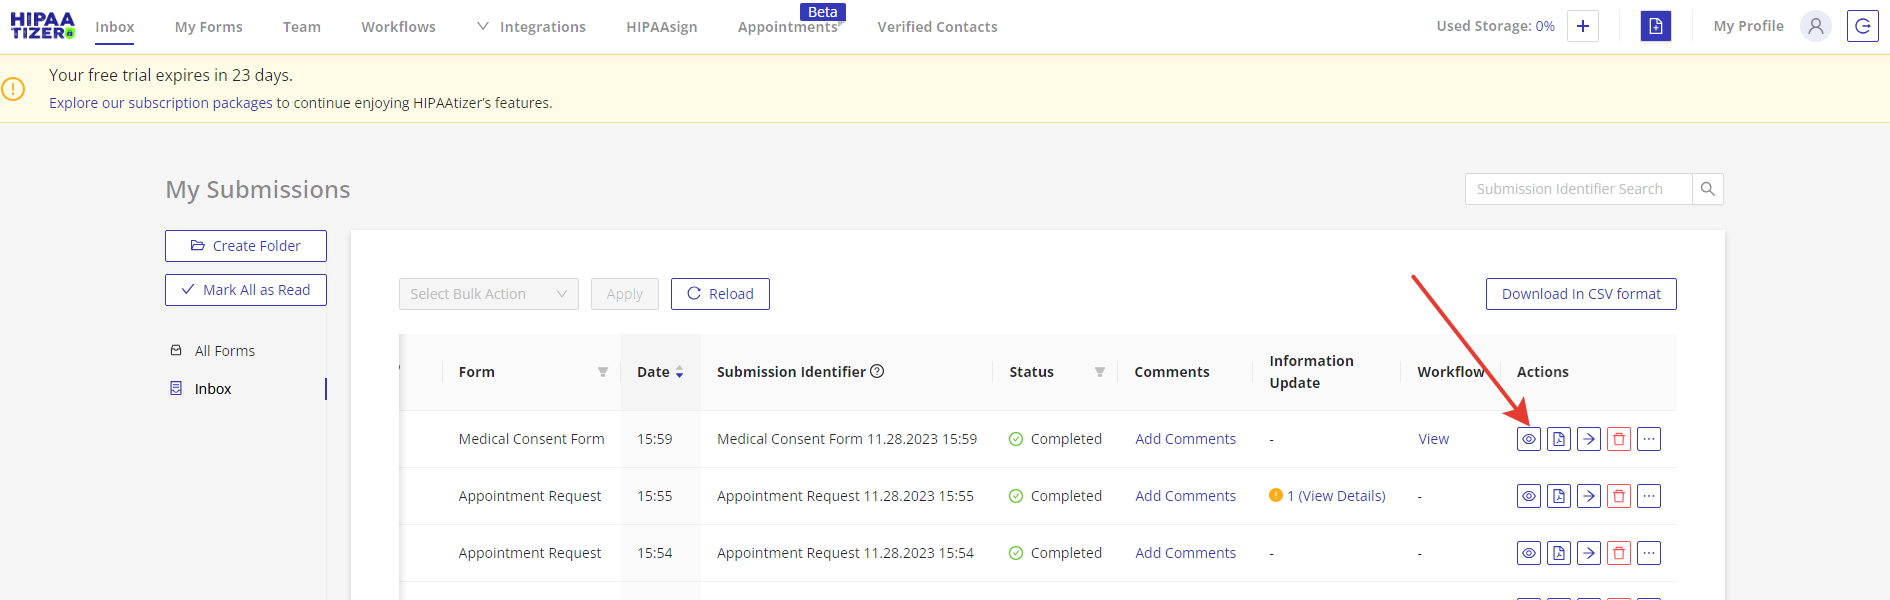
- View a printable version of the submission: Click on the “Download PDF” icon in the “Actions” column to download a printable form submission.
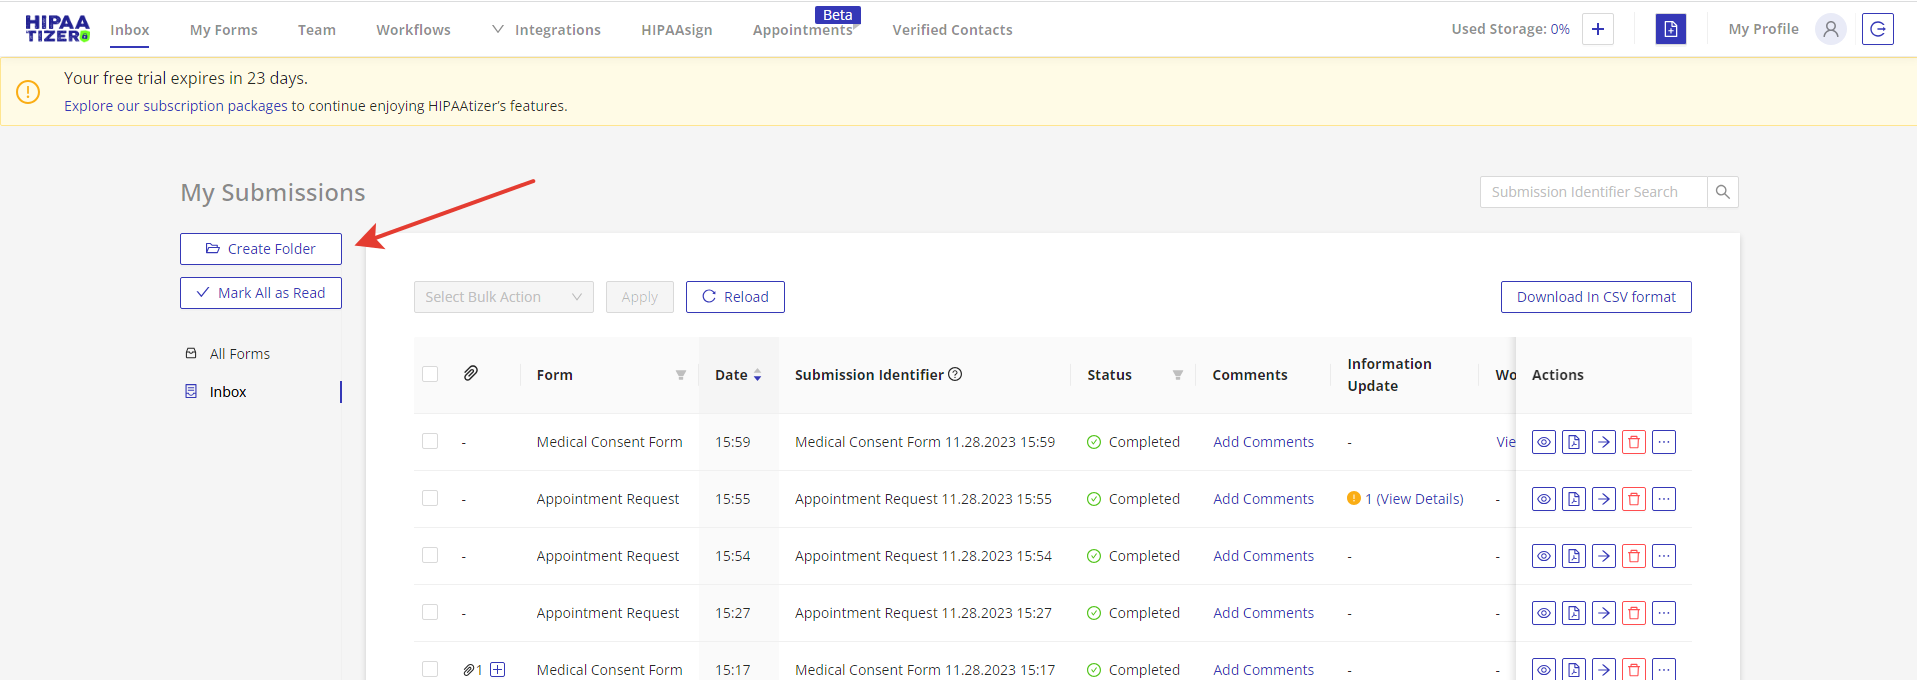
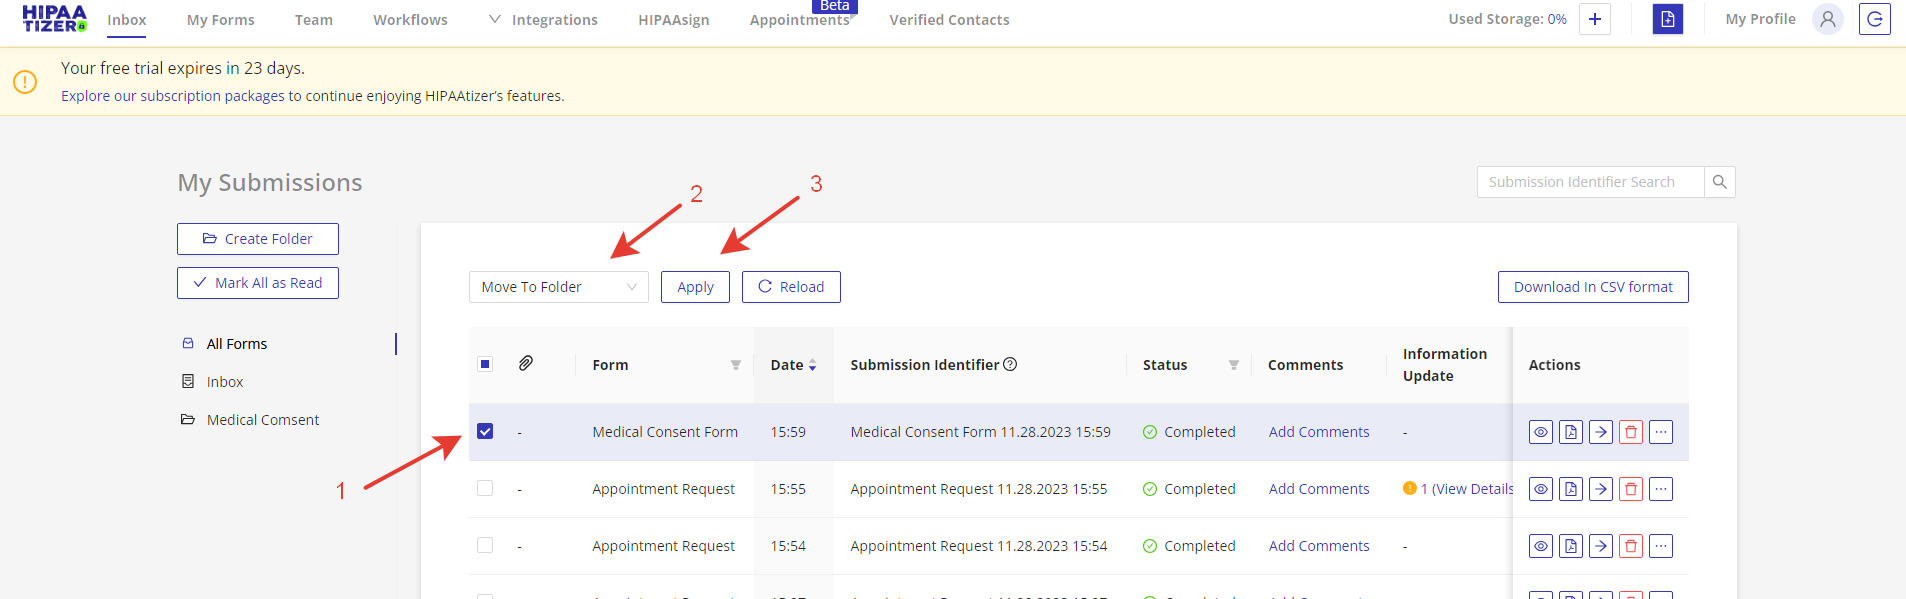
- Group submissions by folders: Click on the “Create Folder” button on the left navigation to create folders. To move submissions to any folder, click on the “Move to Folder” icon in the “Actions” column, then select the appropriate folder, or select several forms by checking them with checkboxes, then click on the bulk action -> Move to Folder -> Apply.
Other Actions
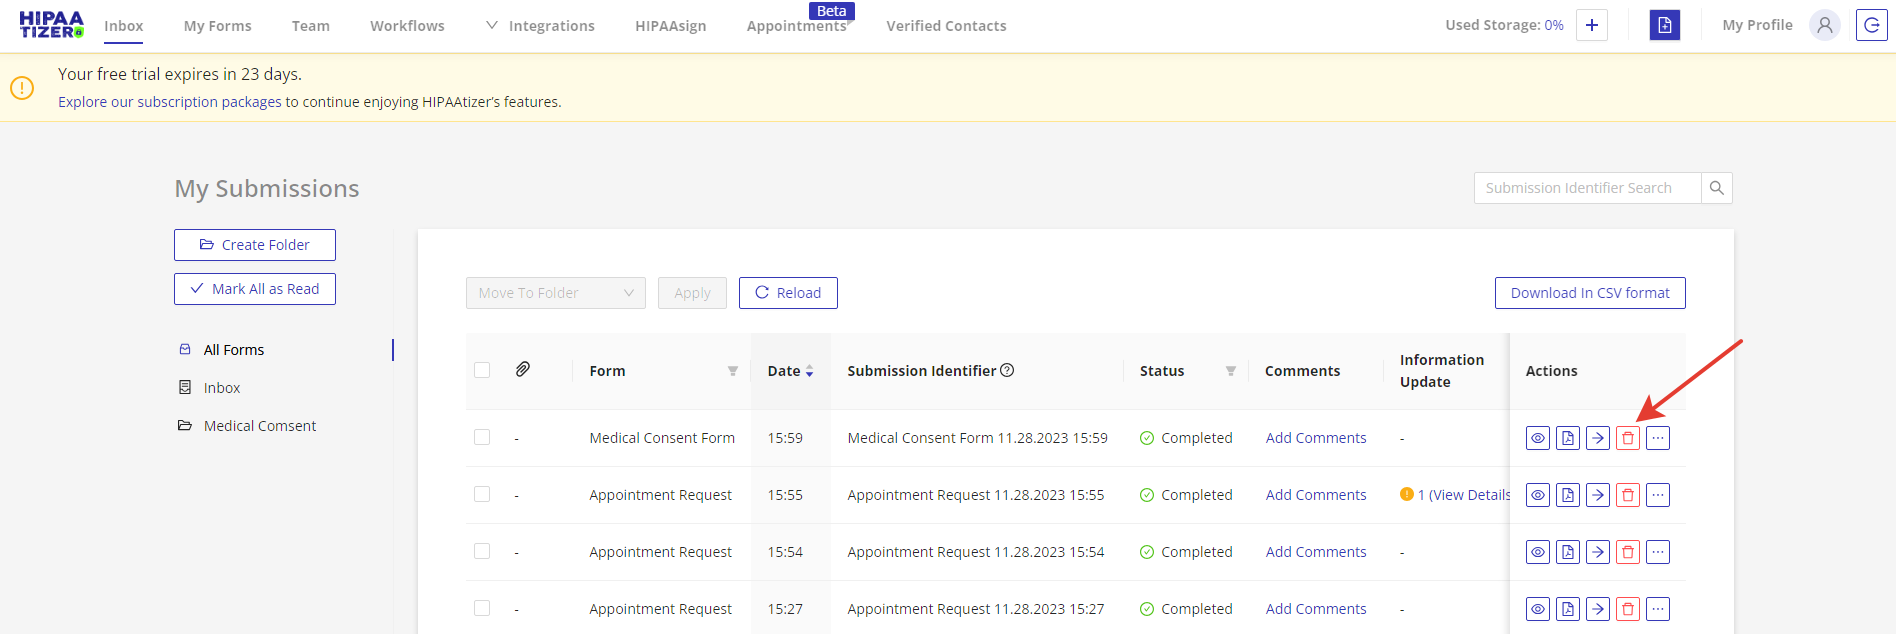
- Delete submissions: To delete submissions, click on the “Delete” icon in the “Actions” column.
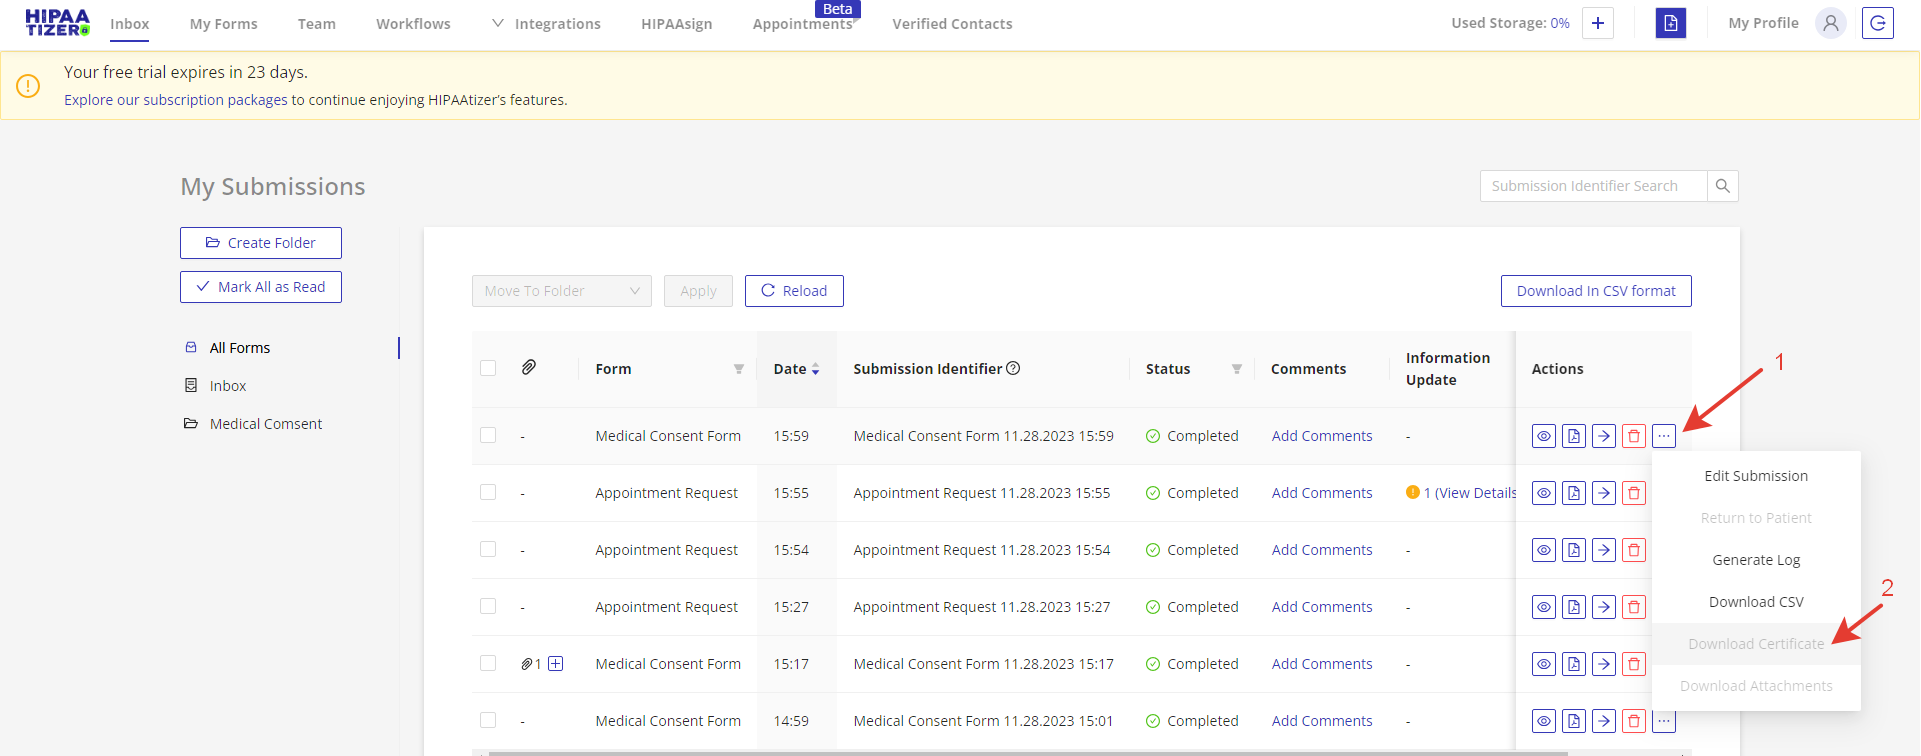
- Edit submission: If you need to complete any internal use fields or edit any information in the submission, click on the “…” icon in the “Actions” column, then select “Edit Submission” option.
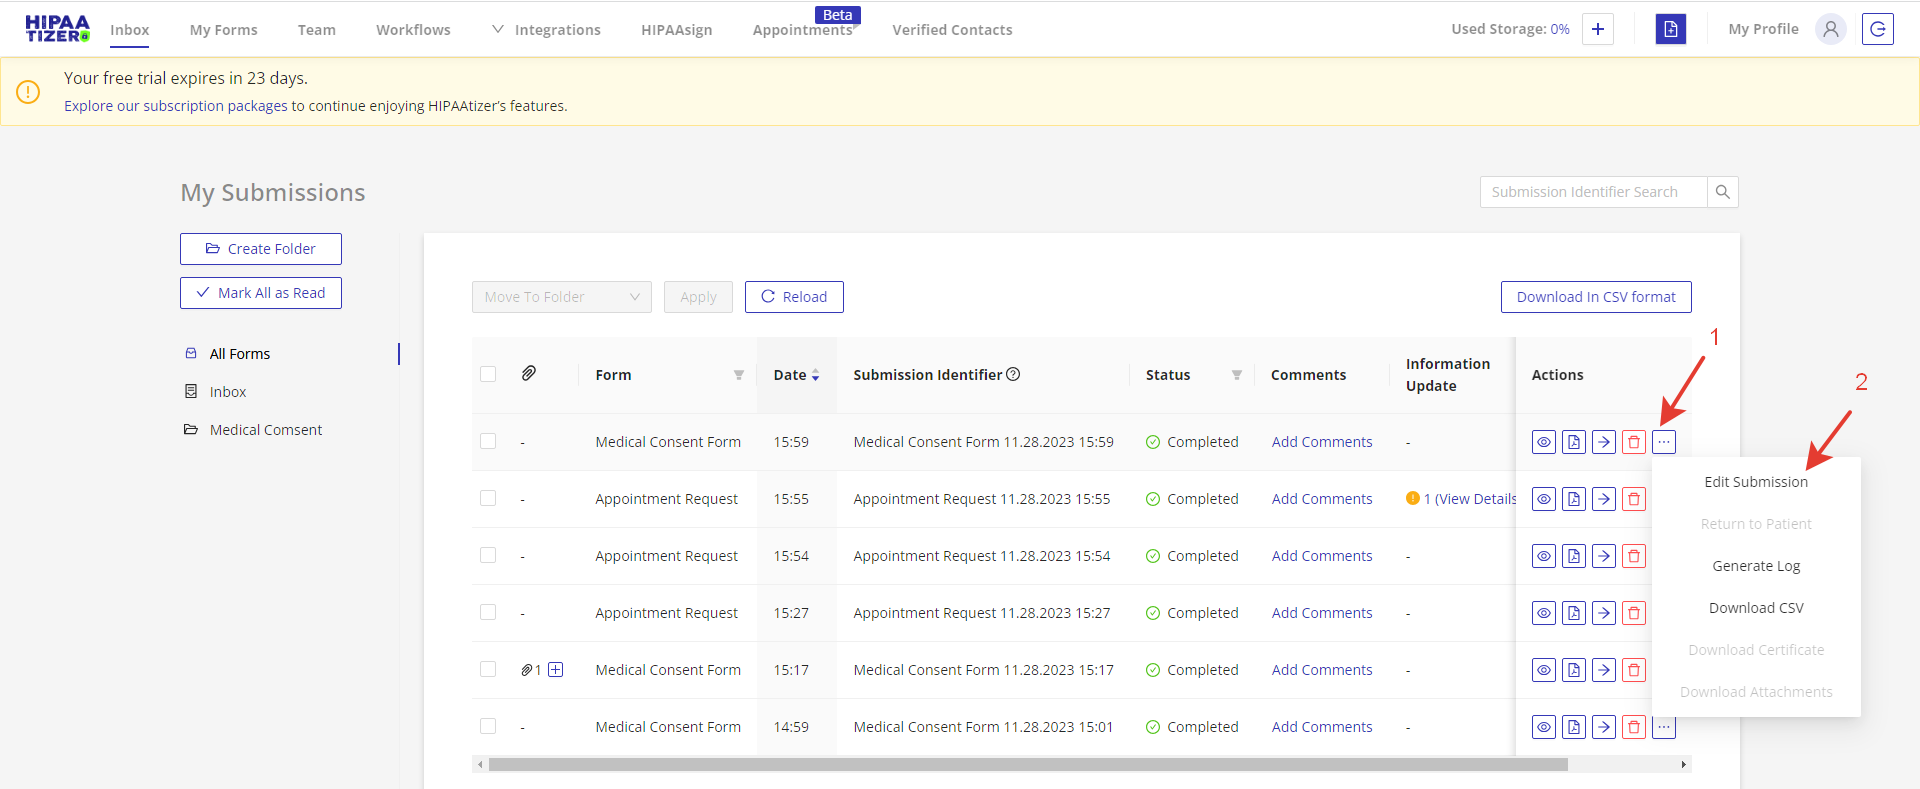
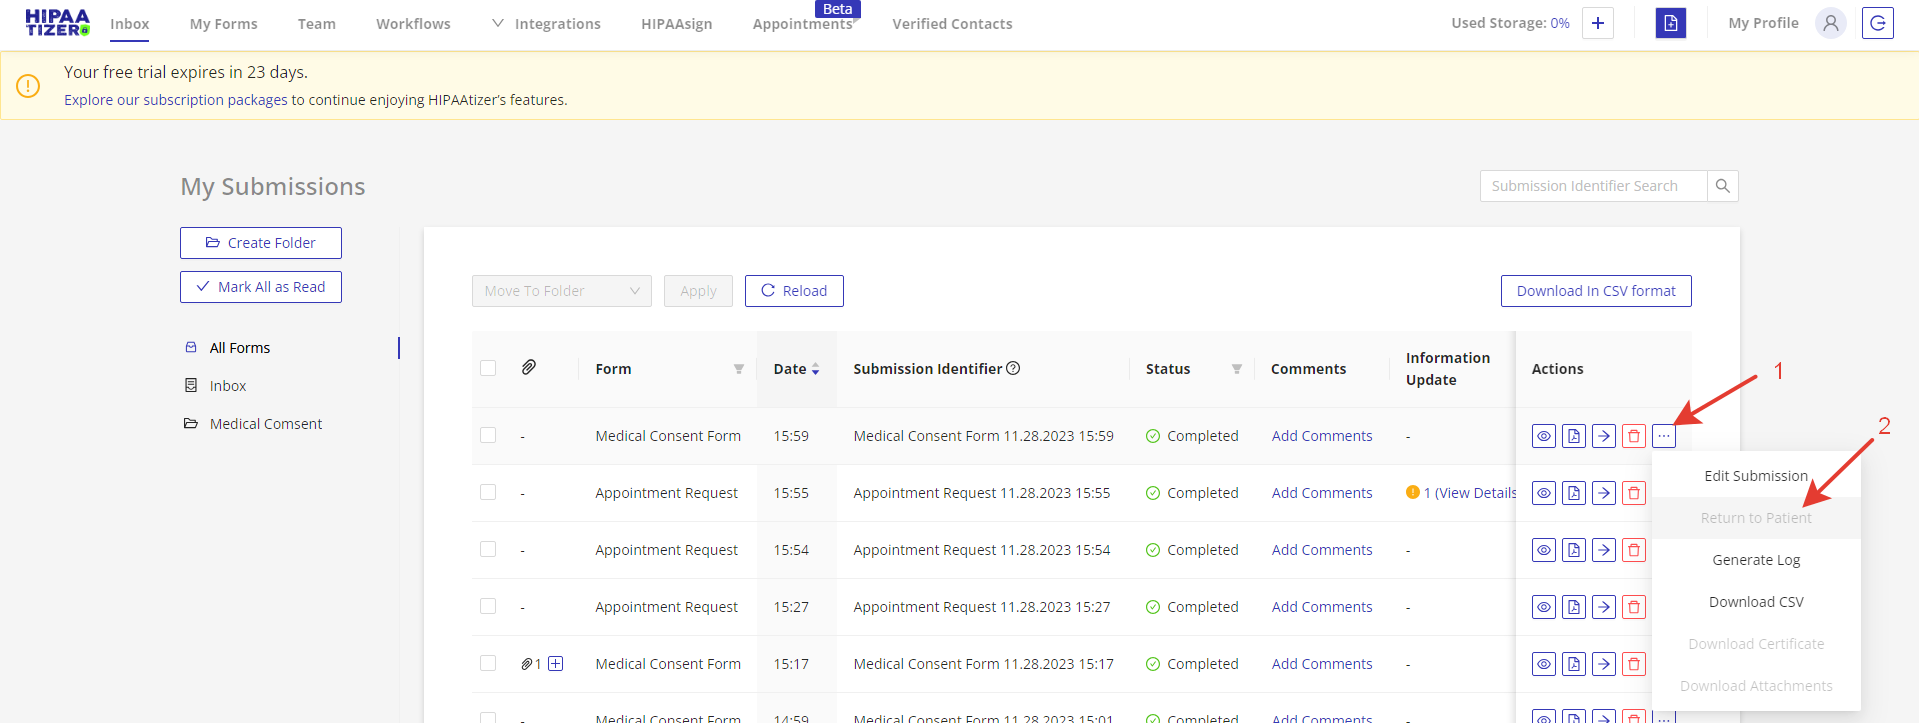
- Return the submission to the patient: If you want to send back the submission to your patients for additional information filling, click on the “…” icon in the “Actions” column, then select “Return to Patient” option.
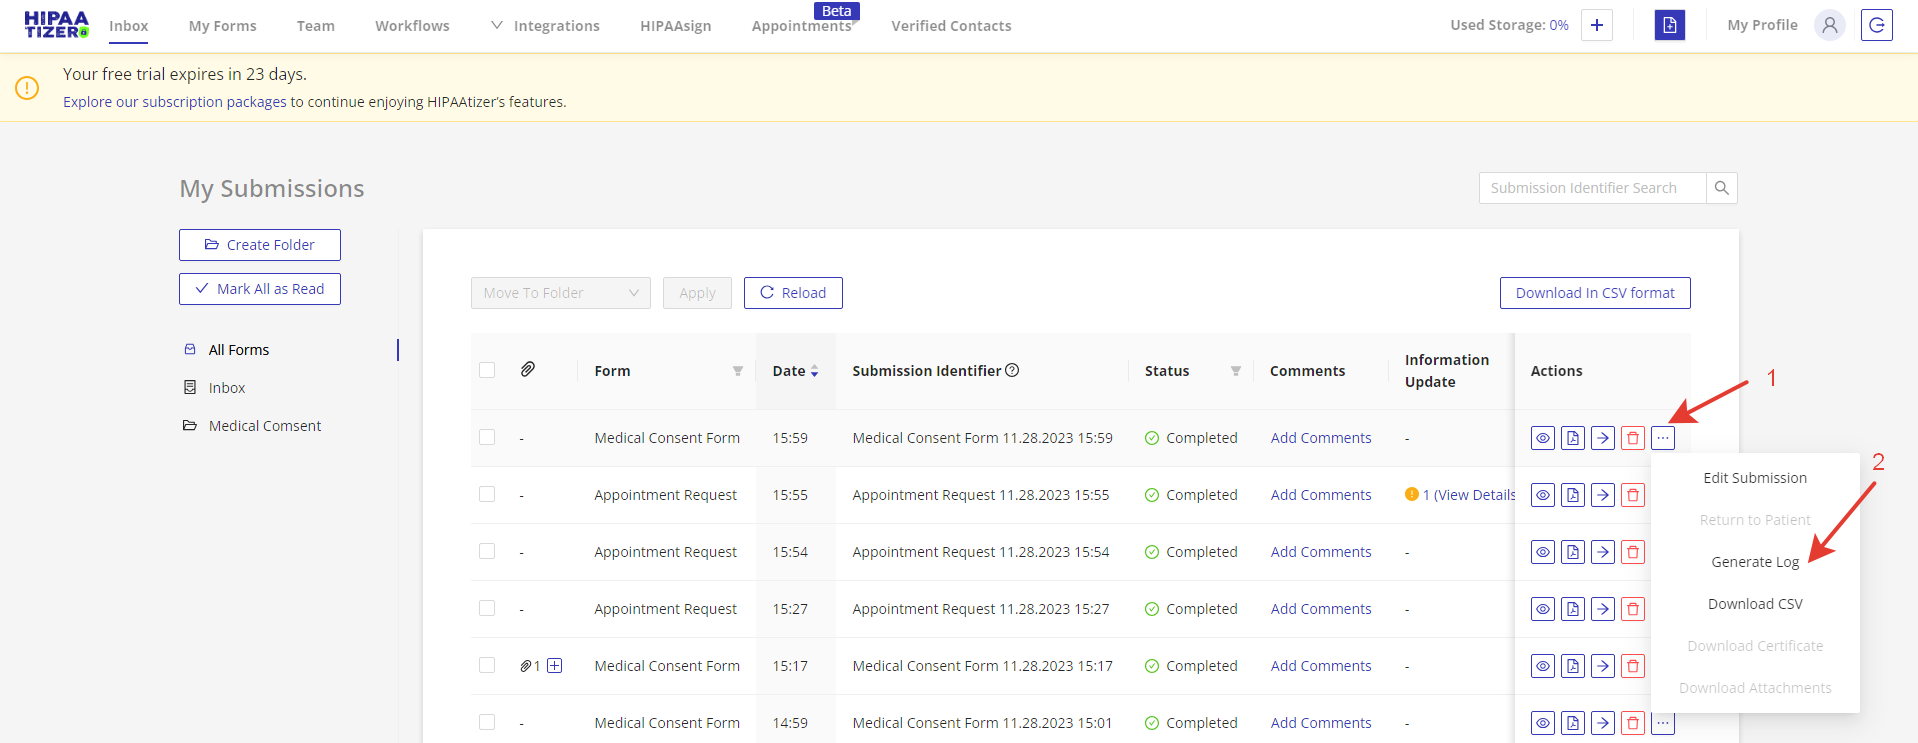
- Generate log: If your practice has several HIPAAtizer accounts with Assistant, Security Officer roles, you can generate a log with information about who accessed this submission. To do so, click on the “…” icon in the “Actions” column, then select “Generate Log” option.
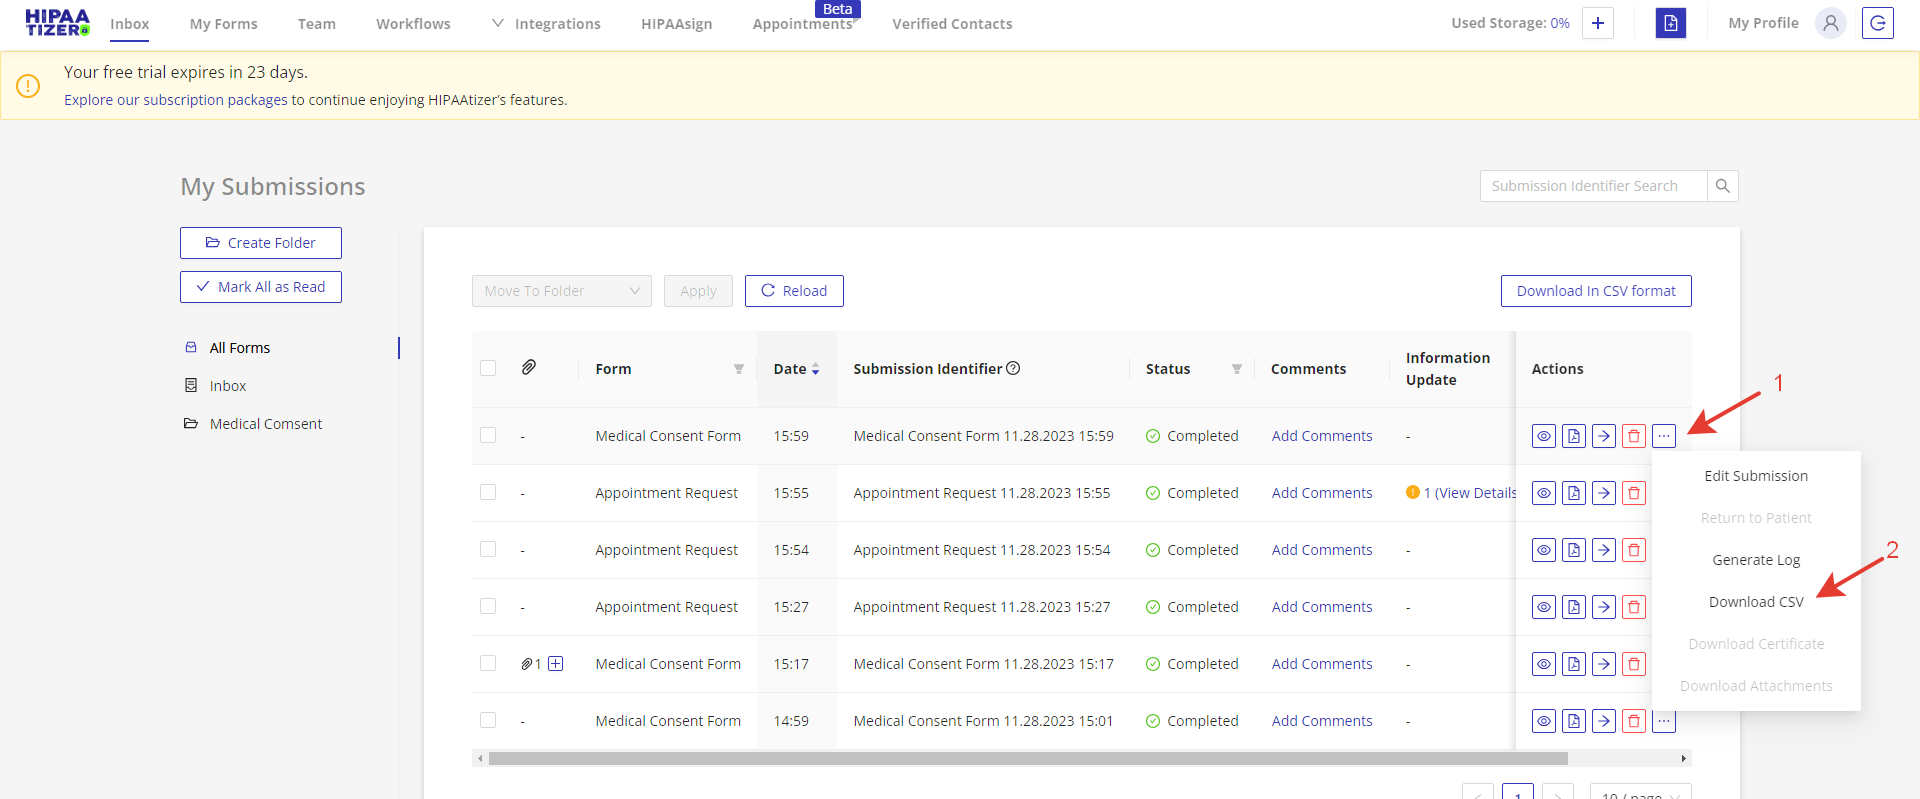
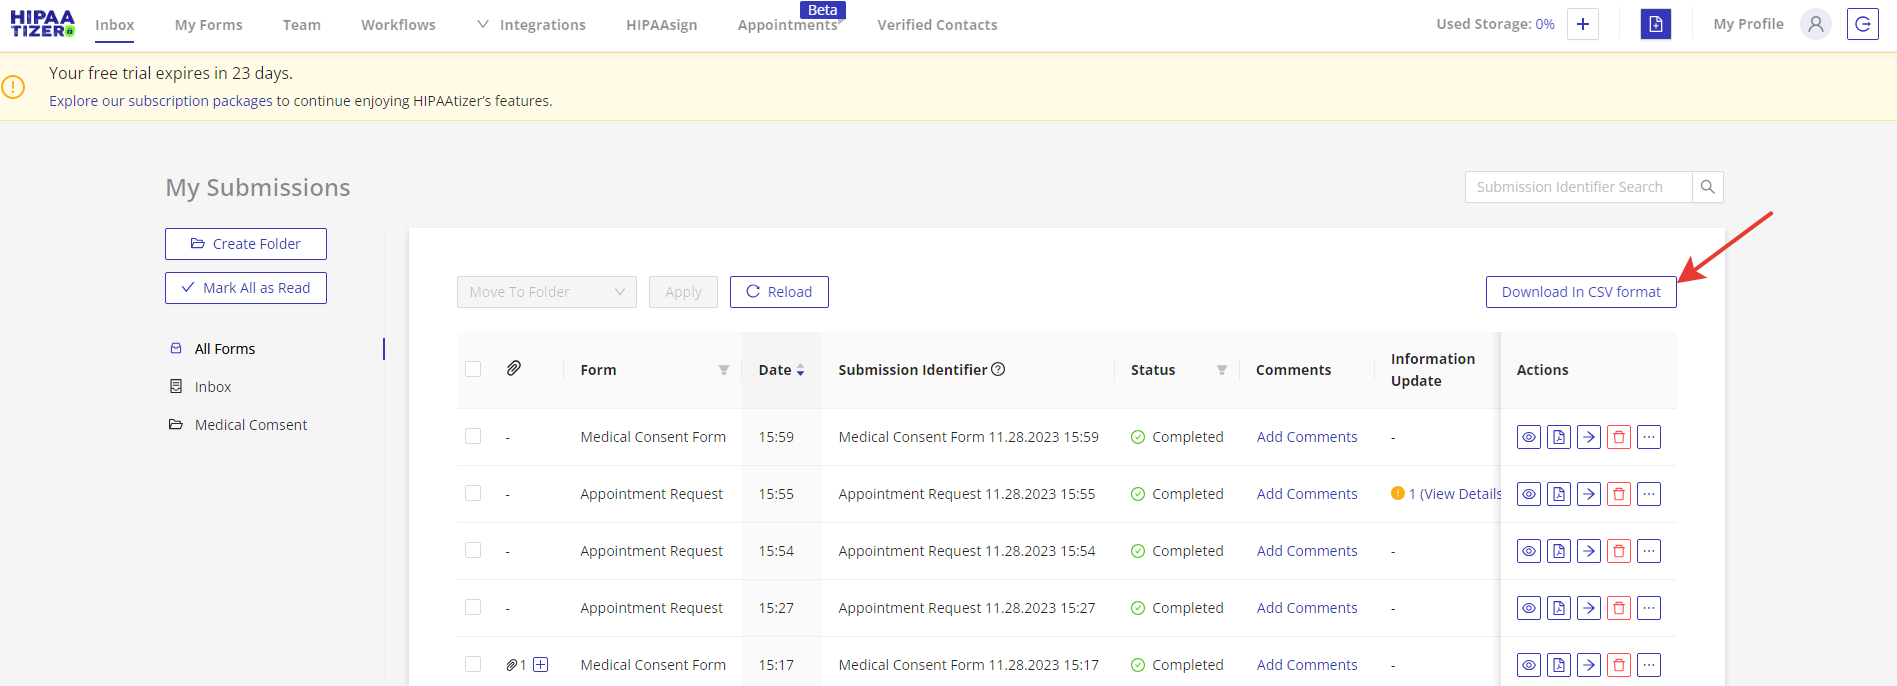
- Download submission in CSV format: If you need the information from the submission in CSV format, you can download the submission in this format by clicking on the “…” icon in the “Actions” column -> “Download in CSV”, or you can download several submissions by clicking on the “Download in CSV format” button on the top of the page (you can filter the submissions first).
- Download certificate: If you use HIPAAsign service and receive HIPAAsign form submissions, you can download the eSignature certificate for the submission you need. To do so, click on the “…” icon in the “Actions” column, then select “Download Certificate” option.
- Manage Comments: To add comment to submission click on the “Add Comments” link on the “Comments” column.
The simplest way to receive form submissions is by setting up email notifications
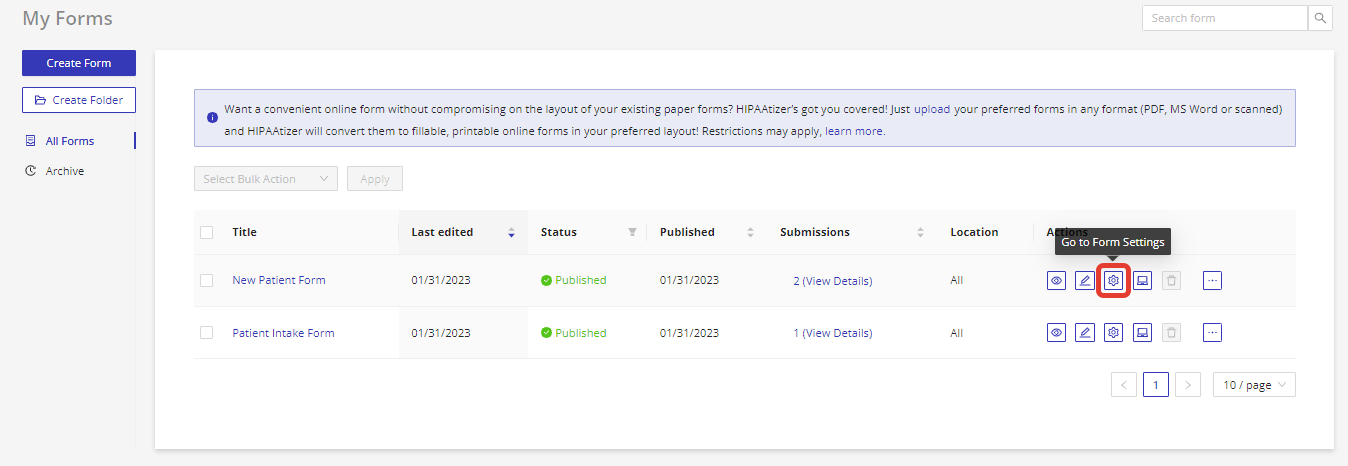
Step 1. Go to the “My Forms” section:
Step 2. Locate the desired form and click on the gear icon to access the form settings:
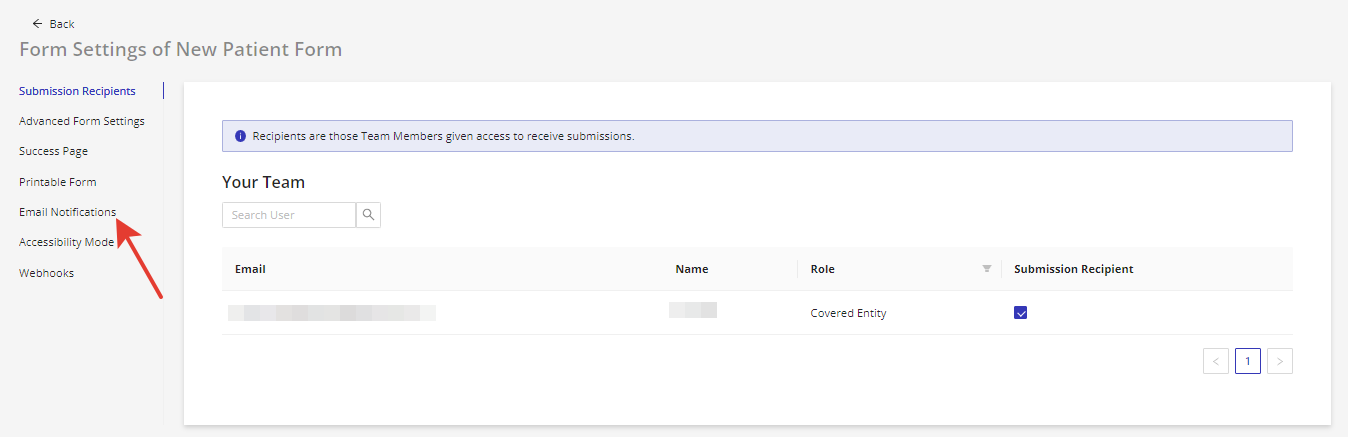
Step 3. In the form settings, navigate to the “Email Notifications” section:
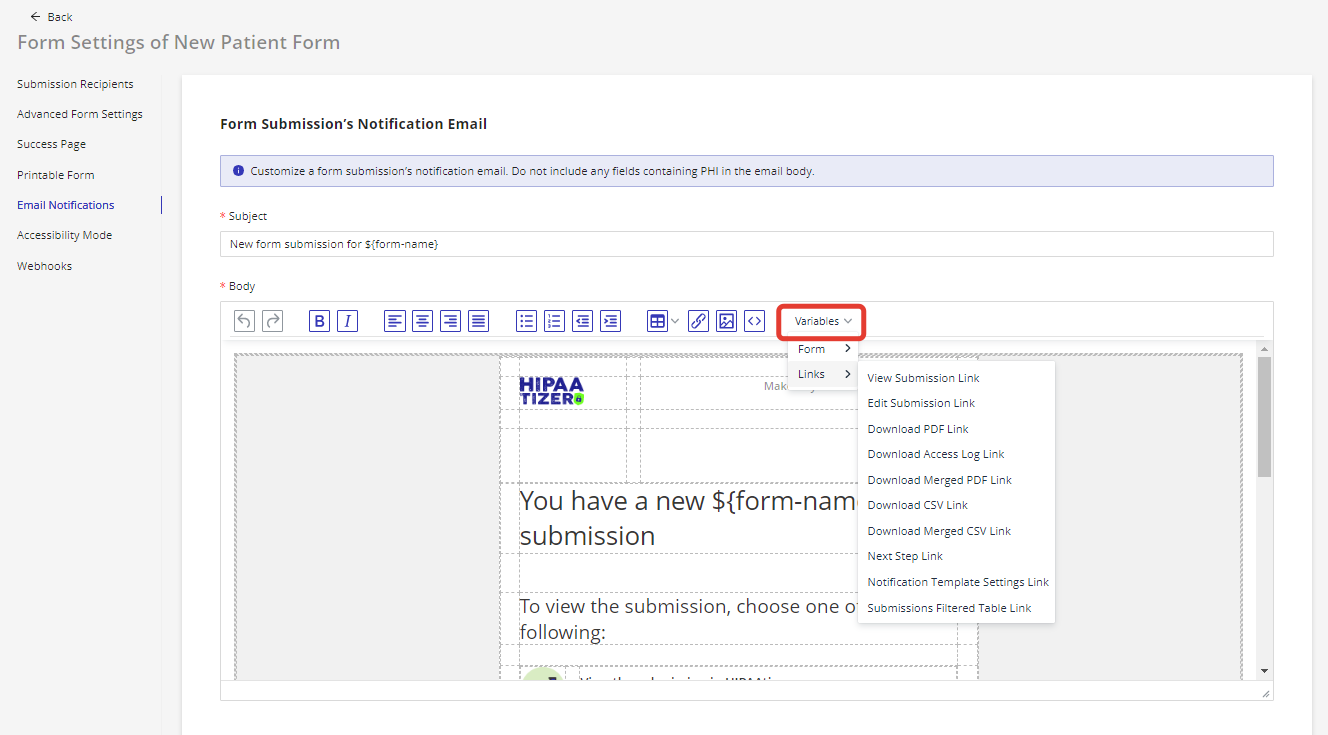
Step 4. Set up the email subject and body. Use the “Variables” dropdown to include links to the form submission data in your HIPAAtizer dashboard:
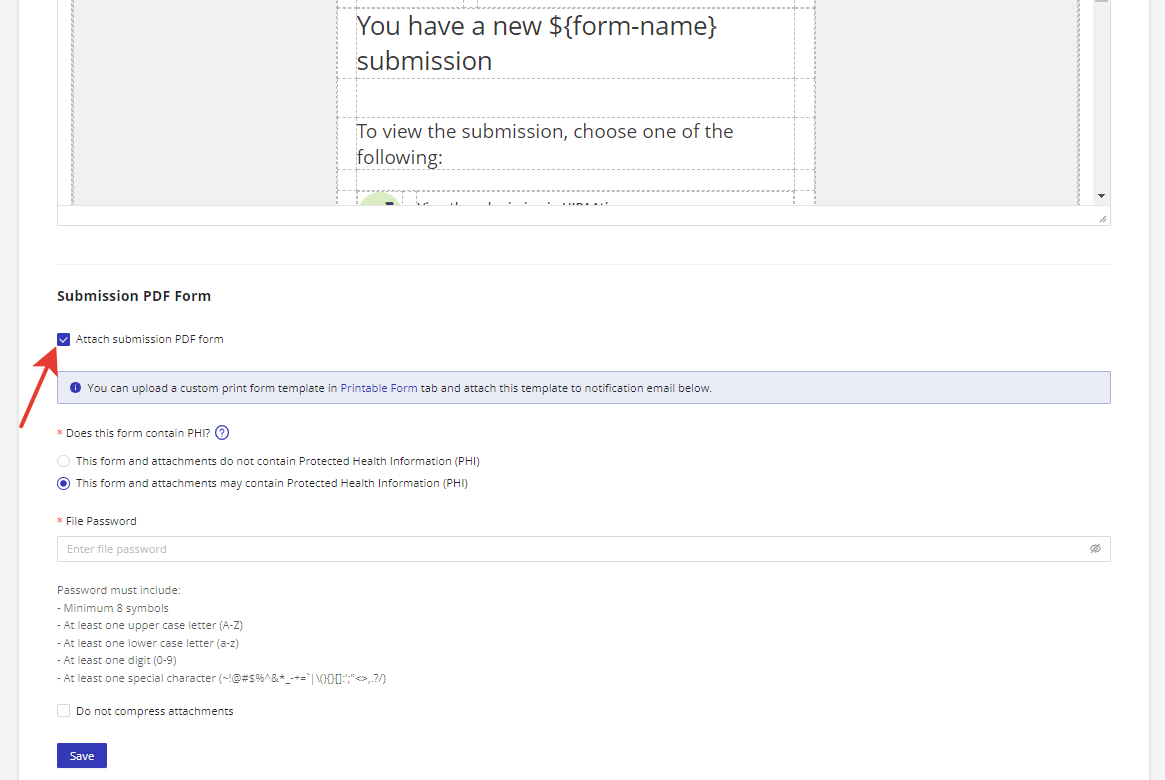
Step 5. To attach an encrypted PDF of the submission, check the “Attach submission PDF form” option. If your form contains protected health information (PHI), provide a password for the PDF file:
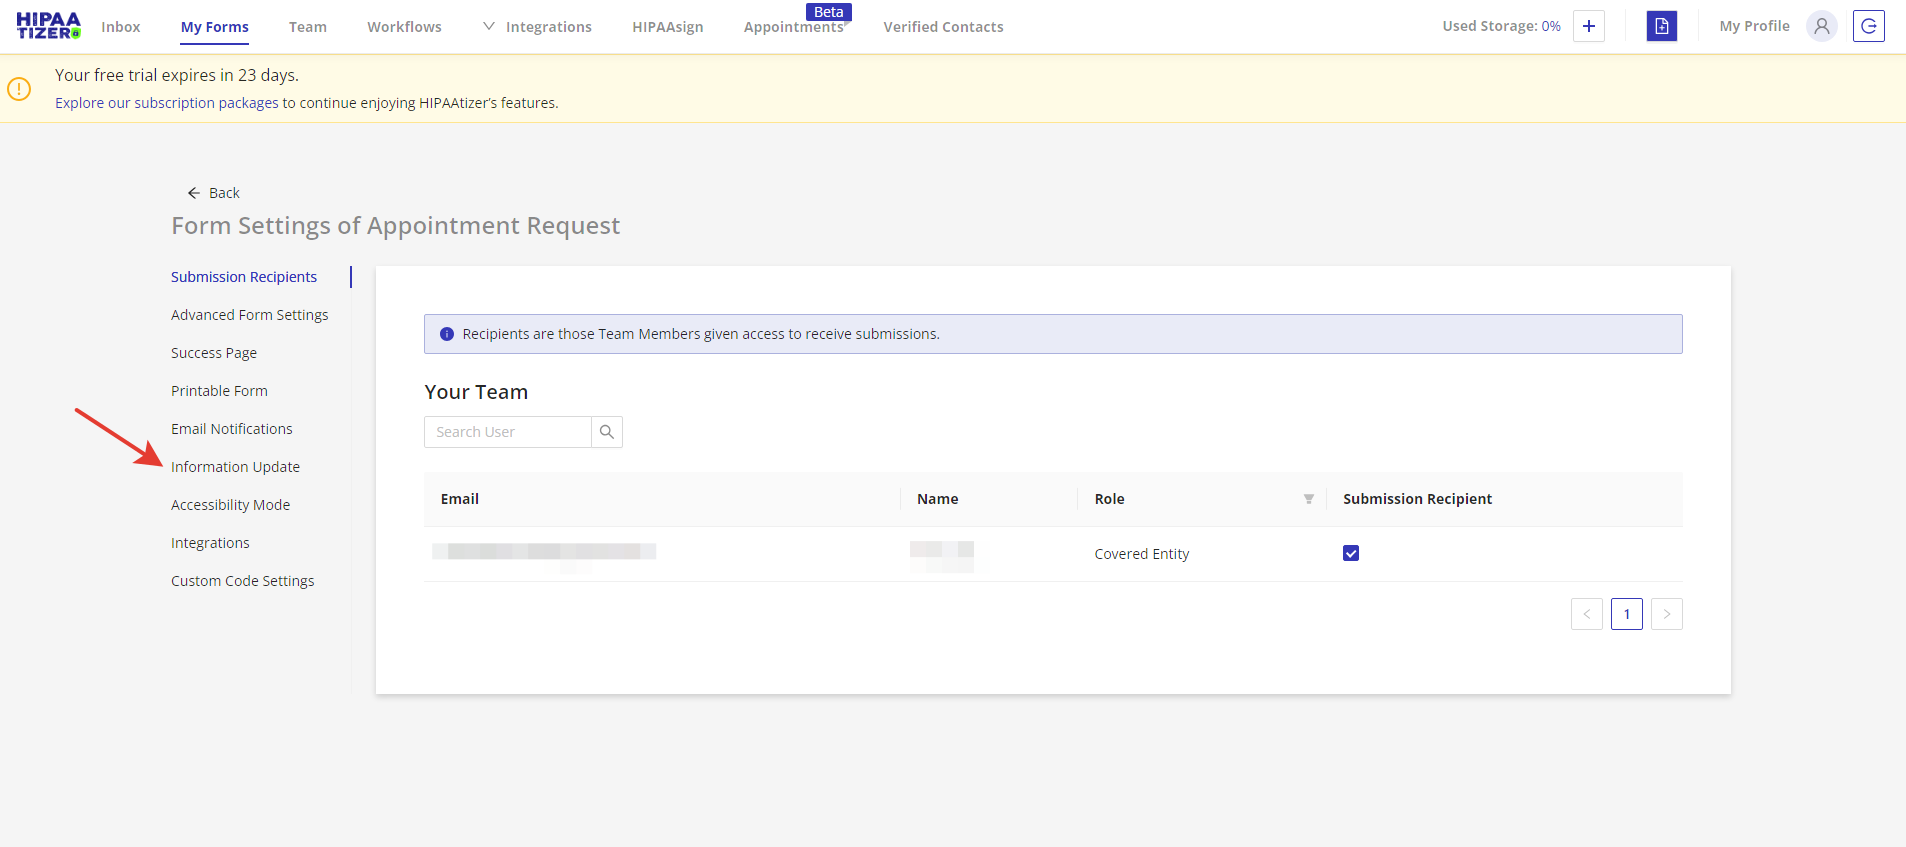
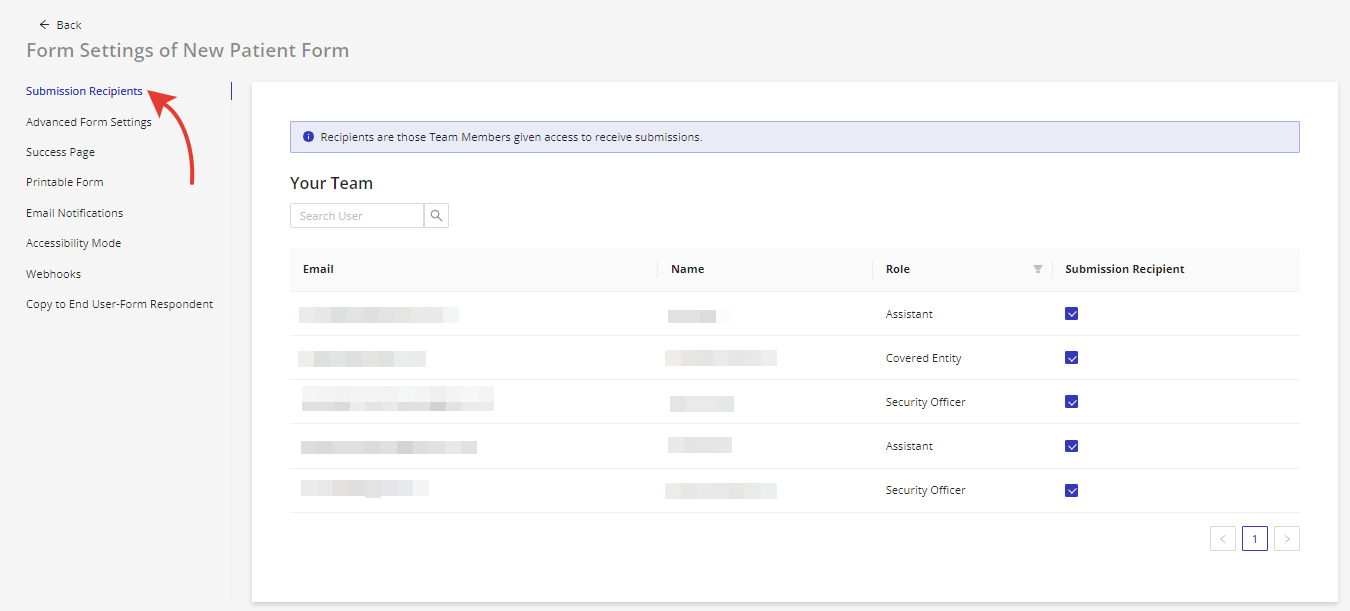
Step 6. In the Form Settings, navigate to the “Submission Recipients” section to control who receives email notifications. Only users with administrator, assistant, or security officer roles can receive form submissions in covered entity accounts:
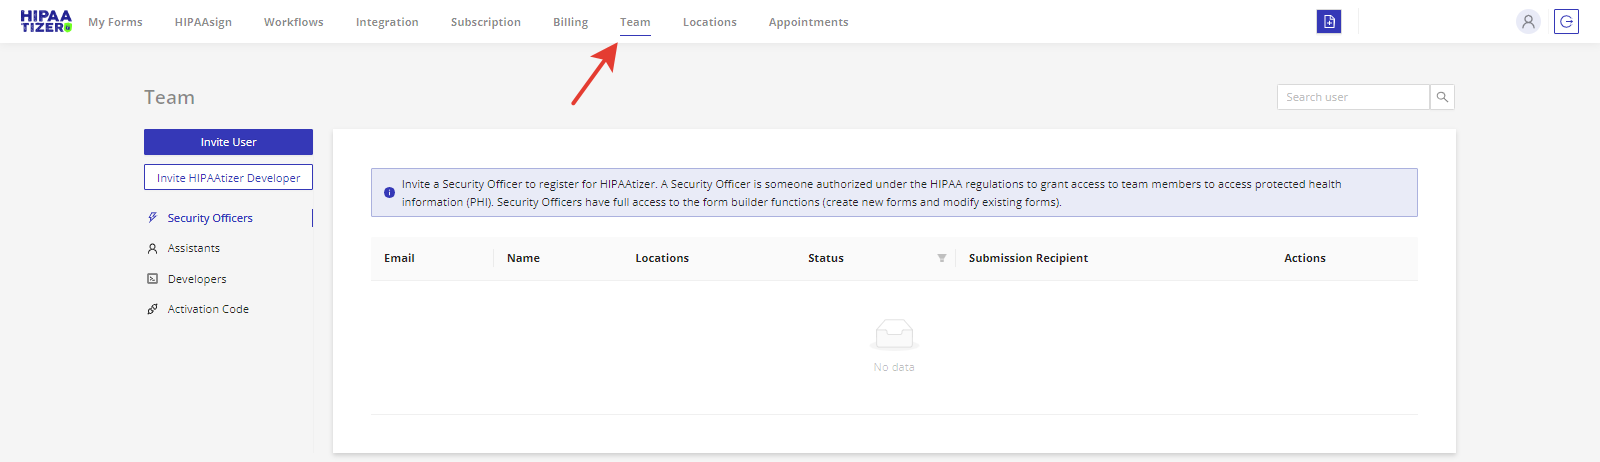
Step 7. To invite users to your HIPAAtizer account, use the “Team” option in the top menu of the dashboard:
Another way to access form submissions is through the HIPAAtizer dashboard
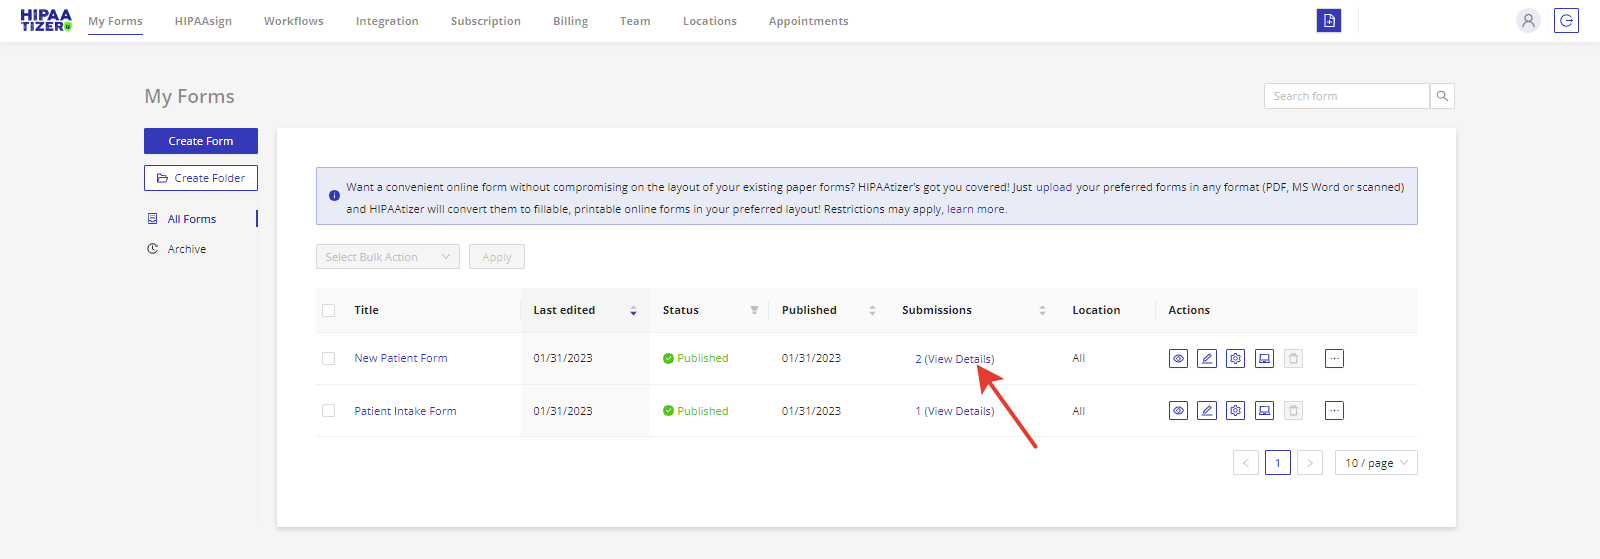
Step 1. Go to “My Forms” and locate the desired form:

Step 2. Go to the “Submissions” tab by clicking #(View Details):
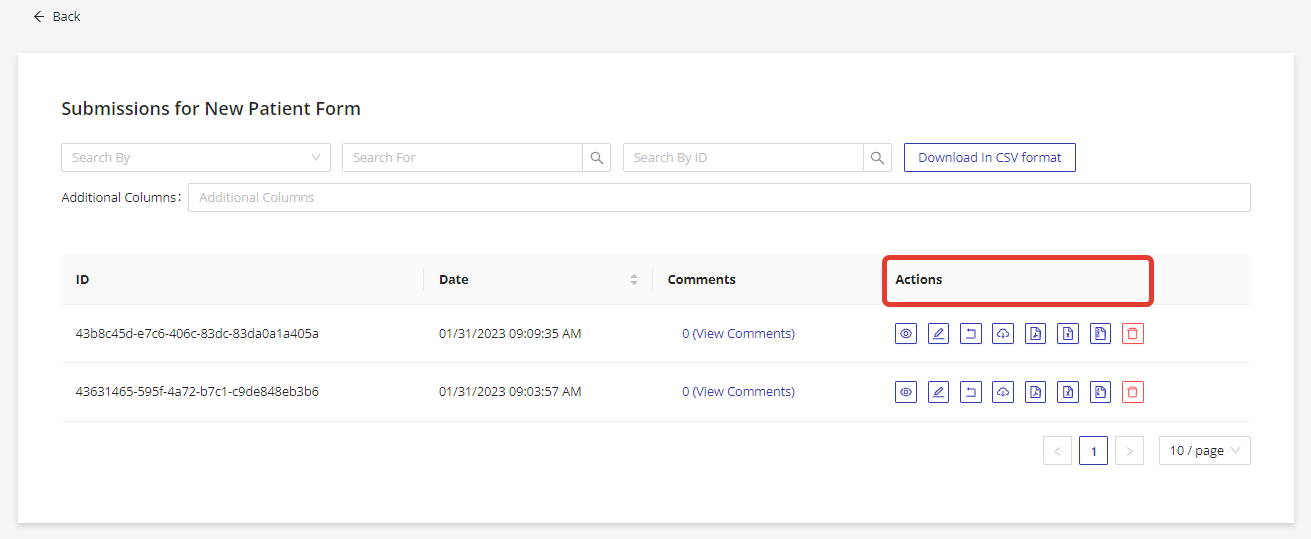
Step 3. Use the buttons in the Actions column to:
- View the details of the submissions as a web form
- Download the submission in PDF format, where you can also upload your own printable template in the form settings
- Download the form submission in CSV format
- Download attachments
- Generate and download a PHI access log
Step 4. To download submissions for a specific date range in a single CSV file, click the “Download in CSV format” button at the top of the page:

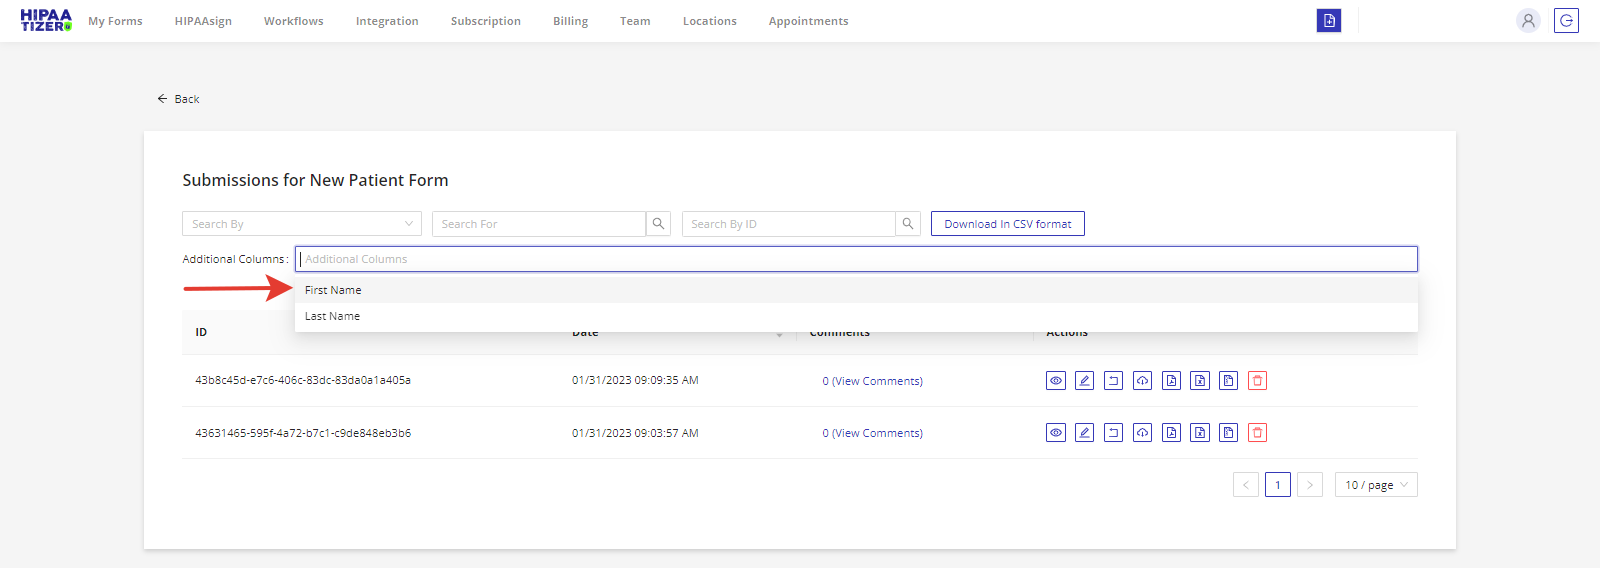
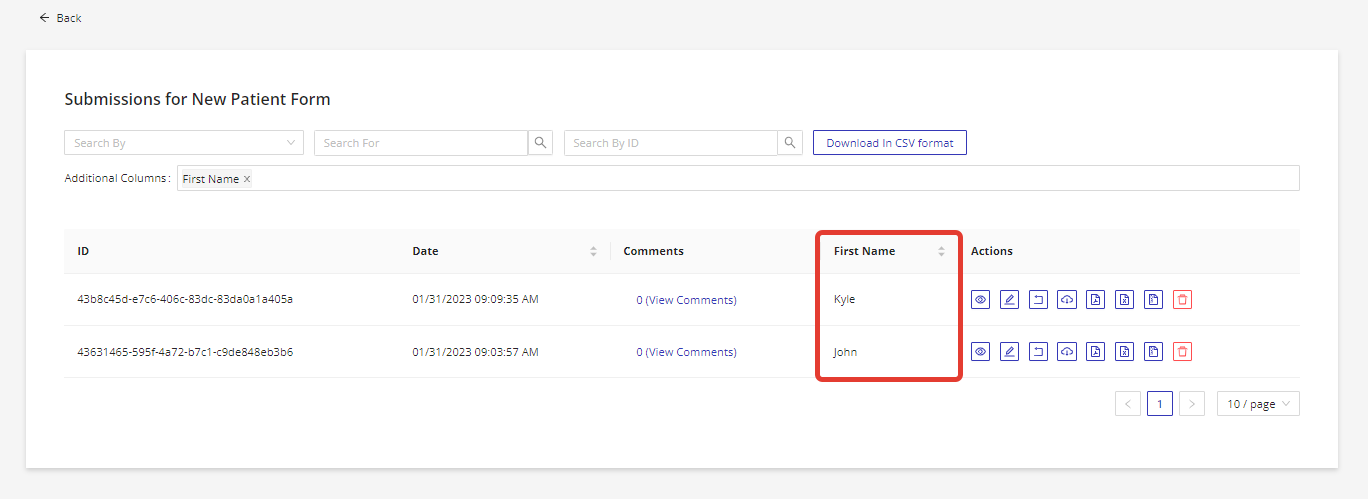
Step 5. Use the “Additional Columns” dropdown to add required form fields to the submissions table, such as a First Name field, to easily see who submitted the form:
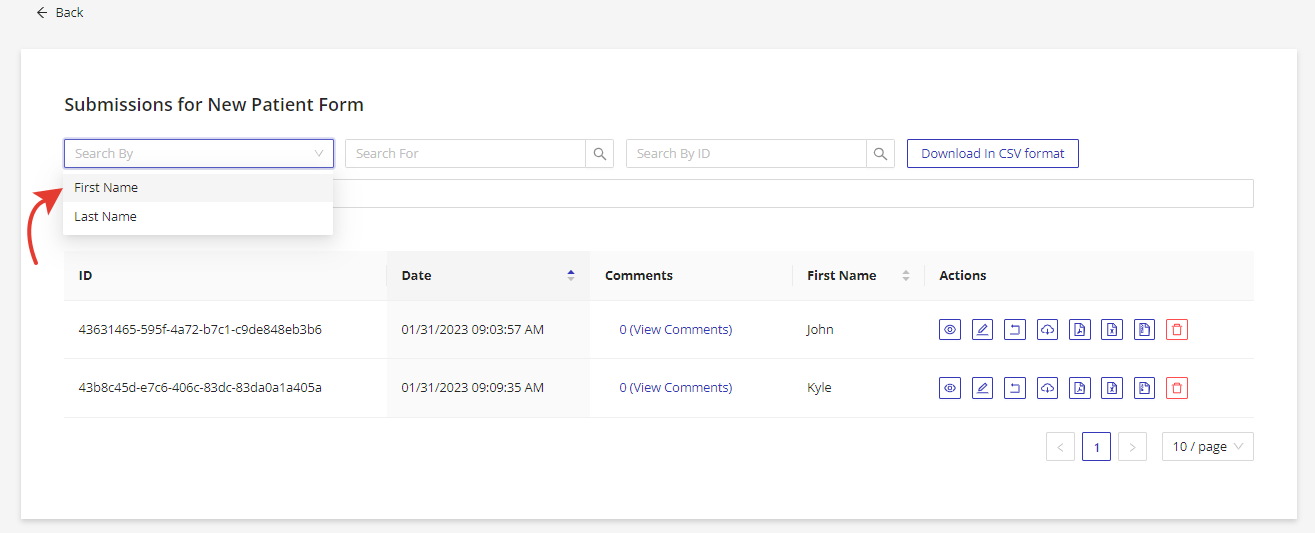
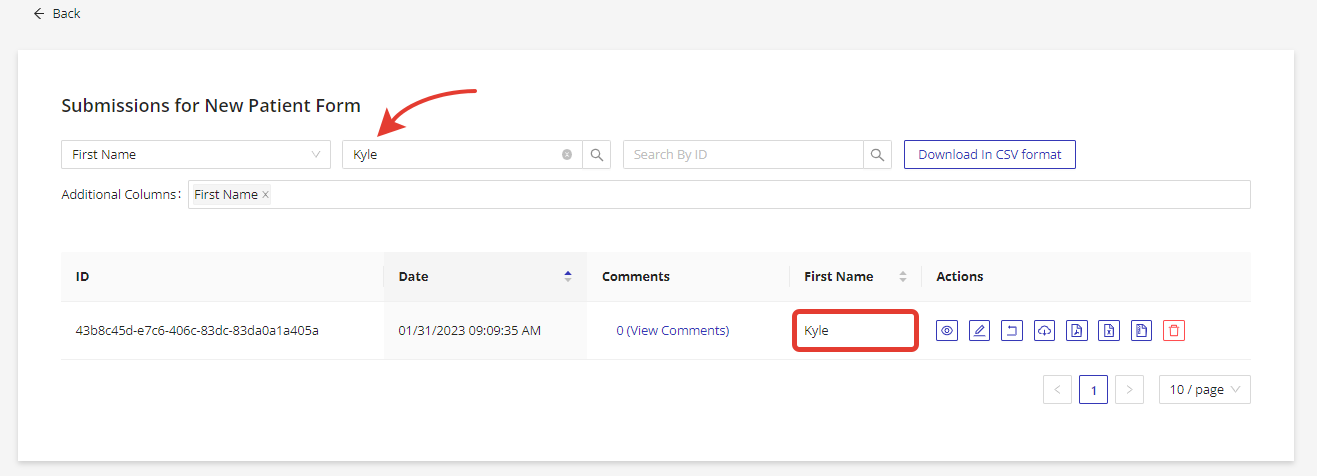
You can also search submissions using filters at the top of the page by selecting the form field in the “Search By” input and the data you are looking for in the “Search For” field:
Still have questions? Contact us